Oh my Brusho!

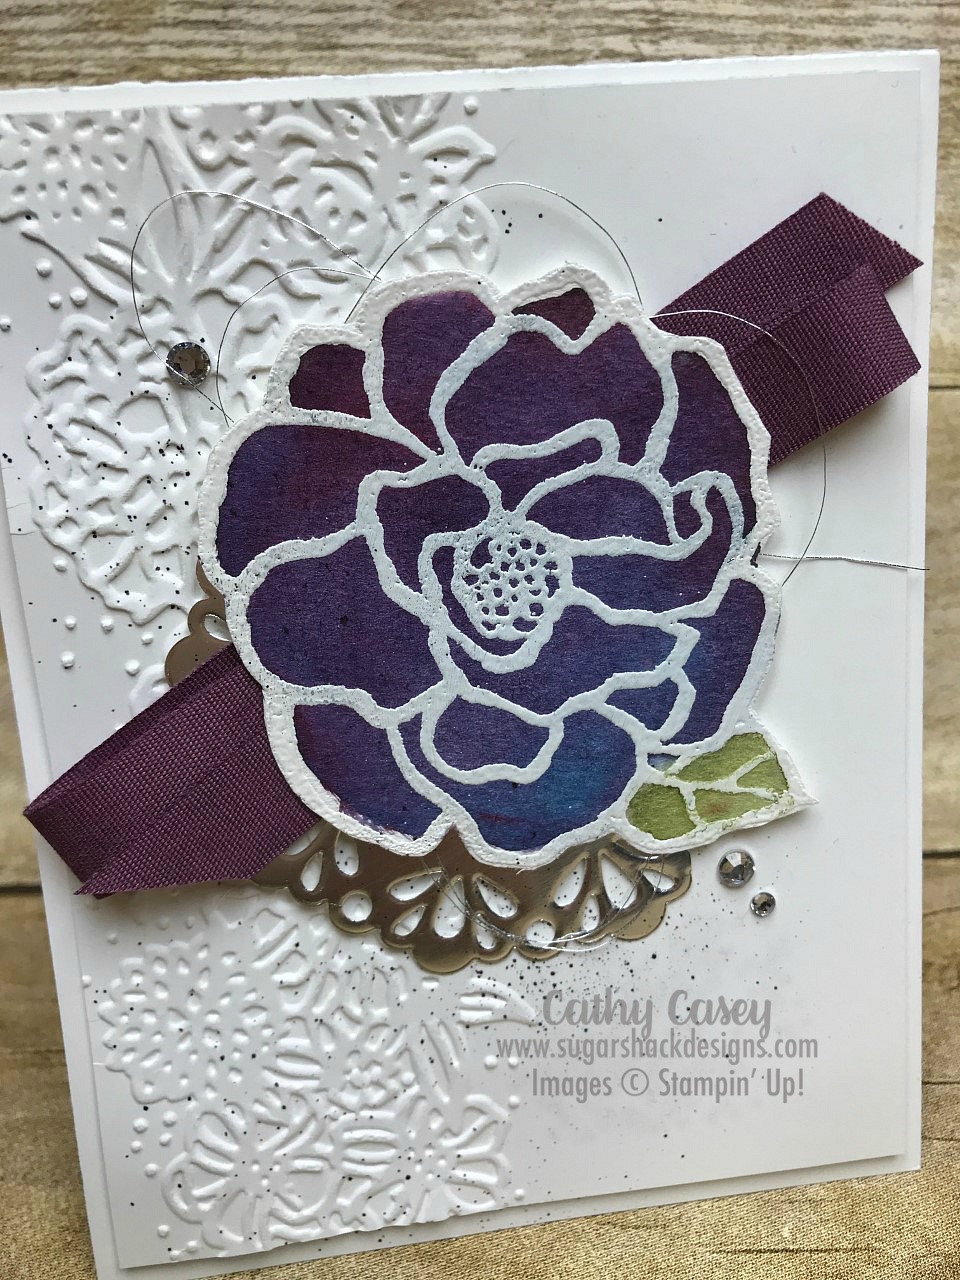
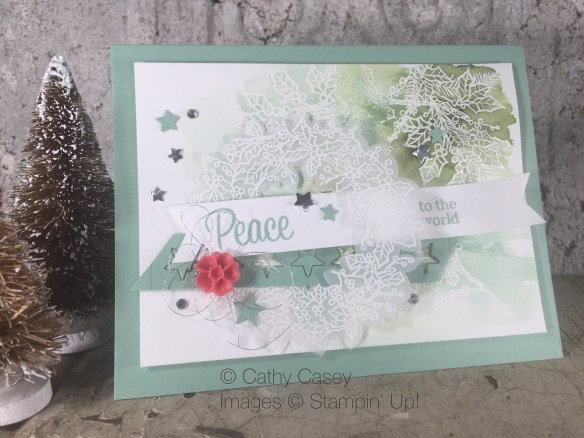
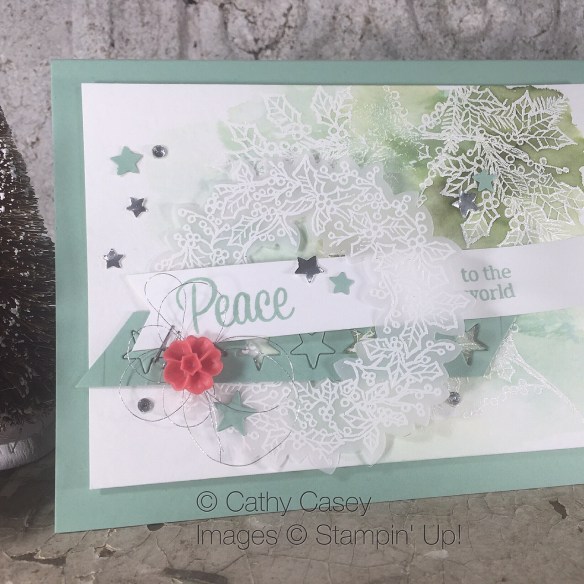
I did a fun Brusho technique class a few weeks ago and this is one of the projects we made.  It is stunning visually and it was super easy to make!

Beautiful Day Stampin' Up

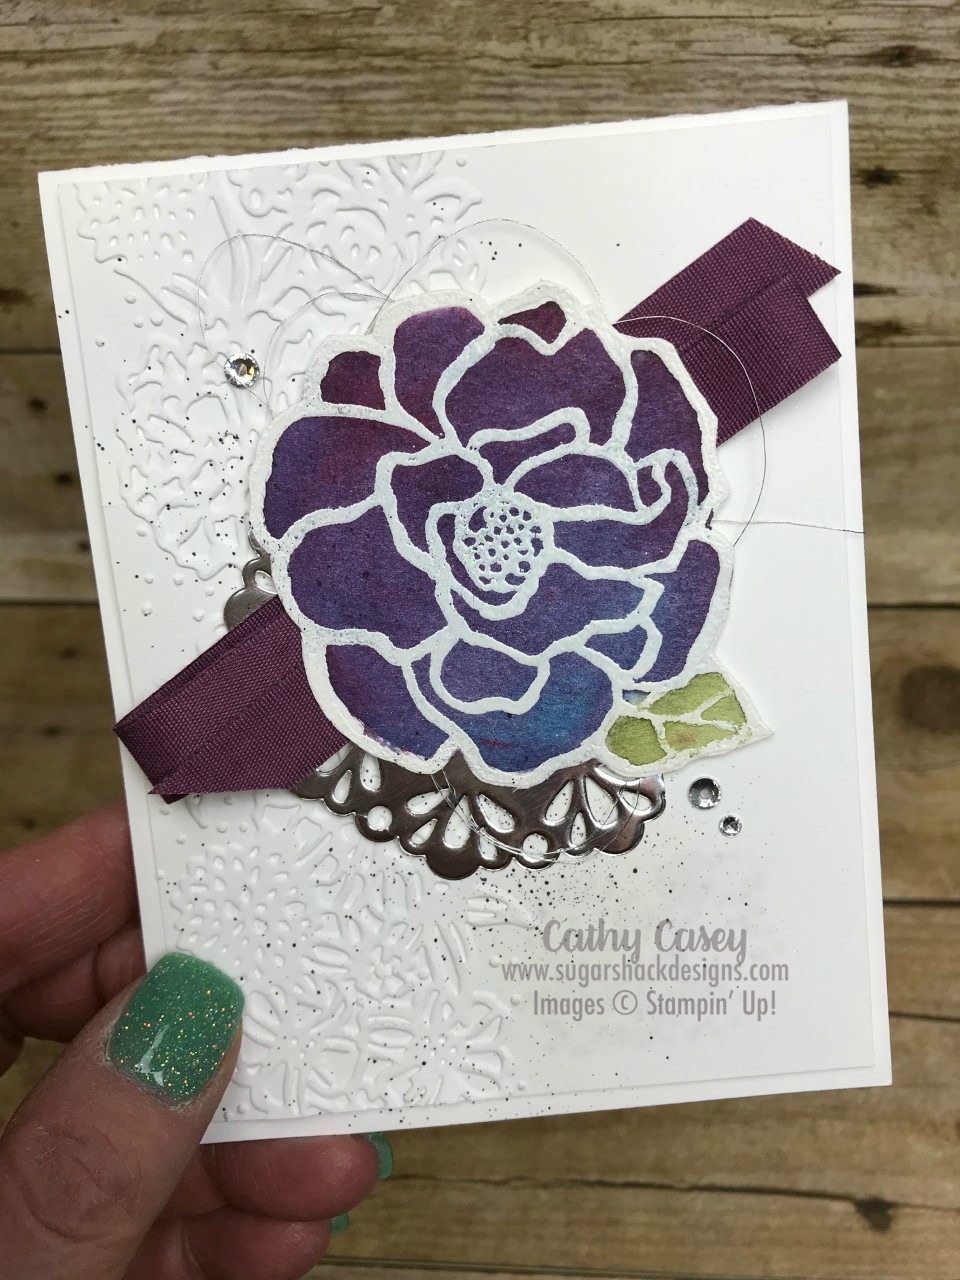
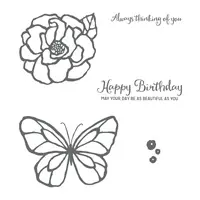
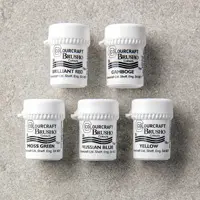
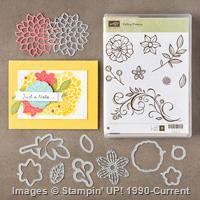
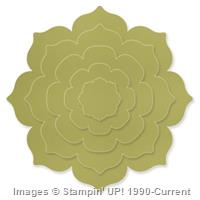
The Beautiful Day Stamp Set is perfect for this technique.  We white embossed the big flower image on watercolor paper and then used Brusho to add the color.  This flower features Prussian Blue and Brilliant Red, they create this luscious blueish purple color when they are allowed to activate together with water and not over worked.  So pretty!  After the flower dried, we fussy cut it out and popped it onto the card front.  The rest of the card was fast and easy and showcased the beautifully colored flower 🙂

Beautiful Day Stampin' Up

So gorgeous!

Creative Tips:

  1.  After you have embossed the flower, paint with water first everywhere inside the flower.  Sprinkle on your Brusho, more red towards the top and more blue towards the bottom.  You can always add more of the Brusho crystals if the you don’t like the initial color saturation, it is much harder to pull the color back without it getting muddy.  If your flower is too wet, blot with a paper towel.  Let your flower dry completely before fussy cutting.
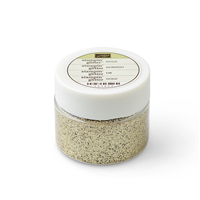
  2. The leaf is colored with Moss Green Brusho.  I have also seen posts where demos have added ink color to the green as an underlying tint.  That’s really pretty too.  With this one I just painted the leaf with water first and sprinkled a little Moss Green and then didn’t work it too much with the aqua painter after adding the Brusho.
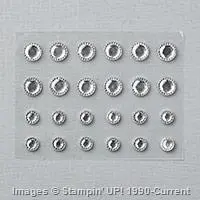
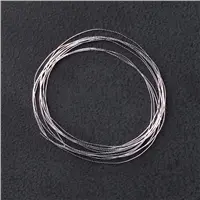
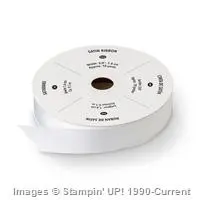
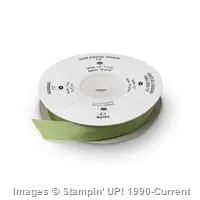
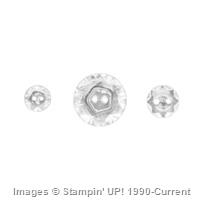
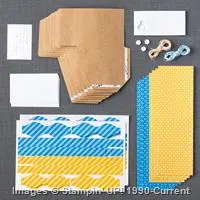
  3. The added ribbon and bling give the card some pop with the deeply saturated flower.  I love the simple richness.

I hope you have a fabulous, creative day!  Happy Stamping 🙂

New Goodies!

I was sooooo excited to be selected as a Display Stamper for the OnStage Local event in Savannah!  I get to play with new product and make a fun display??  Why yes, that sounds amazeballs!

I opened my box of goodies when they came and had a little party all by my ownself looking at all the fun new toys….then came the trepidation….how can I make something cute and worthy for the boards???  What if I can’t come up with all these projects????  Yikes!

Then I thought, I have two months…plenty of time to be inspired by the new In Colors and fun new stamps and new ribbon and other goodies….I’ll make a few projects every week.  Ha!  A week before On Stage and I had three creations and pile of unused product in front of me!  I am the world’s biggest pro-craft-inator!!!  Sometimes I think I work best under pressure or maybe I was just lucky that the ideas flowed at the right time and all my sweet projects were finished with days to spare 🙂  well let’s be honest, 2 days to spare 😉

Today’s card is the first of my display projects that I will be sharing over the next days & weeks.

Display Stamper

Display Stamper

I know, I look like a big ole dork!  (insert dork emoji here)

This card features lot’s of new product and colors.  The stamp sets used are from the current catalog:  Falling Flowers and All Things Thanks.  New products featured are 2017-2019 In Colors Lemon Lime Twist and Berry Burst, Glossy White Cardstock, Eastern Palace Designer Series Paper, Corrugated Elements and 1/4″ Ombre Ribbon.

Creative Tips:

  1. Glossy paper can be used many ways.  On this card, I chose to white emboss the flourish image from Falling Flowers on the card front giving the tone on tone look for my background.
  2. I added one tiny heart in Berry Burst to the Corrugated Element heart.  This heart comes from the row of hearts in the Everyday Jars Framelits set.  The little pop of Berry Burst sets off the blue and green tones in the Lemon Lime Twist and Bermuda Bay prevalent in the rest of the card design.
  3. Layering of several simple elements adds interest and a focal point to the card.  I love being able to see images and backgrounds through and under other elements.  The flower die cut from May Flowers is perfect for this!

Stampin' Up Palette

Such a fun card!  I love how well the new Lemon Lime Twist coordinates with my favorite color, Bermuda Bay.  They just feel vibrant and alive on the page!

I hope you love my card as much as I do!  Stay tuned for more fun projects featuring new product coming out June 1st!  The Eastern Palace Suite will be available to order on May 1st!!!  It includes the yummy Eastern Palace DSP and a great stamp set and coordinating framelits.

Eastern Palace Suite

Thanks for stopping by today!

New products are not listed in the showcase as they won’t be available to order until June 1st with the exception of the Eastern Palace Designer Series Paper (see above).  You can find available products in the click-able links below:

Enjoy the Little Things in 2016!

2016???  Seriously!  The past year just seemed to fly by and now 2016 is here!  I just know this is going to be a fantastic year, I am committed to making it the best year ever 🙂

My last entry into the TGIF Challenge was picked as a favorite again!  Sooo exciting!  I have to play along again this week and I must say I am so excited to take on this week’s glitzy color challenge featuring silver, black and gold….uhhhh, these are faves to play with 🙂

On to this week’s challenge:

TGIF JAN Challenges_2_2-001

I am so in love with this new set in the Occasions Catalog “Enjoy the Little Things”.  I am totes obsessed with the fonts and the sentiments and I wanted to incorporate at least one in my New Year’s card.  Then I thought, hey why not use a bunch of them subway style??  The result is this beauty.

First several of the stamps were set up on one large block in the design and then gold embossed on vellum.  The vellum was added to a Basic Black card base.  Next, gold satin ribbon and banners of gold, black and silver glimmer paper were added along the bottom of the card front.  A vellum banner was added with the year 2016 silver embossed on it.  The final touches were sequins, rhinestones and stars to add glitz and glam….all a fitting welcome to the new year!

Enjoy the Little Things Stampin' Up

Enjoy the Little Things Stampin' Up

Happy, happy new year to you and yours!

Price: $5.25

Supply List

Built for Free Using: My Stampin Blog

Christmas Eve, Eve!

Wow, I can hardly believe it is already Christmas Eve in just a few hours!  I.am.not.ready!  LOL!  So tonight I will be burning the midnight oil for sure!!!  I made scrumptious chocolate covered pretzels for my team and peers at work and I needed something super cute to put them in.  Voila!  This adorbs pillow box is perfect!  Except….I probably will be up alllll night if I make one of these for each recipient.  I may end up doing something a little simpler for tomorrow’s treats 🙂

I love this pillow box though and it is my entry for the “Holly Jolly” TGIF Challenge this week!  I’m super excited to say that I was the winner of last week’s challenge….yippeeeee!  I just need to figure out how to add this cute button to my blog sidebar 🙂

TGIF Fave!

On to this week’s challenge:

#tgifc34

My pillow box is my favorite kind of Christmas project, you may have noticed I am a fan of non-traditional Christmas color schemes and this is no exception!  Black, white and silver!  Classy Christmas right?

To start, the pillow box is die cut in Whisper White and one additional side in the tree image from the Winter Wonderland Designer Vellum Stack.   The tag image is die cut from Black Glimmer Paper…so gorge!  The deer image from Jolly Christmas is silver embossed and fussy cut.  The final touches are a Silver Satin Ribbon belly band tied in a big bow and White Perfect Accents & Rhinestones.  I love the simplicity and beauty of this project!  It would look fantastic as place setting gifts for Christmas dinner guests.

Jolly Christmas Pillow Box

Jolly Christmas Pillow Box

Jolly Christmas Pillow Box

Jolly Christmas Pillow Box

I wish the very best for Christmas with your family and loved ones!  I hope you are inspired to make something pretty over the holidays 🙂

Supply List

Built for Free Using: My Stampin Blog

Dove of Peace, a really BIG class & a really BIG sale!

I have so much to share this morning!   A beautiful card, a fantastic class and the last day of the Online Extravaganza!  So pull up a comfy chair and a nice warm coffee (or tea or whatever makes you happy) and enjoy 🙂

I’ve been thinking about this card ever since I got the Dove of Peace Stamp … I knew I had to create something with this stamp and this technique!  Super simple with lots of wow factor.  The dove is white embossed on watercolor paper and then randomly watercolored with blues and greens (Island Indigo, Lost Lagoon, Mossy Meadow, Soft Sky, Bermuda Bay and Wild Wasabi).  The Soft Sky base cardstock is stenciled with Whisper White Craft Ink using the stars mask from the Hearts and Stars Decorative Mask set.  Final touches were the “peace” die cut in Silver Foil with the Christmas Greetings Thinlets, an Iced Rhinestone and Silver Thread.  The results are stunning!  There was a terrible shooting in Colorado Springs on Black Friday and all I want for Christmas is peace for all.

Dove of Peace Stampin' Up

Dove of Peace Stampin’ Up

Dove of Peace Stampin' Up

Dove of Peace Stampin’ Up

Dove of Peace Stampin' Up

Dove of Peace Stampin’ Up

Price: $5.25

Supply List

Built for Free Using: My Stampin Blog

****************************************************************************
Hello December December Daily Class

Hello December December Daily Class

The next big news that I am super, duper excited to share about is a big project I have been working on with my bestie Kimberly!  We are offering an online class to help you create your very own 2015 December Daily book using the Hello December 2015 Project Life Suite from Stampin’ Up.  This product suite is gorgeous!  The class includes detailed instructions to create your own beautiful book, daily prompts and inspiration and membership in an exclusive closed Facebook Group for additional daily inspiration and idea sharing!  You won’t want to miss out on this!  See all of the details and options HERE.

****************************************************************************

Online Extravaganza!

Online Extravaganza!

The last thing I want to share is that it’s Cyber Monday and the very last day of the big Online Extravaganza!  There have been some really great deals on this sale and today there are great 24 hour flash sale items too!  I am posting all of the sale items at the bottom of this post for your convenience.  These prices are while supplies last, so don’t wait!

Thanks for stopping by this morning!  Don’t miss our Hello December class or the big sale!  I hope I’ve inspired you to make something pretty today 🙂

These items are 50% off through 11/30 only!

Sale: $4.50

Price: $9.00

Sale: $4.50

Price: $9.00

Sale: $1.50

Price: $3.00

Sale: $1.50

Price: $3.00

Sale: $9.00

Price: $18.00

Sale: $2.50

Price: $5.00

Sale: $3.50

Price: $7.00

Sale: $1.50

Price: $3.00

Sale: $4.00

Price: $8.00

Sale: $8.00

Price: $16.00

Supply List

Built for Free Using: My Stampin Blog

These items are 40% off through 11/30 only!

Sale: $3.00

Price: $5.00

Sale: $13.80

Price: $23.00

Sale: $3.60

Price: $6.00

Sale: $4.50

Price: $7.50

Sale: $4.80

Price: $8.00

Sale: $2.40

Price: $4.00

Sale: $24.00

Price: $40.00

Sale: $3.00

Price: $5.00

Sale: $10.20

Price: $17.00

Sale: $2.40

Price: $4.00

Sale: $4.80

Price: $8.00

Supply List

Built for Free Using: My Stampin Blog

Sale: $28.00

Price: $40.00

Sale: $15.40

Price: $22.00

Sale: $2.80

Price: $4.00

Sale: $15.40

Price: $22.00

Sale: $23.10

Price: $33.00

Sale: $12.60

Price: $18.00

Sale: $1.75

Price: $2.50

Sale: $30.10

Price: $43.00

Sale: $17.50

Price: $25.00

Sale: $11.20

Price: $16.00

Sale: $2.80

Price: $4.00

Sale: $3.50

Price: $5.00

Sale: $28.00

Price: $40.00

Sale: $16.10

Price: $23.00

Sale: $11.20

Price: $16.00

Sale: $4.90

Price: $7.00

Sale: $4.20

Price: $6.00

Sale: $11.90

Price: $17.00

Sale: $5.60

Price: $8.00

Sale: $4.90

Price: $7.00

Supply List

Built for Free Using: My Stampin Blog

These items are 20% off through 11/30 only!

Sale: $26.40

Price: $33.00

Sale: $30.40

Price: $38.00

Sale: $20.00

Price: $25.00

Sale: $20.00

Price: $25.00

Sale: $8.80

Price: $11.00

Sale: $6.40

Price: $8.00

Sale: $21.60

Price: $27.00

Supply List

Built for Free Using: My Stampin Blog

Flash sale items!  Cyber Monday only!

Peaceful Wreath

I played with the Peaceful Wreath Stamp Set and Wonderful Wreath Framelits today.  My idea was to change it up to not so traditional Christmas colors and I love how the card came out!  This card looks lots more complicated than it actually was to make, lotsa wow factor!  Nothing about it is perfectly placed, it is a lovely, random mess of pretty 🙂

The base of the card front is watercolor paper cut slightly smaller than usual:  3 3/4 x 4 3/4.  The large bough image from the set is white embossed randomly on the watercolor paper and then watercolored in Mint Macaron and Mossy Meadow ink.  No effort was made to “stay in the lines”, just random watercoloring on and around the images.  The wreath image was white embossed on vellum and then cut out with the wreath thinlit die.  A star banner (from the Mini Treat Bag Thinlit die set) was cut out of Mint Macaron.

The sentiment banner is stamped on Whisper White card stock, the “Peace” is offset from “to the world” on the banner so the banner fits under the right side of the wreath.  Sparkly embellishments are Mint Macaron and Silver Foil stars punched with the Confetti Stars Border Punch and rhinestones randomly scattered around the rest of the elements.

I thought the card needed a pop of another color and the Blossom Accent in Watermelon Wonder worked perfectly for that.  There is a little halo of Silver Thread added under the blossom for a tiny extra detail.  The finished card front is adhered to a Mint Macaron base.

I’m only in Florida for a few more days, this has been once again a wonderful time of creativity unleashed in so many ways!  My cup is (almost) full.

I hope you love this card as much as I do and it inspires you to make something lovely today!

Peaceful Wreath Stampin' Up

Peaceful Wreath Stampin’ Up

Peaceful Wreath Stampin' Up

Peaceful Wreath Stampin’ Up

Supply List

Built for Free Using: My Stampin Blog

On Stage 2015

On Stage 2015mondaymontage banner revised Oct 13

Monday Montage Blog Hop – Week 56

Hello friends! Welcome back to the Monday Montage Blog Hop! You may have gotten here from the amazing Bree Renwick’s blog, make sure you select the “next” button below and that will take you to the next stop on the hop, the fabulous Dani Dziama’s blog.  I am sure we have some super cute goodies for you today!

I just got “home” from Onstage 2015 in Tampa.  I’m actually in Florida for another week, so home is my bestie’s in Pensacola, it’s going to be an amazing week of crafting and talking and laughing and crying 🙂

My project today is a card I posted at the event.  It’s a beauty featuring the Wonderland stamp set, I just love the trees in this set and the antlers….oh those antlers!  Love, love, love!

I stamped the trees in Mossy Meadow and Old Olive, stamping each color three times randomly so they got lighter and lighter.  I gold embossed the sentiment and the cute antlers on vellum.  I added the gold foil star die cut from the Mini Treat Bag Thinlits, a button and gold thread.  This made a beautiful and elegant card that came together really quickly and easily.

On Stage 2015, Wonderland stamp set, Stampin' Up!

On Stage 2015, Wonderland stamp set, Stampin' Up!

Onstage 2015 was really fun!  We, of course, talked and talked and talked and talked and laughed and laughed and laughed and laughed.  We got into crazy shenanigans with the rest of the Stampin’ by the Sea girls at the event and then at dinner in Ybor City…on Saturday night…uh, this was very adventurous!  lol

The absolute highlight of the day was Kimberly’s selection to the 2015-2016 Artisan Design Team for Stampin’ Up!  I could not be more excited for her!!!  She is the most creative and talented stamper I know and I can’t wait to see what she creates this year for Stampin’ Up!

On Stage 2015, Wonderland stamp set, Stampin' Up!

Our girls at Onstage!  Photo Op 🙂

On Stage 2015, Wonderland stamp set, Stampin' Up!

Heading home on Sunday afternoon…still smiling after all our weekend adventures!

I hope you enjoy!

Thanks for letting me share, have a great week filled with inspiration and beauty!

Make sure you go “Back” if you missed Bree Renwick or you can loop on around by hitting the “Next” button to get to Dani Dziama and the rest of the hop!

mondaymontagebackrev

mondaymontagenext

Sweet trees….

mondaymontage banner revised Oct 13

Monday Montage Blog Hop – Week 55

Hello friends! Welcome back to the Monday Montage Blog Hop! You may have gotten here from the amazing Bree Renwick’s blog, make sure you select the “next” button below and that will take you to the next stop on the hop, the fabulous Dani Dziama’s blog.  I know we have some super cute goodies for you today!

I know it’s November now but I have to share the pretties I handed out to my team at work on Friday.  So first a Halloween project, super easy with the Mini Treat Bag die and the Sweet Hauntings stamp set.  I just love this cute set, so fun 🙂


Halloween Treat Bags

Halloween Treat Bags

My projects for this week are two versions of practically the same card.  I did it in Pink Pirouette and immediately knew I had to do it in Soft Sky next!  I used Peaceful Pines and the Perfect Pines Framelits.  So easy!  I embossed the tree image on the card stock in white and then stamped in the coordinating ink on whisper white.  I added some snowy hills to each card and a simple sentiment.  I used watercolor paper and Soft Sky reindeer for the hills on the Soft Sky card, this looks so amazing!  So sweet and soft.  I also added random glitter splatters with my fine tip glue!  I love that you can control the splats this way 🙂

Peaceful Pines

Peaceful Pines


Peaceful Pines - Pink Pirouette

Peaceful Pines – Pink Pirouette


Peaceful Pines - Soft Sky

Peaceful Pines – Soft Sky

Peaceful Pines - Soft Sky

Peaceful Pines – Soft Sky

I hope you enjoy!

Thanks for letting me share, have a great week filled with inspiration and beauty!

Make sure you go “Back” if you missed Bree Renwick or you can loop on around by hitting the “Next” button to get to Dani Dziama and the rest of the hop!

mondaymontagebackrev

mondaymontagenext

Product List

Links by TheseAreMyStamps.com

Flurries!

mondaymontage banner revised Oct 13

Monday Montage Blog Hop – Week 54

Hello friends! Welcome back to the Monday Montage Blog Hop! You may have gotten here from the amazing Bree Renwick’s blog, make sure you select the “next” button below and that will take you to the next stop on the hop, the fabulous Dani Dziama’s blog.  I know we have some super cute goodies for you today!


It’s getting to be flurry time in Colorado!  The leaves are turning and we could get our first snowfall anytime, usually before Halloween!  This is an over the top card that was really pretty simple to make using the Flurry of Wishes stamp set.  I stamped snowflake images on Whisper White in Island Indigo, Smoky Slate and Pool Party.  Next I layered a piece of vellum over the whole top of the card and splattered Silver Glitter mixed with green glue and water over the vellum.  I also Silver Embossed snowflake images on vellum and punched them out.  The final embellies were Silver Thread and a silver foil “Joy” stapled on top.  I love the richness of this card and it was actually very quick to make!

Cathy Casey, Independent Stampin' Up Demonstrator www.sugarshackdes... Flurry of Wishes Stampin' Up

Cathy Casey, Independent Stampin' Up Demonstrator www.sugarshackdes... Flurry of Wishes Stampin' Up

I hope you enjoy!

Thanks for letting me share, have a great week filled with inspiration and beauty!

Make sure you go “Back” if you missed Bree Renwick or you can loop on around by hitting the “Next” button to get to Dani Dziama and the rest of the hop!

mondaymontagebackrev

mondaymontagenext

Product List

Links by TheseAreMyStamps.com

8th Annual Stampin’ for a Cure!

mondaymontage banner revised Oct 13

Monday Montage Blog Hop – Week 53

Hello friends! Welcome back to the Monday Montage Blog Hop! You may have gotten here from the amazing Bree Renwick’s blog, make sure you select the “next” button below and that will take you to the next stop on the hop, the fabulous Dani Dziama’s blog.  I know we have some super cute goodies for you today!

Yesterday we held our 8th Annual Stampin’ for a Cure fundraiser for World Cardmaking Day!  We raised about $4,000 for our local Susan G. Komen Affiliate.  It was so much work and so much fun and sooooooo inspiring!  I co-designed two projects for the event this year and I want to share them with you today 🙂

On this first card, I used the Cozy Christmas stamp set and the Home for Christmas DSP.  I just love the sweet, vintage images in this paper!  Pretty simple, dimple card 🙂

Cozy Christmas


Cathy Casey, Independent Stampin' Up Demonstrator www.sugarshackdes... Cozy Christmas Stampin' Up

I used Embellished Ornaments for the second card.  Oh my, do I love these images and framelits!!  So lovely!

Cathy Casey, Independent Stampin' Up Demonstrator www.sugarshackdes... Embellished Ornaments Stampin' Up

Cathy Casey, Independent Stampin' Up Demonstrator www.sugarshackdes... Embellished Ornaments Stampin' Up

Here are some pics from our day yesterday…

Lot’s of pink and busy stampers:Lot's of pink and busy stampers :)

Part of my display:
Part of my display at our event.

A toast to our success!

A toast to our success!

A great bunch of hardworking ladies, dinner after our long day:Celebration Dinner!

I hope you enjoy!

Thanks for letting me share, have a great week filled with inspiration and beauty!

Make sure you go “Back” if you missed Bree Renwick or you can loop on around by hitting the “Next” button to get to Dani Dziama and the rest of the hop!

mondaymontagebackrev

mondaymontagenext

Product List

Links by TheseAreMyStamps.com


Product List

Links by TheseAreMyStamps.com