Amazingness!

I cannot love the Celebrate You Thinlits enough!!!!  The “amazing” is just that….amazing!!!  The only thing that would be more amazing?  If it said “amazeballs” lol…just kidding.  I would love amazeballs but I am not sure who else would and, to be honest, I probably use the word amazing wayyyyy too much anyway.  Whatever, I love this word & there are so many things each and every day that are amazing 🙂  Guess what makes these dies even better?  They are FREE with a $100 order during Sale-A-Bration.  Seriously.  Free.  What is more amazing than free????  Okay, enough amazingness…on to the project!

I needed a thank you card for a sweet, sweet girl that house sat for us in December and took the best care of our doggies.  This card came together soooo fast!

Celebrate You Stampin' Up

Creative Tips:

  1.  Word dies are my go to when I need big impact and a quick card.  I love how this set has 3 different fonts, each word is a different font.  I used staples to attach “amazing” and mini dimensionals to attach “you” to the card front.
  2. I used the Wood Textures DSP as a focal point on the card front.
  3. To add a little more interest to the card, the large flower image from Awesomely Artistic is stamped in Bermuda Bay on the white card base.

Thank you so much for stopping by!  I hope I’ve inspired you to be creative today!

Shop now for any of the products used in this project, links below:

Bestie alert!

I am on a countdown to go on a fabulous cruise with my besties in……2 weeks!!!!  I am super excited, we are going on a Stamping & Scrapbooking cruise with about 100 fun people.  I am just praying every day that the weather gives us a break.  The last couple of weeks have been crazy with these giant hurricanes.  Right now I am listening to a crazy man standing in the street in Naples, Florida who is about to be blown all the way to Tampa lol!  I think these weather guys live for their moment fighting the wind on camera 🙂

As soon as I saw this stamp set in the catalog, I knew I had to have it.  How much time do we spend with our faces in our phones?  This card just reminds me that in person is way better than digital and to make the most of every second I get to spend IRL with my besties 🙂

Text Ya Later Stampin' Up

Text Ya Later Stampin' Up

Creative Tips:

  1.  Use lot’s of the small images to create background stamping.  The small words and emoji’s from the set are stamped tone on tone along the top of the card base.
  2. Use dimensionals to make your card pop.  All of the text blocks on the phone are popped up with dimensionals to create layers.
  3. Most of the card is in Whisper White and Bermuda Bay.  The text bubble responses are in Berry Burst.  This pop of color balances the card out.


Are you ready for a sweet adventure?

Oh my gosh, I love love love the fonts and sayings in this Hostess Set!  It’s called Dare to Dream and it just has the best words in it!  I am a huge fan of mixing fonts and this set makes it super simple to pair two fonts perfectly for just the right look 🙂  So cute and easy!

Dare to Dream Stampin' Up

Dare to Dream Stampin' Up

Creative Tips:

  1.  I used a scrap of watercolor paper and watercolor washed sections in Sweet Sugarplum and Soft Sky.  After they dried, I stamped the balloon outline on top of the washes and then cut out the balloons.
  2. The square window is cut with a Layering Squares die, whatever size you like.  After this “window” was cut into the watercolor paper, I went back and lightly watercolor washed around the window in Soft Sky.
  3. Dimensionals under the watercolor paper base and under the balloons add tons of dimension to this card.  It is super simple and came together quickly but the extra dimension makes the entire card pop 🙂

I hope this project inspires you to dare to adventure in your craft room today!

All supplies are available at the links to my store below:


You deserve this!!

Display Stamper

Today I have another super cute card from my Display Stamper board.  I got really deeply hooked on the new Lemon Lime Twist In Color combined with the new Berry Burst In Color!  I think these two colors together are yumma-liscious-ness!!!

Remember when I had all the time in the world to create my display samples?  Remember when I procrastinated till the week before OnStage?  Yes, well, that of course all happened.  And then I fell in love with these colors and couldn’t stop creating fun cards with all the new goodies in my box 🙂  This card is one of what I am calling my “creative flow” cards…I got on a little roll and made a bunch of cute cards for the display.  I love when that happens…almost as much as I hate it when I can’t put anything together at all that I don’t hate!

You Deserve This Stampin' Up

You Deserve This Stampin' Up

This card features a new stamp set from the June 1st catalog:  You Deserve This on page 44.  The other new products featured are 2017-2019 In Colors Lemon Lime Twist and Berry Burst, Eastern Palace Designer Series Paper, Corrugated Elements, 1/4″ Ombre Ribbon in Lemon Lime Twist and 3/8″ Stitched Satin Ribbon in Basic Gray.

Creative Tips:

  1.  The image I used from the stamp set is part of a huge background style stamp that I ultimately cut up into it’s individual parts.  You can commit stamp abuse like I did or another option would be to mask off the parts of the stamp you didn’t want to get inky for your design.  I heat embossed the “You Deserve This” portion of the stamp on Watercolor Paper with White Stampin’ Emboss Powder.  After embossing, I added a watercolor wash of Bermuda Bay to make the image pop.
  2. Create a frame with your Layering Squares Framelits and use a portion of the cute gate die cut from your Flourish Thinlits to showcase your sentiment.  The frame and other embellishments are attached with a combination of staples, glue dots and dimensionals.
  3. Final touch?  A spritz of Bermuda Bay over the card front adds one more layer of fun and dimension.

SU Palette

You Deserve This Stampin' Up

I can’t wait to share more fun cards created for my board!  I know you will love these new colors and stamps as much as I do 🙂

Thanks for stopping by today!

The retired list is out and selling quickly!  See the complete list and pricing (some items are discounted) here.  Please order anything you want as soon as possible, all items are while supplies last and they will be gone before you know it!!

New products are not listed in the showcase as they won’t be available to order until June 1st with the exception of the Eastern Palace Designer Series Paper.  You will be able to order this paper on May 1st 🙂  You can find available products in the click-able links below:

New Goodies!

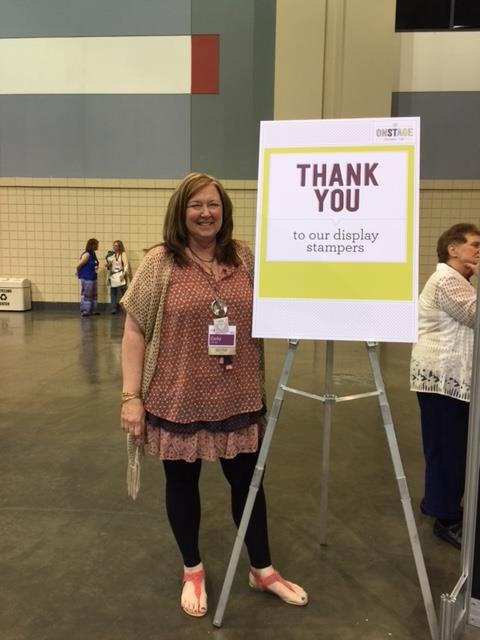
I was sooooo excited to be selected as a Display Stamper for the OnStage Local event in Savannah!  I get to play with new product and make a fun display??  Why yes, that sounds amazeballs!

I opened my box of goodies when they came and had a little party all by my ownself looking at all the fun new toys….then came the trepidation….how can I make something cute and worthy for the boards???  What if I can’t come up with all these projects????  Yikes!

Then I thought, I have two months…plenty of time to be inspired by the new In Colors and fun new stamps and new ribbon and other goodies….I’ll make a few projects every week.  Ha!  A week before On Stage and I had three creations and pile of unused product in front of me!  I am the world’s biggest pro-craft-inator!!!  Sometimes I think I work best under pressure or maybe I was just lucky that the ideas flowed at the right time and all my sweet projects were finished with days to spare 🙂  well let’s be honest, 2 days to spare 😉

Today’s card is the first of my display projects that I will be sharing over the next days & weeks.

Display Stamper

Display Stamper

I know, I look like a big ole dork!  (insert dork emoji here)

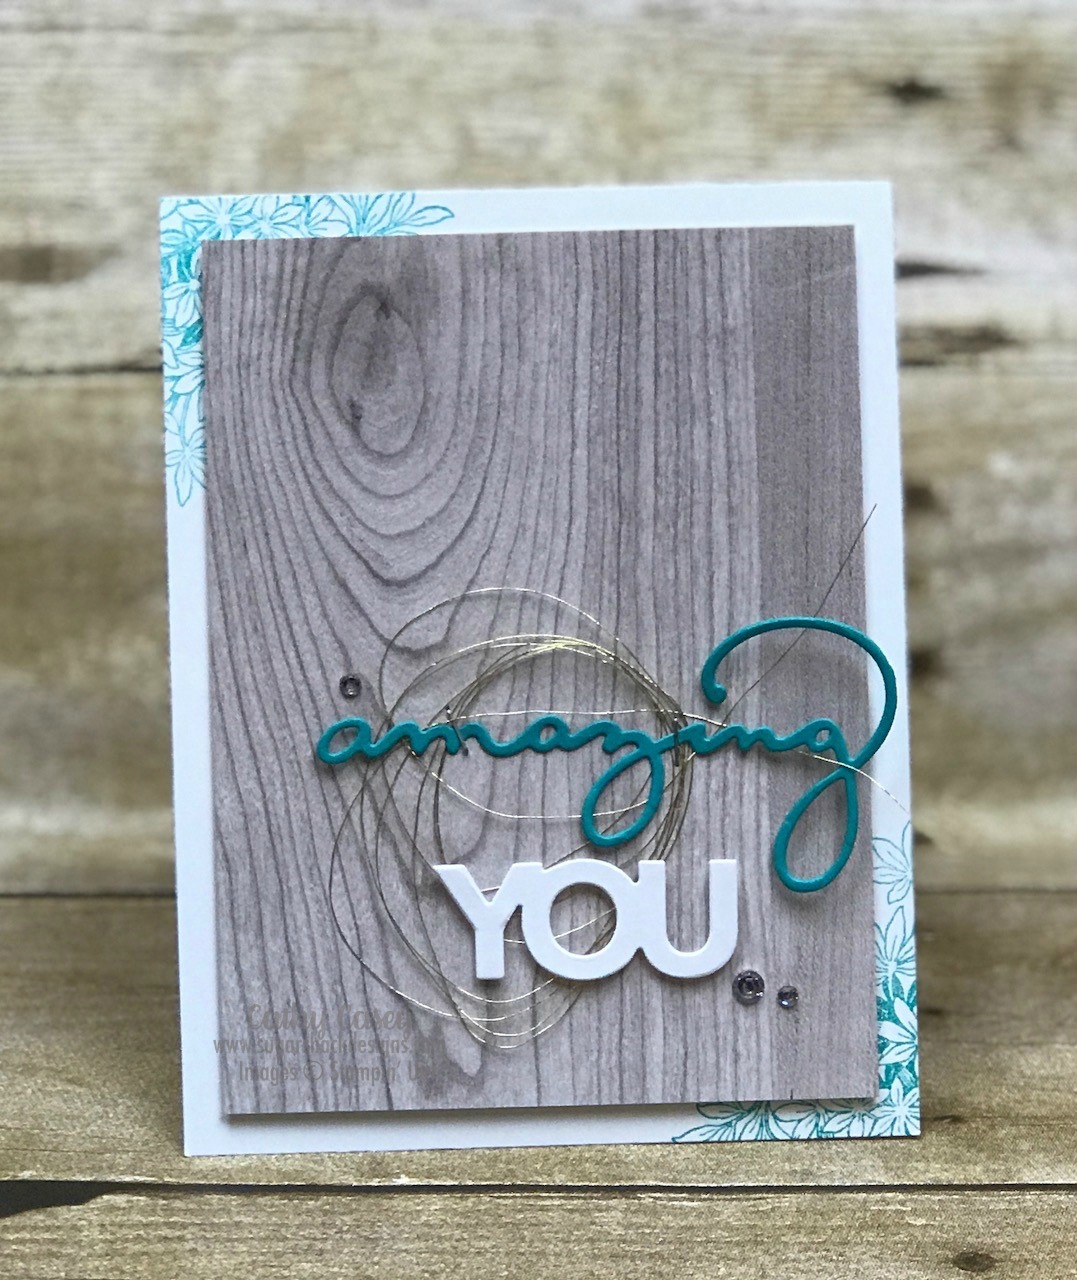
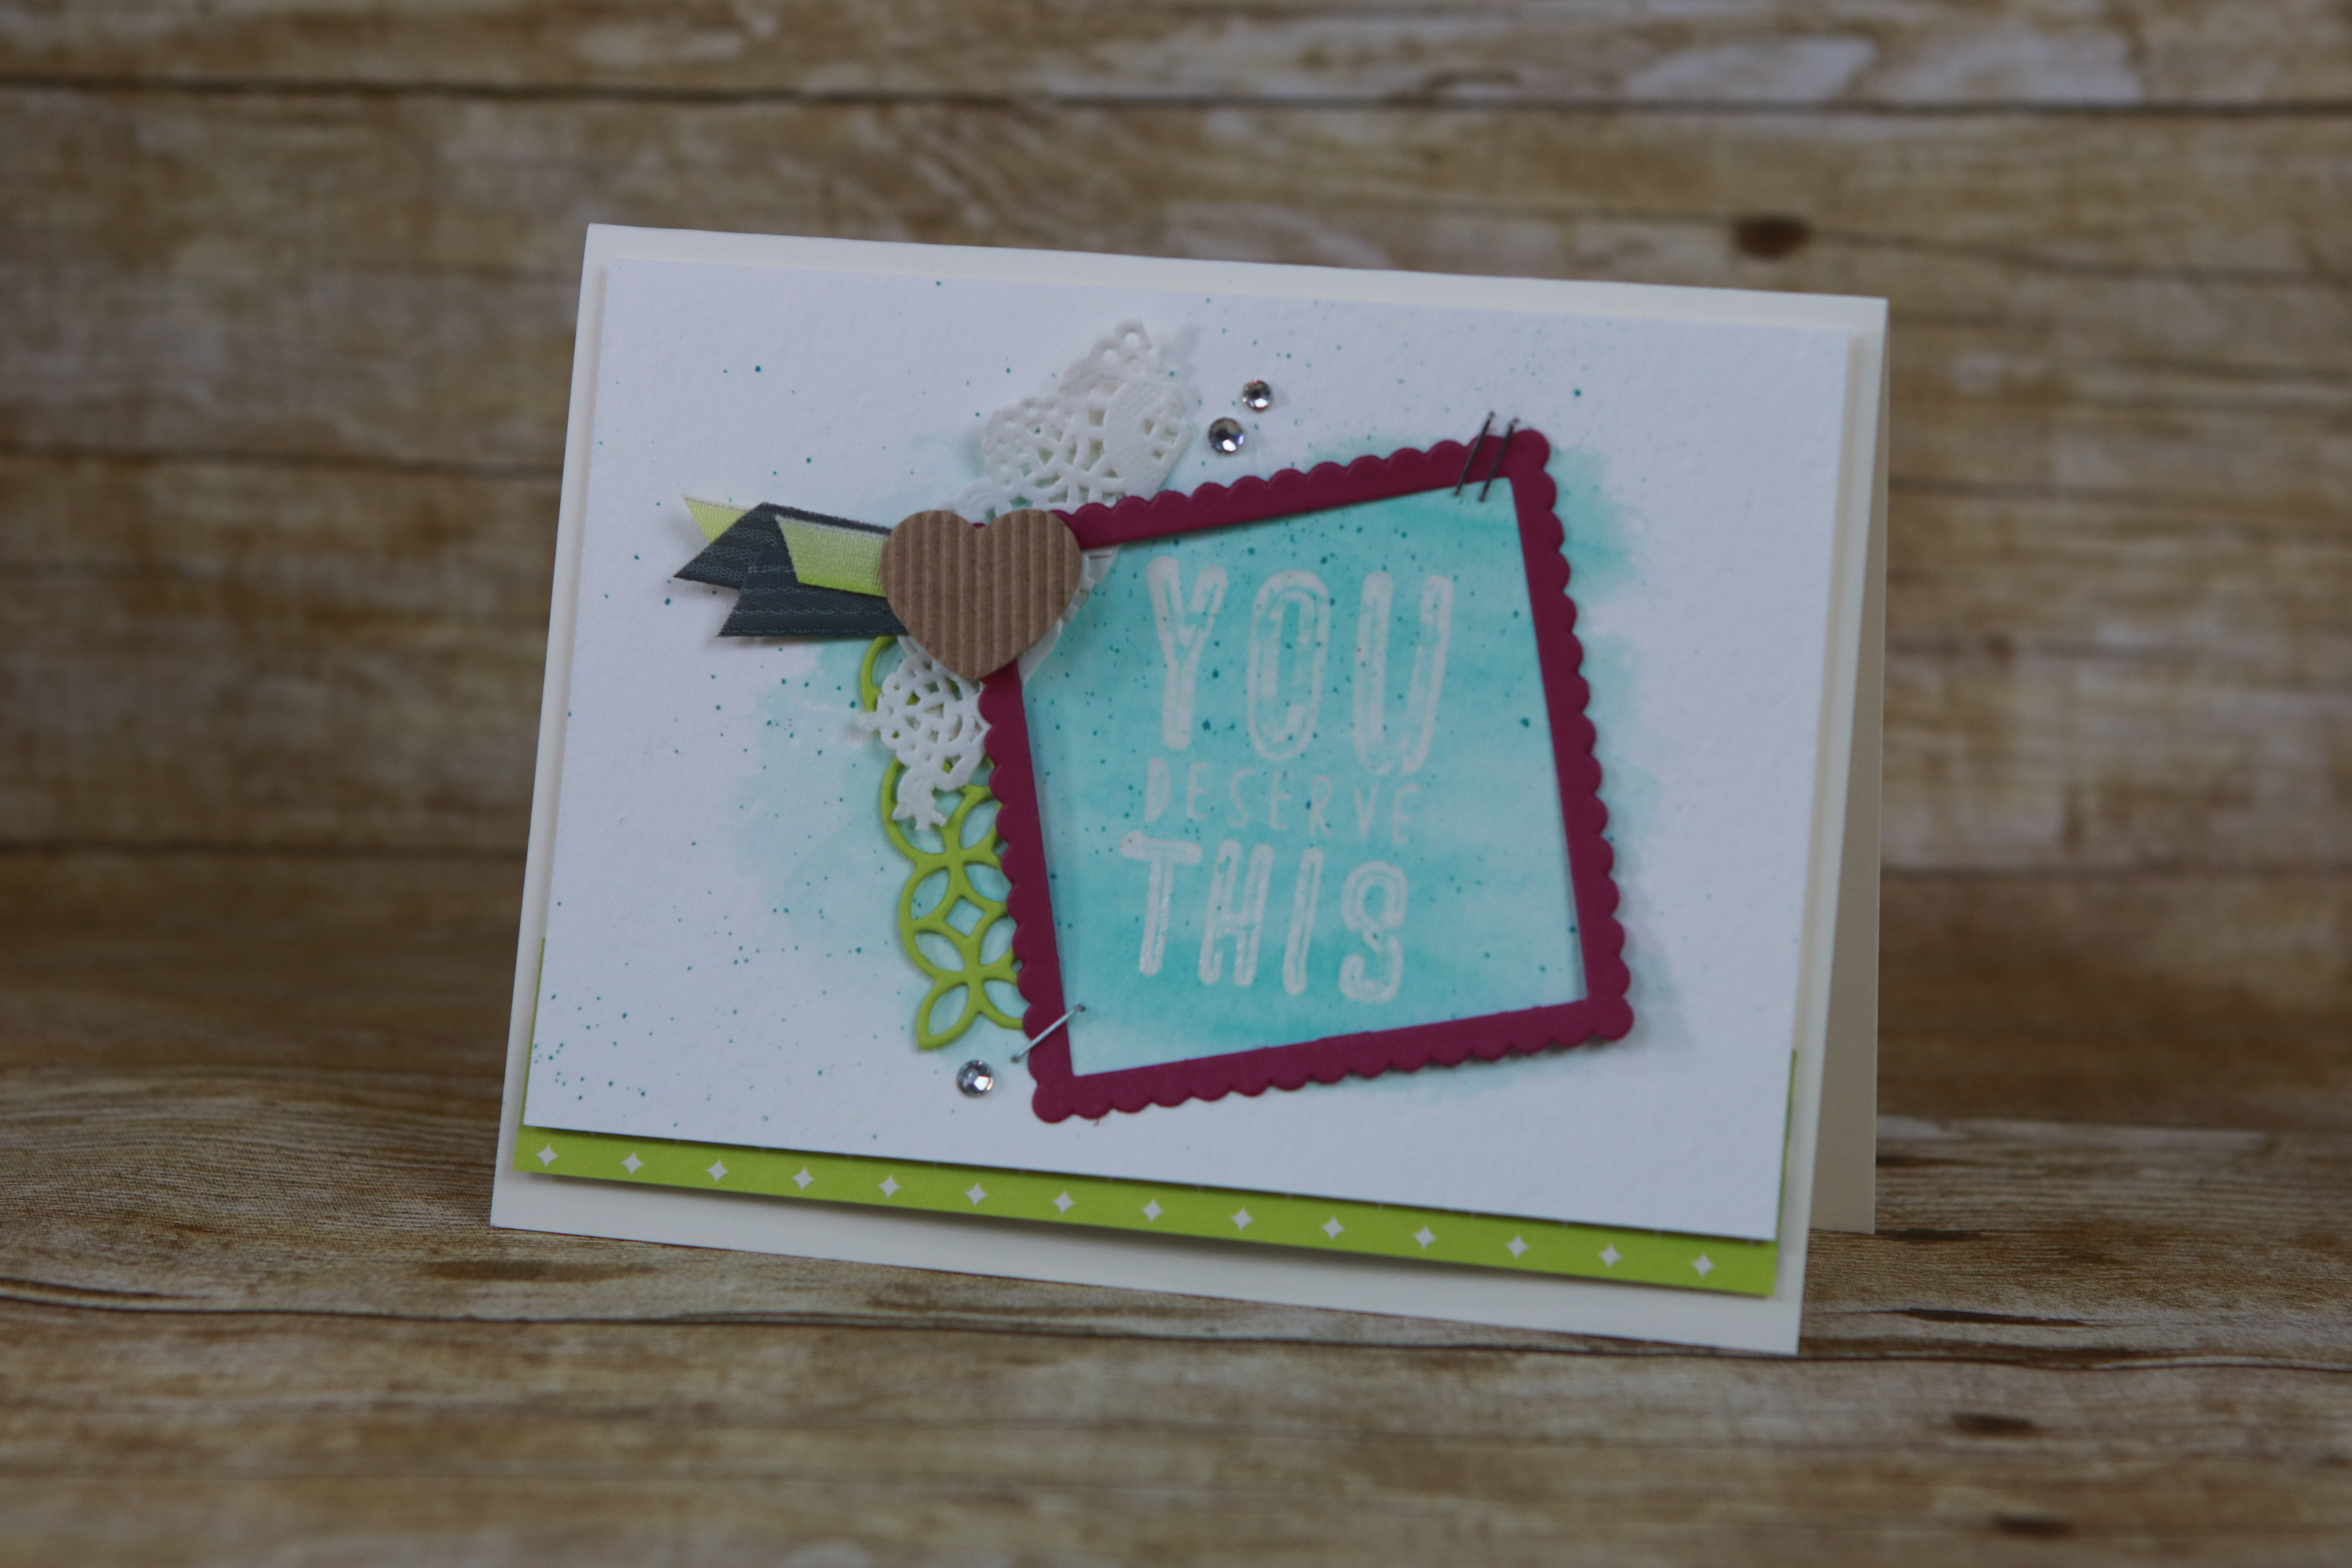
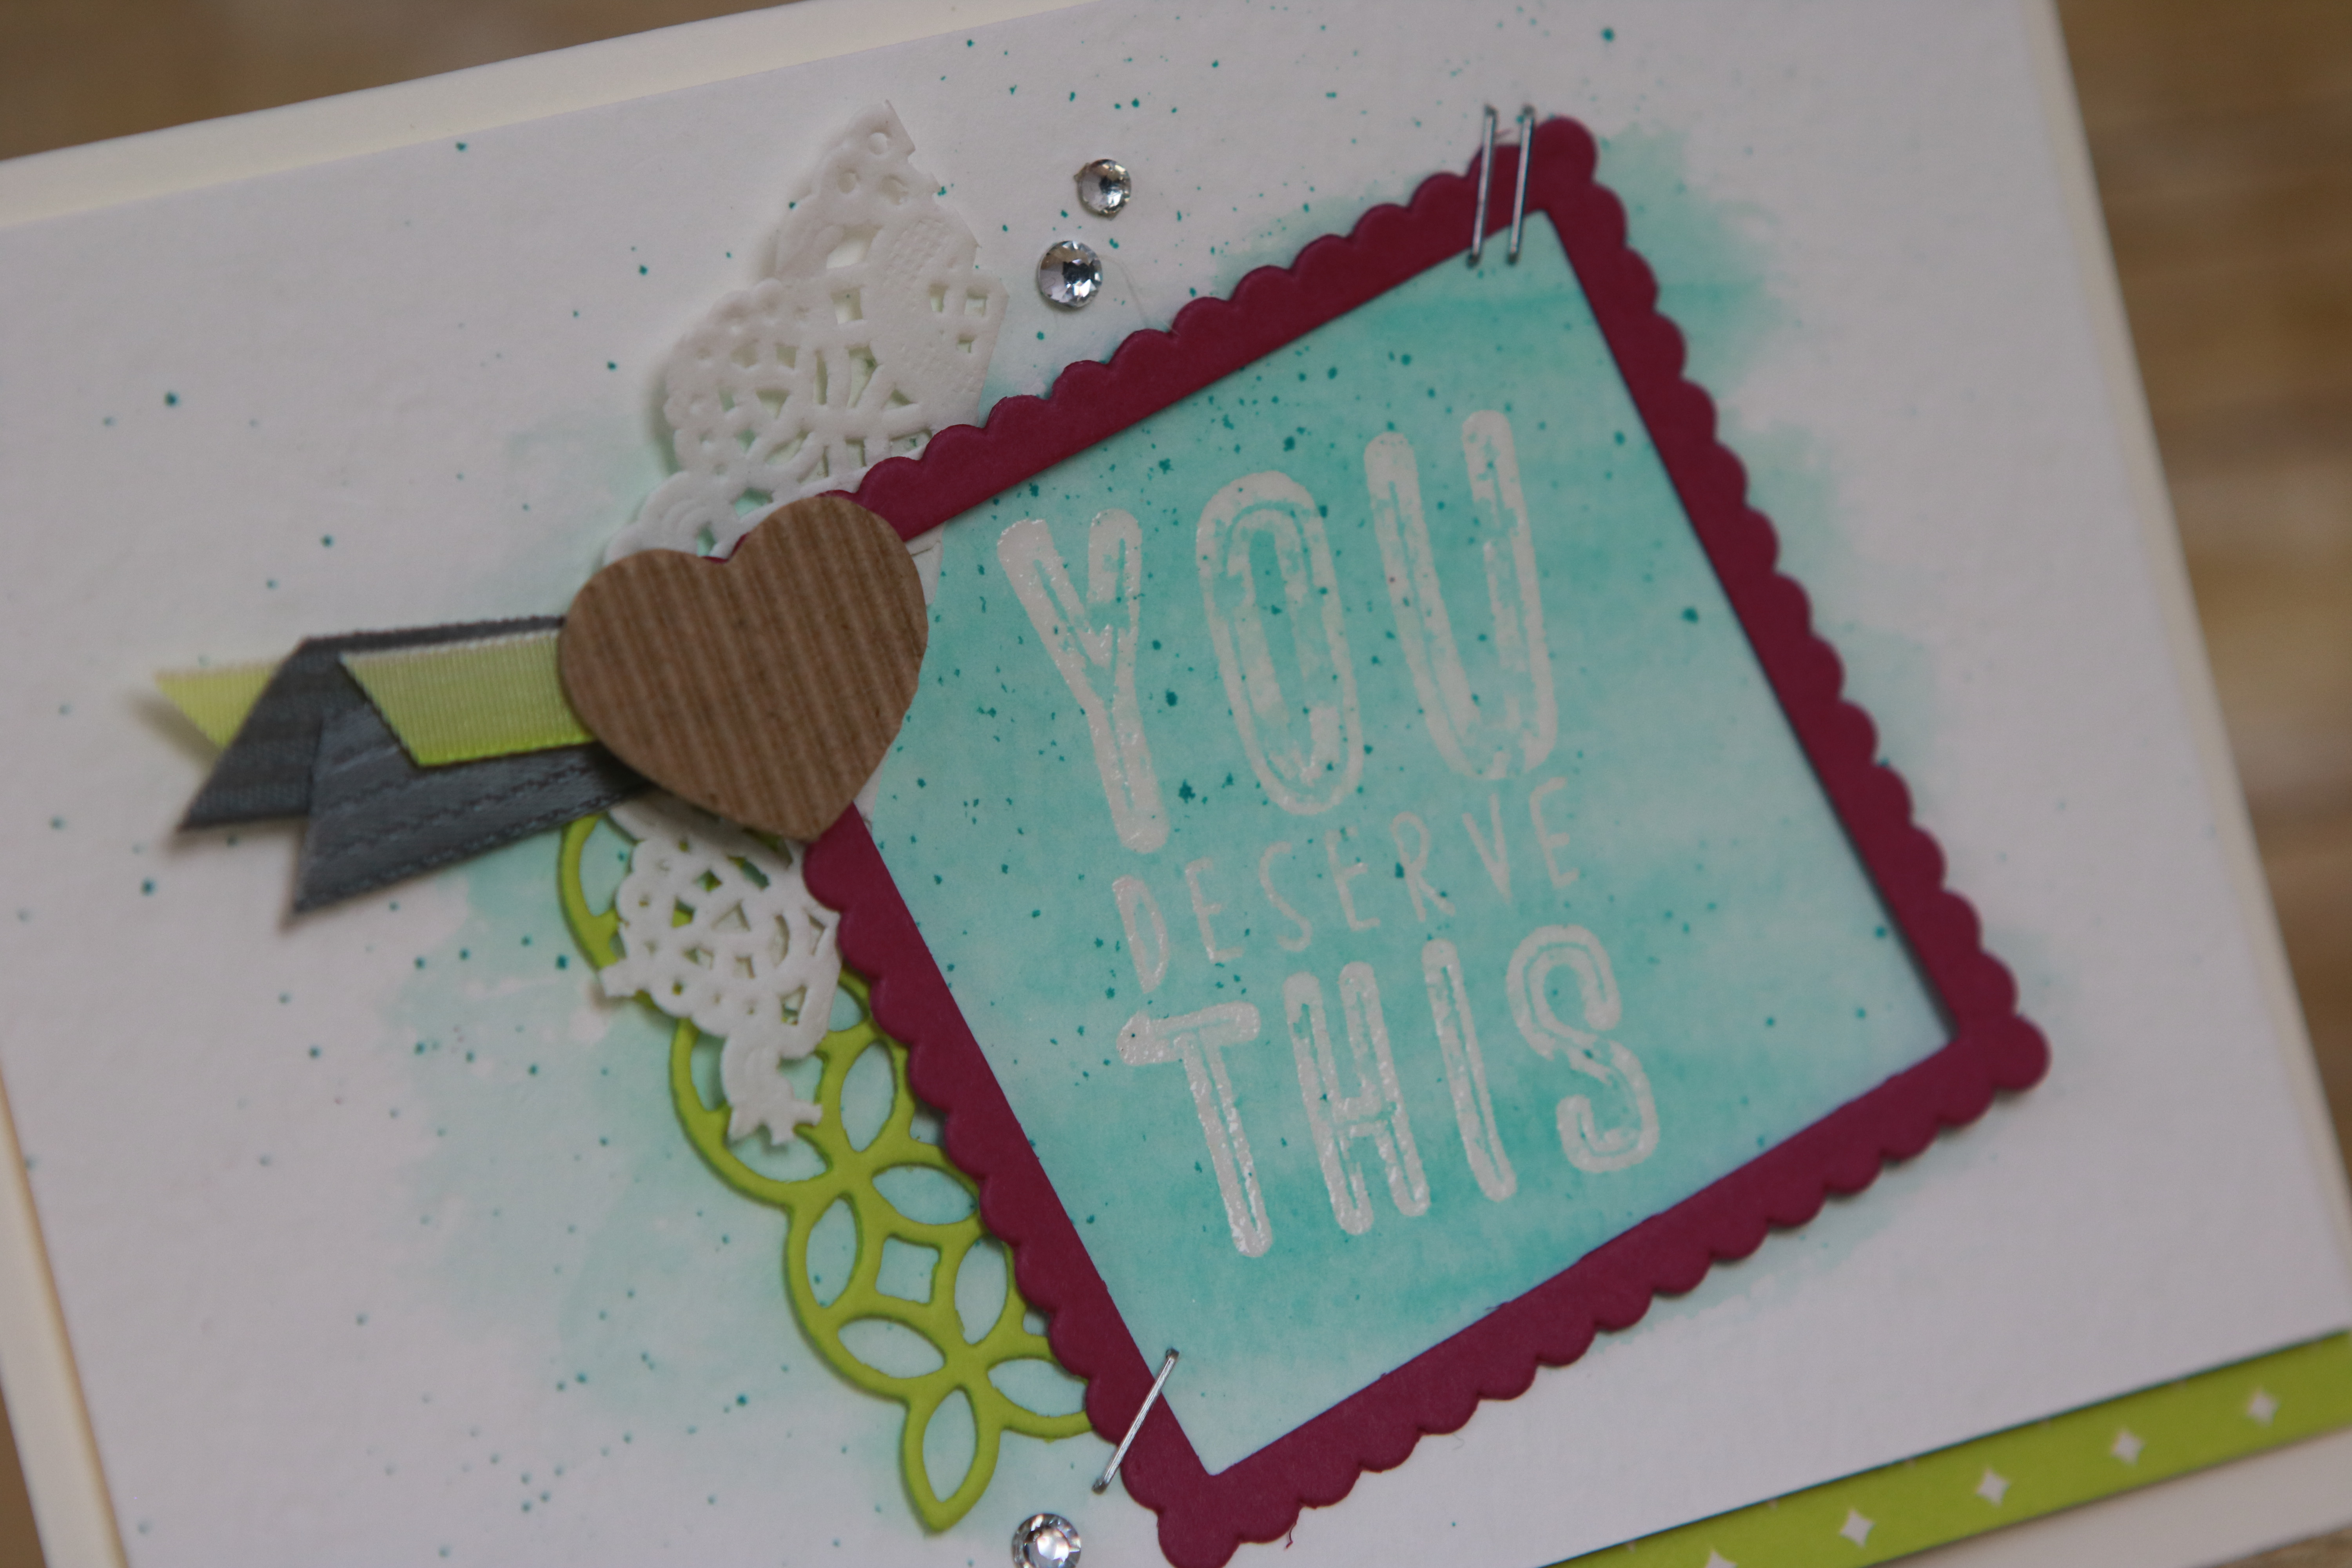
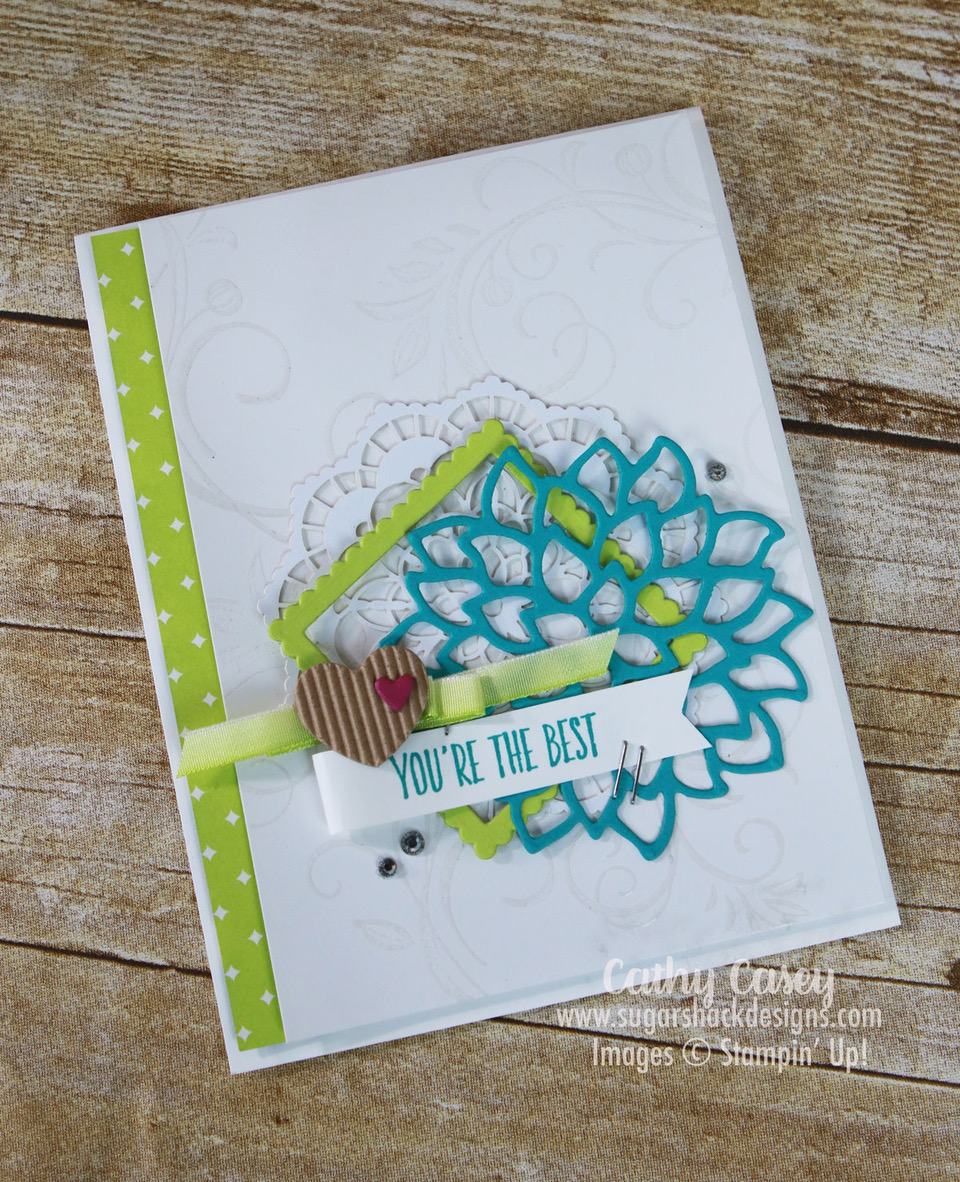
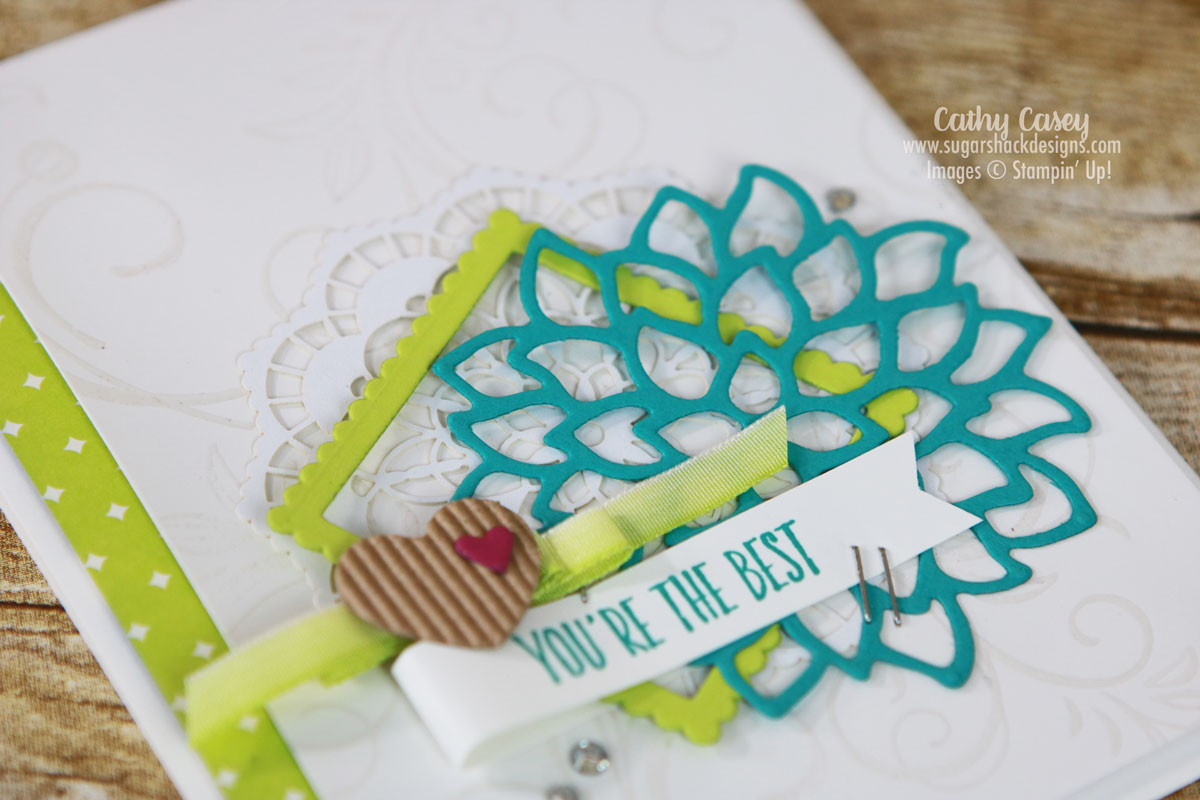
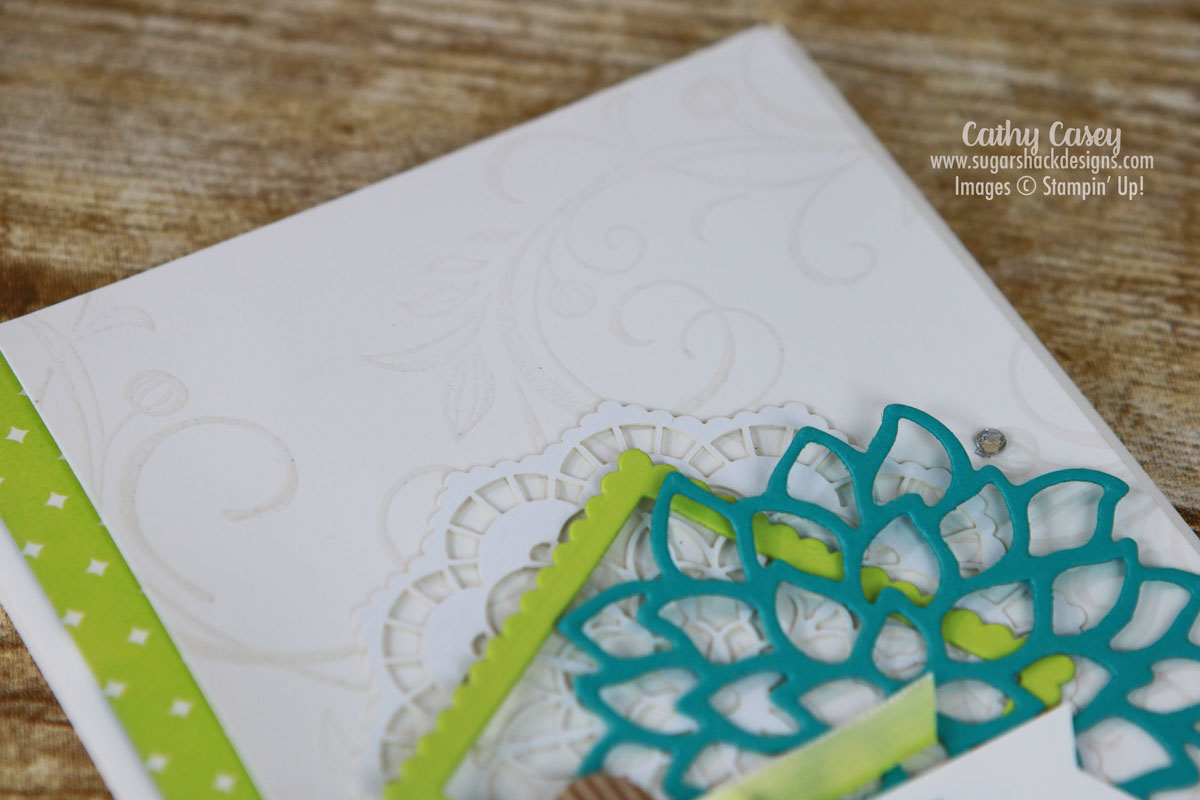
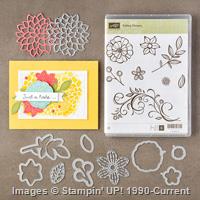
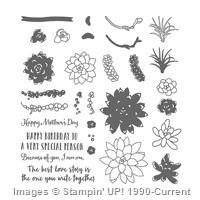
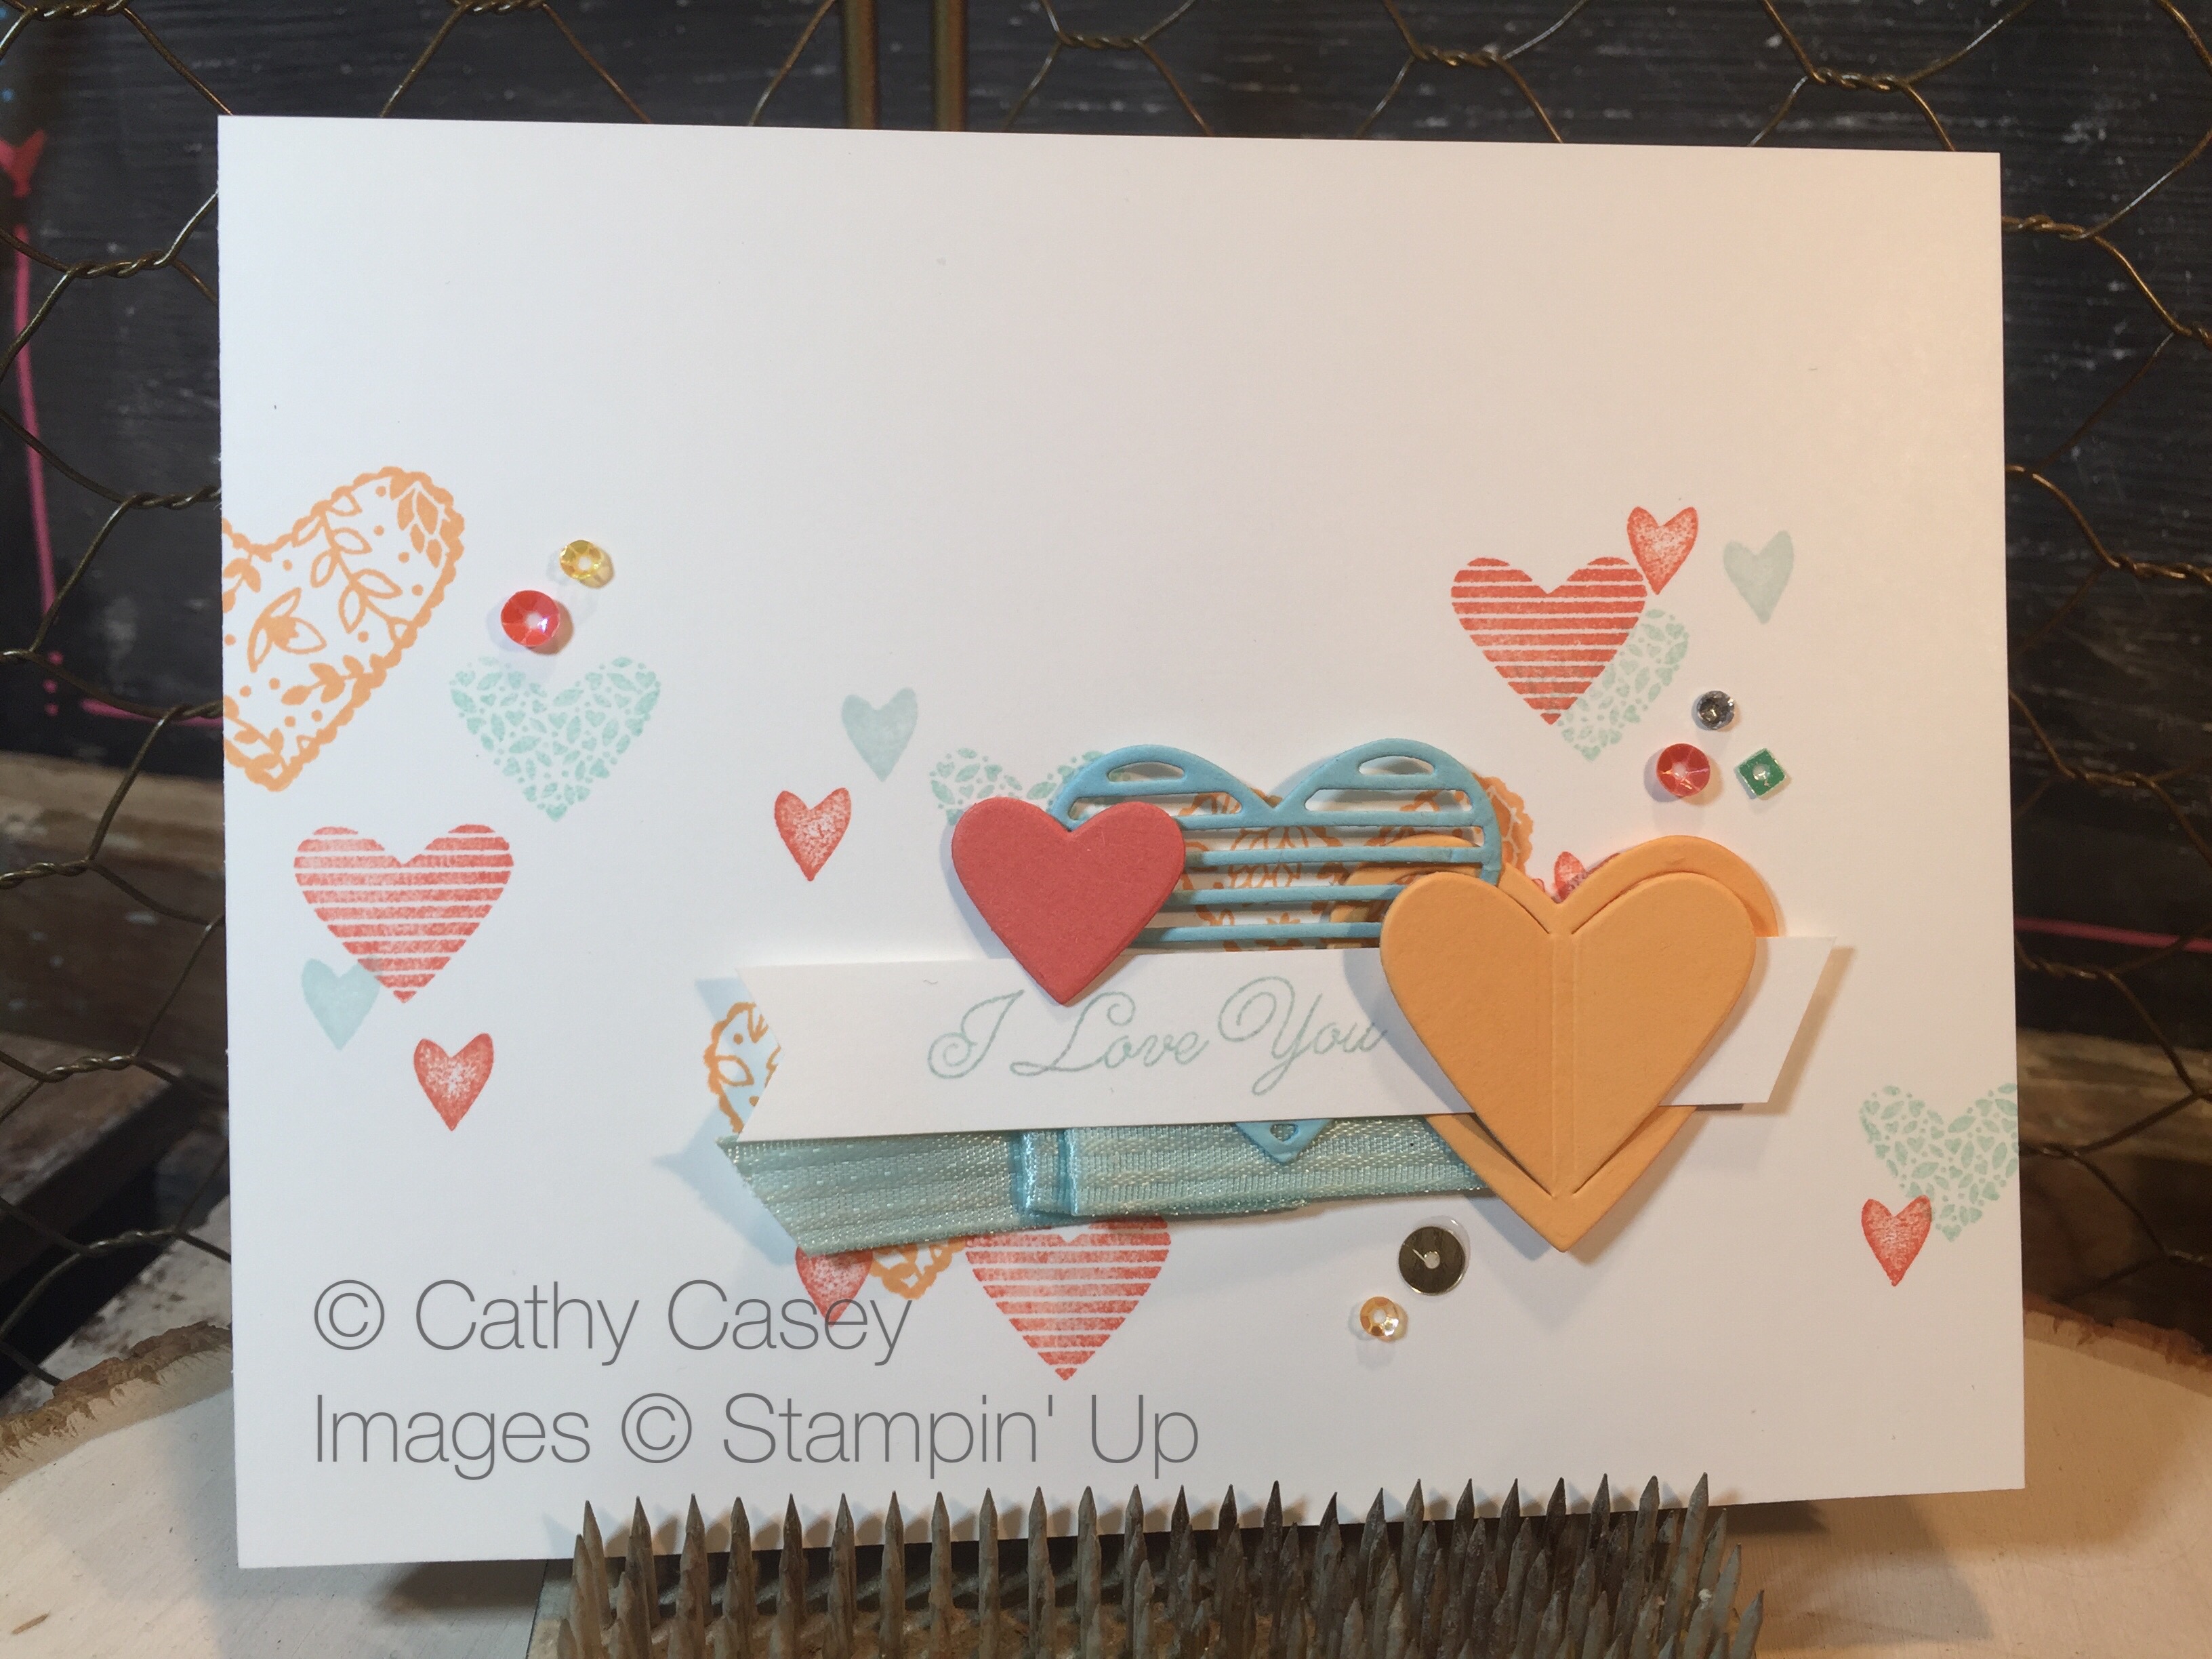
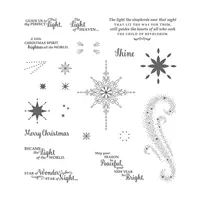
This card features lot’s of new product and colors.  The stamp sets used are from the current catalog:  Falling Flowers and All Things Thanks.  New products featured are 2017-2019 In Colors Lemon Lime Twist and Berry Burst, Glossy White Cardstock, Eastern Palace Designer Series Paper, Corrugated Elements and 1/4″ Ombre Ribbon.

Creative Tips:

  1. Glossy paper can be used many ways.  On this card, I chose to white emboss the flourish image from Falling Flowers on the card front giving the tone on tone look for my background.
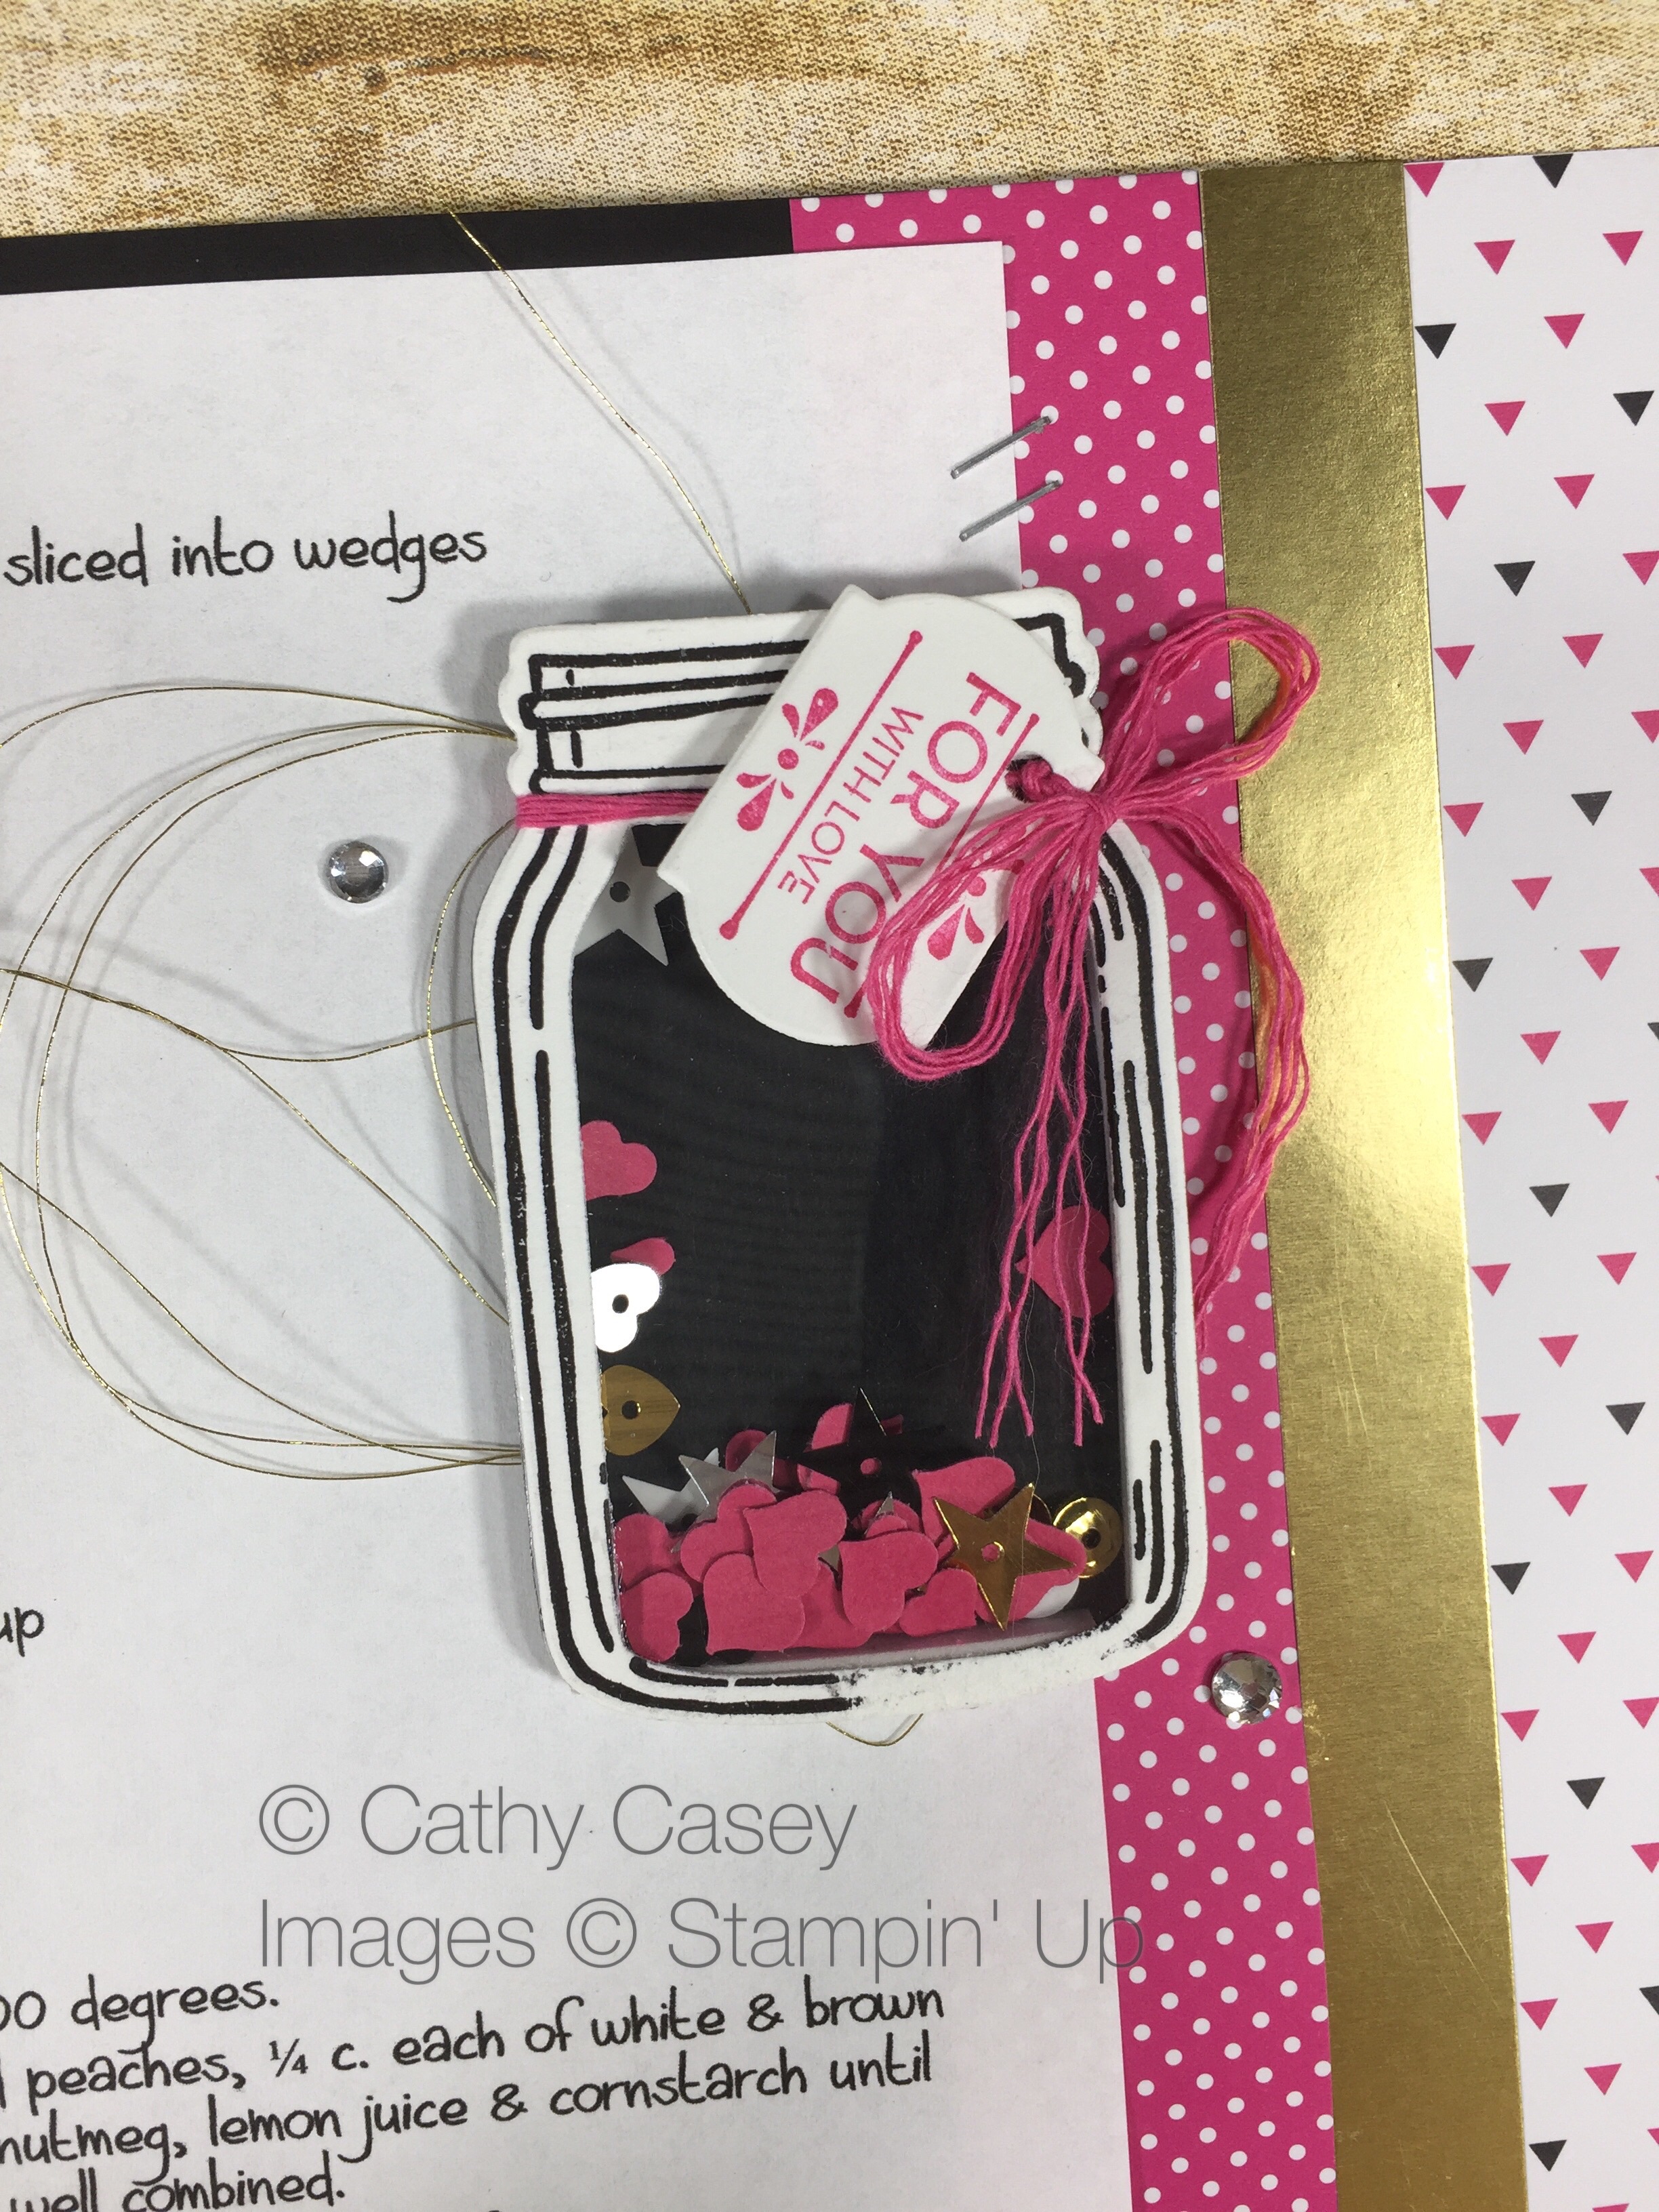
  2. I added one tiny heart in Berry Burst to the Corrugated Element heart.  This heart comes from the row of hearts in the Everyday Jars Framelits set.  The little pop of Berry Burst sets off the blue and green tones in the Lemon Lime Twist and Bermuda Bay prevalent in the rest of the card design.
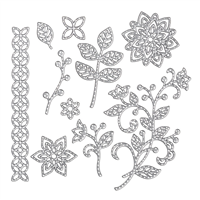
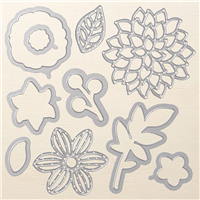
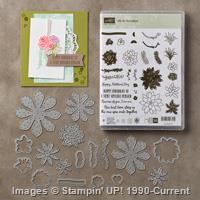
  3. Layering of several simple elements adds interest and a focal point to the card.  I love being able to see images and backgrounds through and under other elements.  The flower die cut from May Flowers is perfect for this!

Stampin' Up Palette

Such a fun card!  I love how well the new Lemon Lime Twist coordinates with my favorite color, Bermuda Bay.  They just feel vibrant and alive on the page!

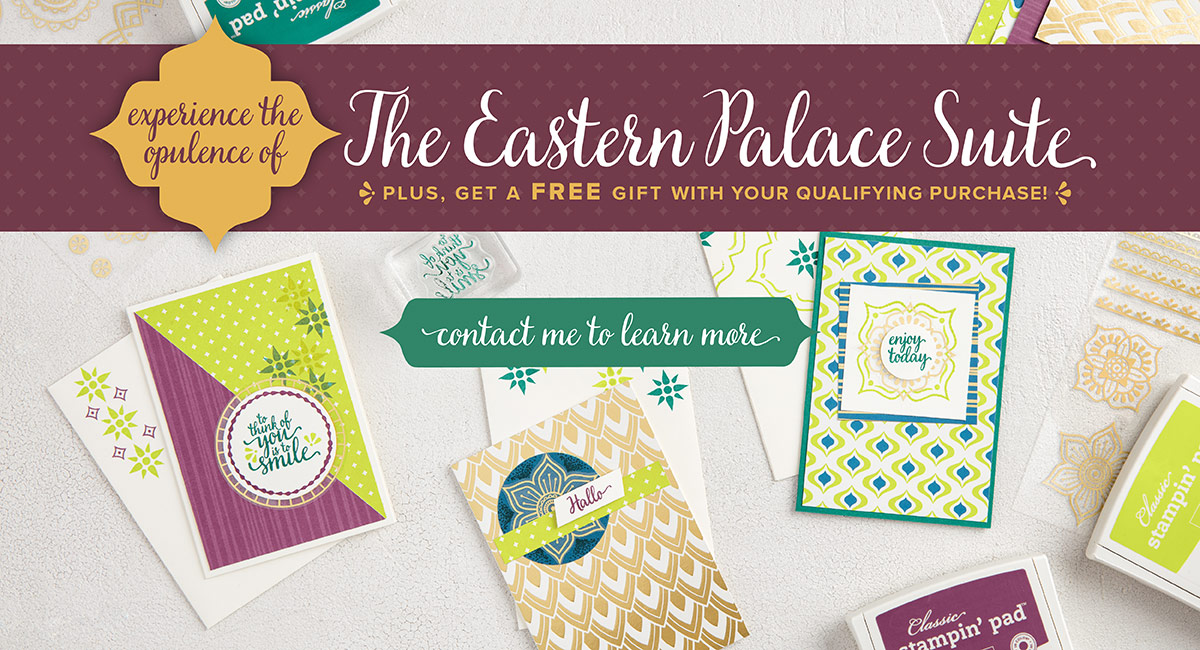
I hope you love my card as much as I do!  Stay tuned for more fun projects featuring new product coming out June 1st!  The Eastern Palace Suite will be available to order on May 1st!!!  It includes the yummy Eastern Palace DSP and a great stamp set and coordinating framelits.

Eastern Palace Suite

Thanks for stopping by today!

New products are not listed in the showcase as they won’t be available to order until June 1st with the exception of the Eastern Palace Designer Series Paper (see above).  You can find available products in the click-able links below:

Succulents for Mama

I’m traveling this week for a Stampin’ Up event in Savannah, Georgia.  My first stop is my bestie’s in Pensacola, Florida.  We were stamping crazies the first 24 hours after I arrived!  Both of us are Display Stampers for the event and had a pile of projects to create for the display boards in Savannah.  Typical pro-craft-ination waiting till the last few days to finish all our projects!  I’m glad we had required stamping to do…we had so much fun in our whirlwind of creativity, it is the very best getting to stamp together in IRL instead of crafting together virtually across the country!  I can’t wait to share what I made for the boards, you can come back here to see my projects as soon as it’s okay to post them 🙂

You might think I would have needed a rest from stamping for the displays but I couldn’t wait to play with some of the sets in this stamp room that are not in my own lol!  I finally got to play with the Oh So Succulent stamp set and I am in love with the results!  The possibilities for watercoloring with this set makes my heart go pitter-pat 🙂  There are so many fun images and details in the set and you can color the line images like I did or you can use it for two-step stamping and fill in the line images with the second stamp.  This makes this set exceptionally versatile for whatever kind of stamping you feel like doing.

Oh So Succulent Stampin' Up

Oh So Succulent Stampin' Up

Creative Tips:

  1.  I played with my colors on a scrap of watercolor paper before committing to each plant image.  When I had a combination I liked, I watercolored one of the plants.  Inks I played with for this card include:  Sweet Sugarplum, Island Indigo, Mint Macaron, Old Olive, Bermuda Bay and Rich Razzleberry.
  2. Isn’t the little planter the cutest?  Can you guess where it came from?  It’s the ice cream bowl from the Frozen Treats die set!
  3. I am obsessed with watercolor washes in the background of my card fronts.  I think that sweet wash of color makes the main images pop.  On this card I used Mint Macaron and Bermuda Bay in my wash.

Oh So Succulent Stampin' Up

Stay tuned for more stamping fun over the next two weeks!  I can’t wait to share crafting and traveling fun with you 🙂


Still in love….

I’m still completely loving the Sealed with Love stamp set!  Who says hearts are only for Valentines Day?  This pretty little card took me about three days to make!  I started it one day and finished it up later in the week.  I sure hate it when life gets in the way of crafting lol!

This stamp set and the coordinating framelits are so versatile!  I find myself reaching for them often and they are very well loved in my stamp room 🙂

This card was so easy to create.  Once again I found myself reaching for the Carousels & Cupcakes palette.  Several of the heart images are randomly stamped on Whisper White in Peekaboo Peach, Pool Party and Calypso Coral.  A couple of hearts are die cut in Pool Party, Peekaboo Peach and Calypso Coral.  These are layered with the “I Love You” sentiment and some Pool Party Stitched Satin Ribbon.  The final touches are sequins from the Cupcakes & Carousels Embellishments Kit and Sprinkles Embellishments.

Sealed with Love Stampin' Up

Sealed with Love Stampin' Up

I hope this card pulls your heart strings too!


He’s making a list….

I have a fun card to share today featuring Mr. Santa and his list.  I just love this die cut…so many fun things you can do with this!  I elected to make the let the die cut be the star and just added a few fun elements to set it off.

The base of the card front is a piece of Candy Cane Lane DSP cut to fit the whole card front (5 1/2 x 4 1/4).  Layered over the DSP and under Santa is a piece of vellum that gives a softer look to the DSP under the die cut.  Add ons are the cute list image stamped in Early Espresso and fussy cut.  The list is wrapped in Candy Cane Lane Baker’s Twine and tied off with a tiny bow.  “Merry” is die cut with the Christmas Greetings Thinlit in Real Red.  The “Christmas!” portion of the sentiment is masked to exclude the “Merry” on the stamp and stamped in Crumb Cake on a 1/2″ x 4″ piece of Whisper White.  The right edge of the banner wraps around on the right side and goes behind the card front.

Greetings from Santa Stampin' Up

It’s hard to believe it is really almost Christmas again!  I hope you are enjoying time with your family this week for Thanksgiving and maybe getting in a little crafting too!


Peach cobbler and such…

mondaymontage banner revised Oct 13

Monday Montage Blog Hop – Week 81

Hello friends! Welcome back to the Monday Montage Blog Hop! You may have gotten here from the amazing Bree Renwick’s blog, make sure you select the “next” button below and that will take you to the next stop on the hop, the wonderful Dani Dziama’s blog.  As always, we have some amazeballs inspiration to share today 🙂

I (just barely) returned home from a Stamping & Scrapbooking Cruise in the Caribbean.  It was soooooo much fun!  The ship was beautiful, the ports were great, time spent with friends old and new was priceless!  One of the fun swaps I participated in was an 8″ x 8″ recipe card swap.   I not only received some amazing projects but some absolutely yummy recipes 🙂

This was my recipe card swap.  This truly is the best peach cobbler evah and I combined the Everyday Jars Framelits and the Jar of Love stamp set with the Pop of Pink DSP to make my cute recipe card.

The 8″ x 8″ inch base is Basic Black cardstock, strips of Pop of Pink designs and gold foil are added next.  The recipe is printed out and stapled to the front of the recipe card and Pop of Pink Washi Tape is added for interest.  The most difficult part of the page is the “Jar of Love” made into a little shaker.  The full jar is die cut in black and in transparency.  The jar is also stamped on Thick Whisper White in Archival Black and die cut.  On this jar, the center is also die cut out.  The transparency jar is adhered to the stamped and die cut jar on the inside to create a clear window.  Foam adhesive strips are added underneath.  Once the foam is on, punched hearts in Melon Mambo are put “inside the jar” along with sequins from the Metallics Assortment.  The back of the jar is sealed with the full black die cut jar.  A small tag is stamped and die cut using the Homemade for You stamp set, it’s attached with Melon Mambo thick twine.  The finished jar is adhered to recipe front with Gold Thread swirled underneath.

Jar of Love Stampin' Up

Jar of Love Stampin' Up

You may not love my recipe card but I guarantee you will love the peach cobbler!

Make sure you go “Back” if you missed Bree Renwick or you can loop on around by hitting the “Next” button to get to Dani Dziama and the rest of the hop!

mondaymontagebackrevmondaymontagenext

A time for peace…

mondaymontage banner revised Oct 13

Monday Montage Blog Hop – Week 80

Hello friends! Welcome back to the Monday Montage Blog Hop! You may have gotten here from the amazing Bree Renwick’s blog, make sure you select the “next” button below and that will take you to the next stop on the hop, the wonderful Dani Dziama’s blog.  As always, we have some amazeballs inspiration to share today 🙂

It’s definitely a time for peace, the holidays are coming and it is truly a time of year to set aside our differences and love one another 🙂

I am totally in love with the Star of Light stamp set and coordinating Starlight Thinlits.  I think the star image is so delicate and lovely!

This card features Marina Mist and Sahara Sand ink.  The swoosh is stamped in Marina Mist on the card front and accented with Sahara Sand stars.  The main image is stamped in Marina Mist and die cut with the large star cut out.  Another piece of Sahara Sand is die cut and layered behind the main star.  “Peace” is die cut from Marina Mist and stapled to the card front.  Add ons are gold thread, rhinestones and gold foil stars.

Stampin' Up Star of Light

I hope you are inspired by my lovely card!

Make sure you go “Back” if you missed Bree Renwick or you can loop on around by hitting the “Next” button to get to Dani Dziama and the rest of the hop!

mondaymontagebackrevmondaymontagenext