Happy Easter

Monday Montage Blog Hop – Week 113!!!!

Hello friends! Welcome back to the Monday Montage Blog Hop!  You won’t want to miss the amazing prettiness that I know you will find at all the stops along the way!

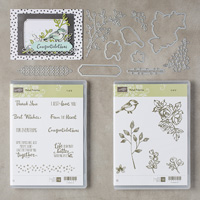
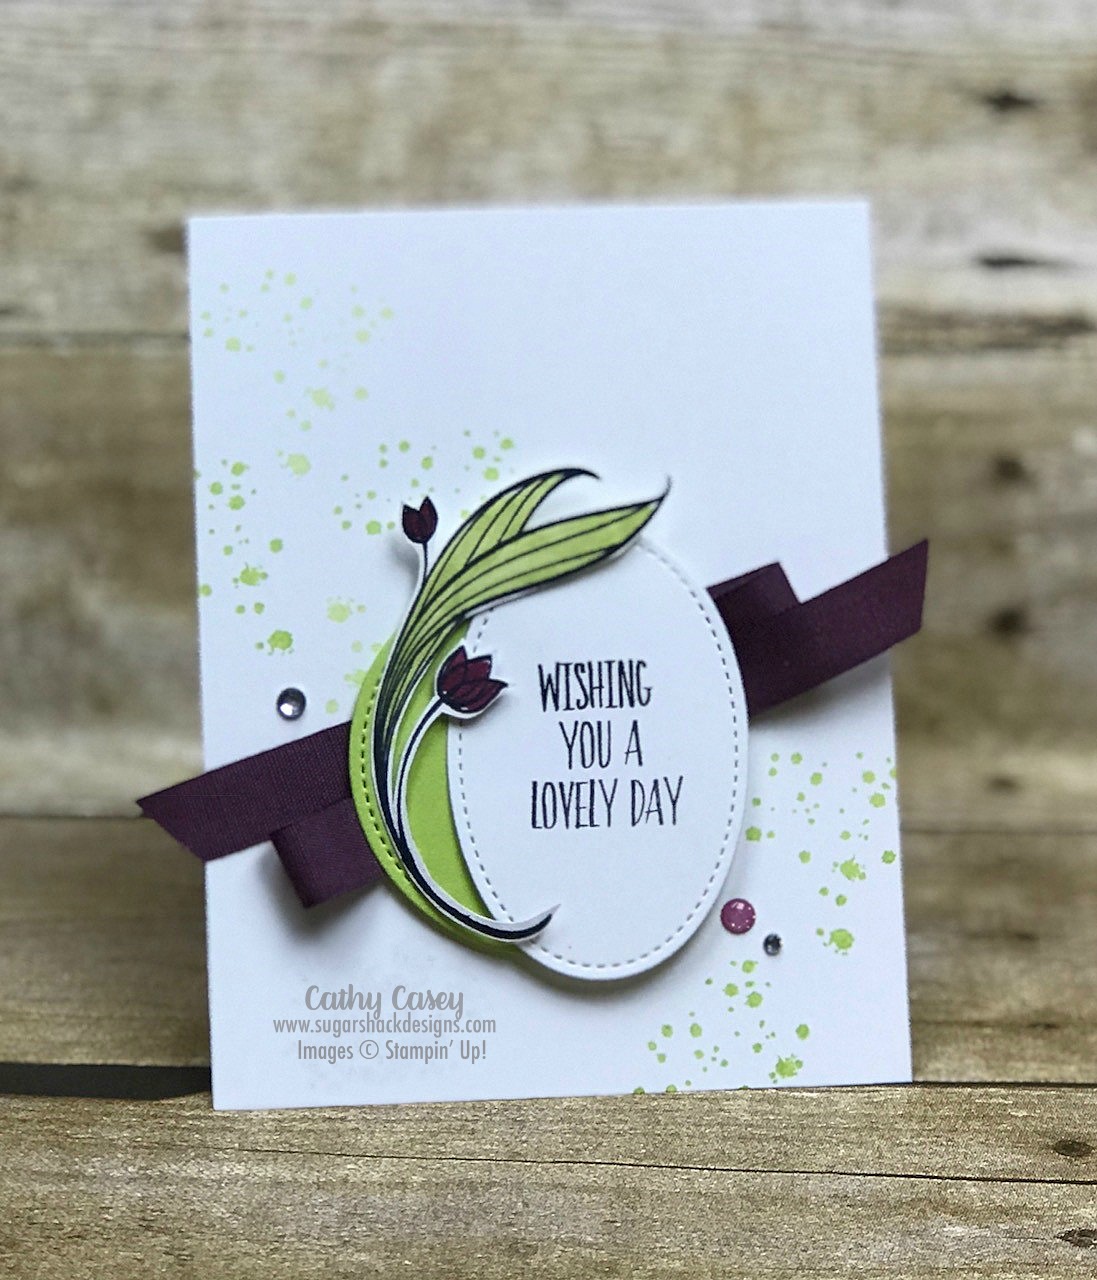
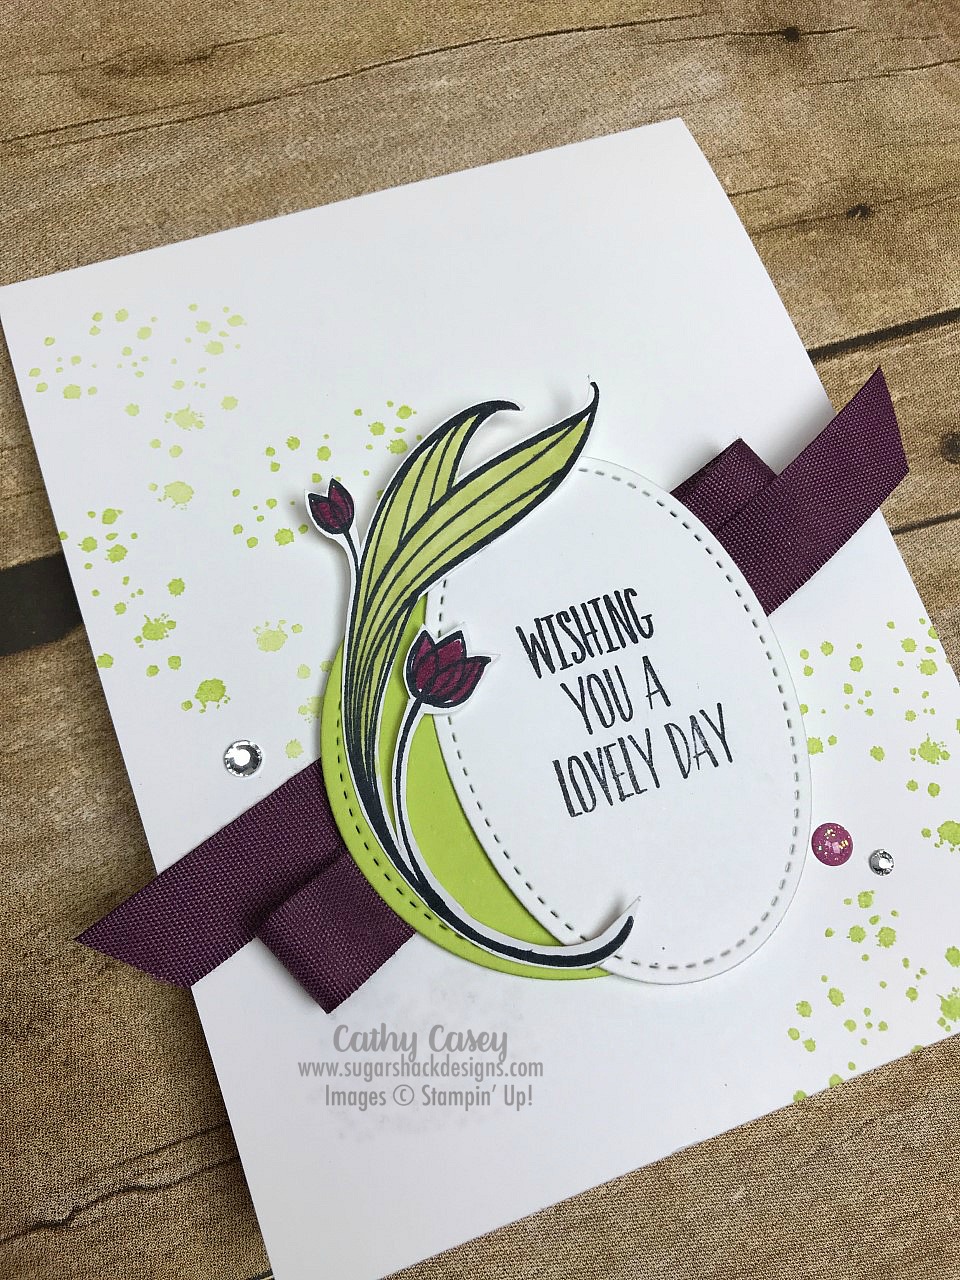
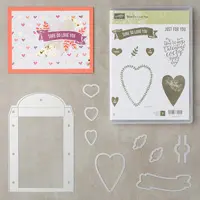
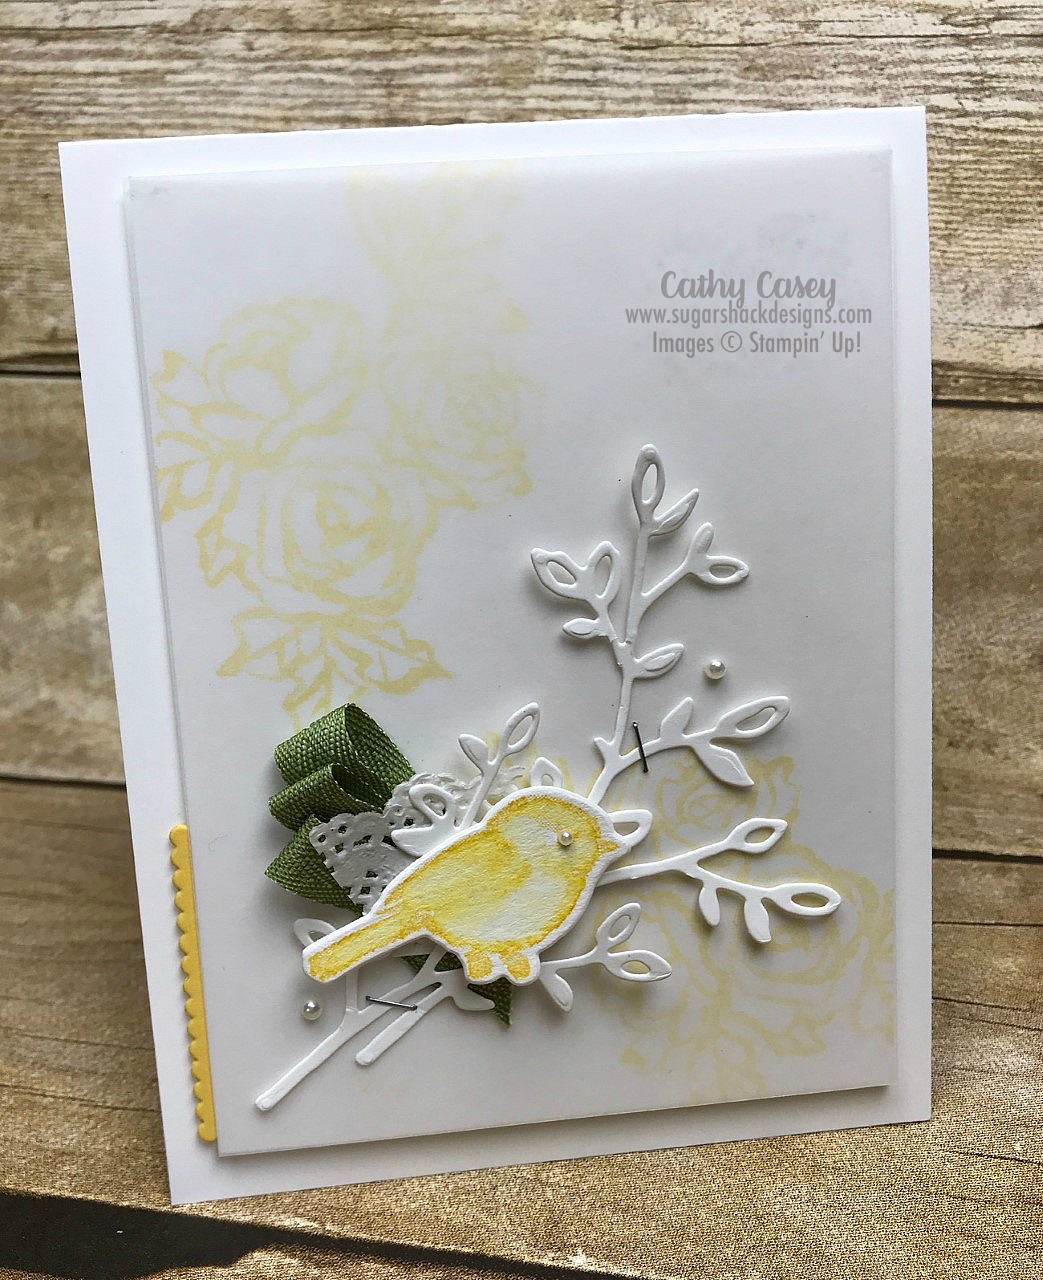
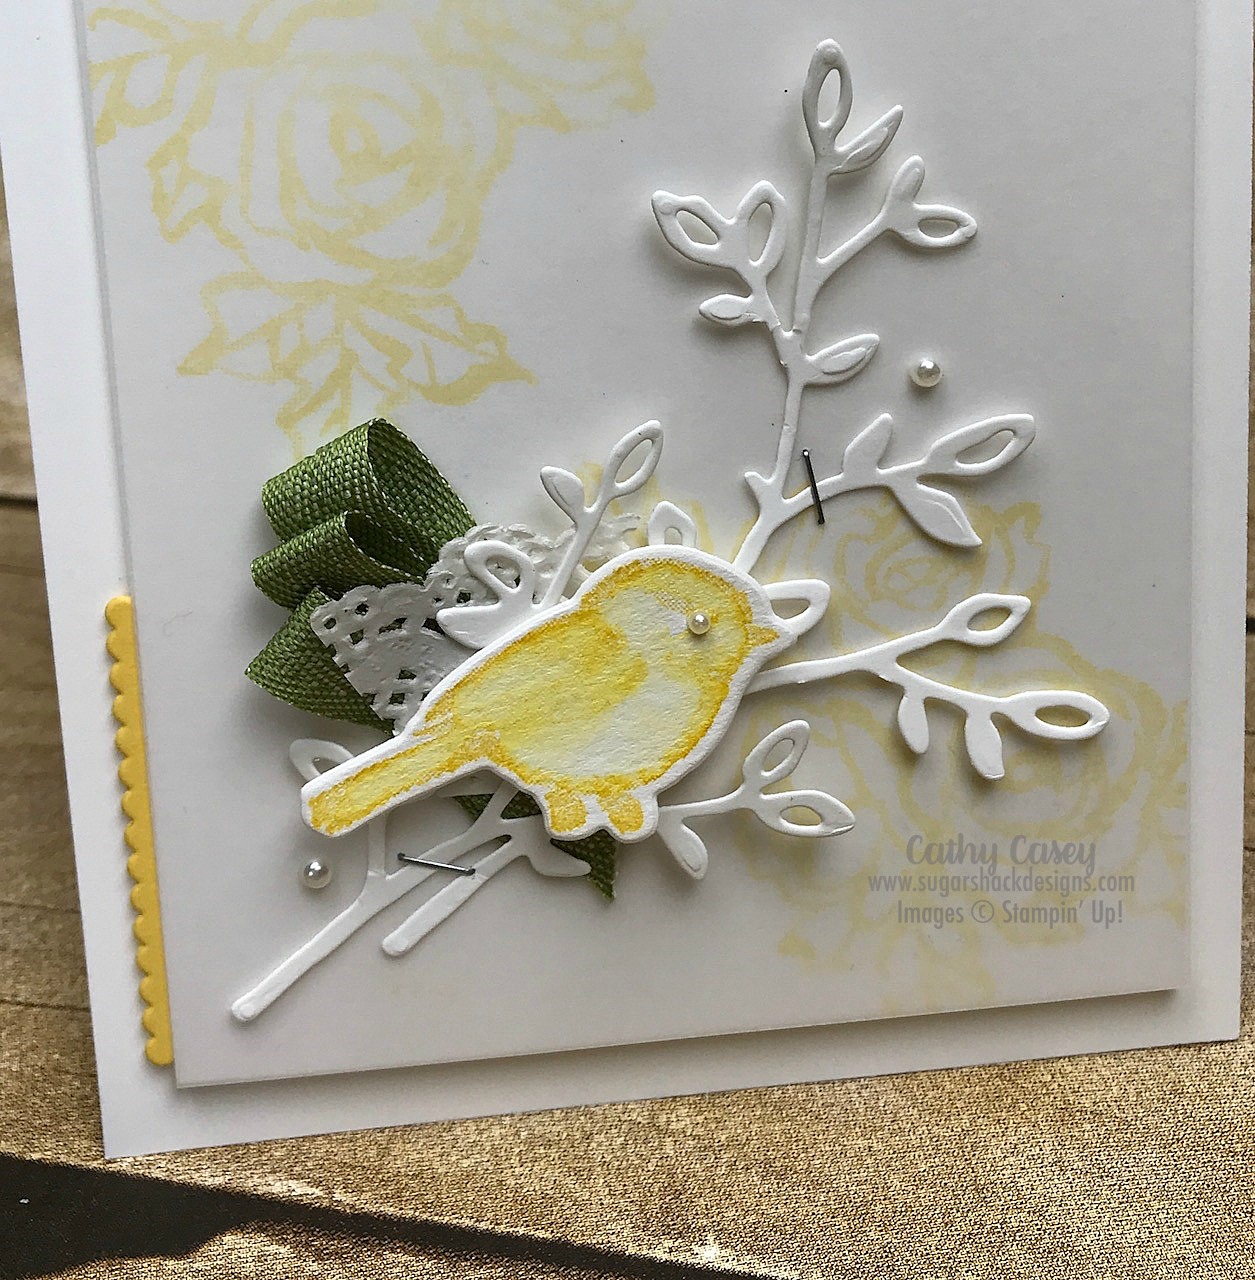
I wanted something soft and sweet for Easter Sunday so I turned once again to the Petal Palette Suite.  I just love how this project came out 🙂

Petal Palette Stampin' Up

Petal Palette Stampin' Up

Creative Tips:

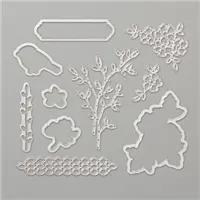
  1. The background flowers were stamped off in Daffodil Delight and then a piece of vellum was placed on top of the base.  This created a soft background for the card, it is so pretty!
  2. After stamping the bird image in Daffodil Delight on watercolor paper, I used my aqua painter with water only to soften the image.  This little birdie almost looks like an Easter chick 🙂
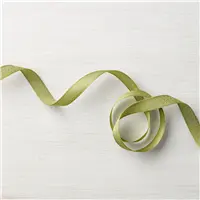
  3. Adding the bit of Old Olive ribbon underneath the bird draws the eye in and adds a pop of a different color from the main scheme.

Make sure you go “back” if you missed Bree’s wonderful creation or you can loop on around by hitting the “next” button to get to Dani’s gorgeous work and the rest of the hop!  Links to all of our fabulous hoppers are listed below 🙂

  1. Amy O’Neill
  2. Breelin Renwick
  3. Dani Dziama
  4. Elizabeth Price
  5. Julie Warnick
  6. Kaitlyn Zumbach
  7. Melissa Stout
  8. Wendy Weixler

Petal Palette Pretty

Monday Montage Blog Hop – Week 112!!!!

Hello friends! Welcome back to the Monday Montage Blog Hop! You may have gotten here from the amazing Bree Renwick’s blog, make sure you select the “next” button below and that will take you to the next stop on the hop, Dani’s beautiful work.

I love this Petal Palette Suite….sooooo versatile and easy to use!  This cute thank you card was easy to put together and is a perfect thank you for someone special 🙂

Petal Palette Stampin' Up

Petal Palette Stampin' Up

Creative Tips:

  1. Stamping the background image in Bermuda Bay on the Bermuda Bay card front gives a subtle background that adds interest to the card.
  2. The flower stamp is stamped in Archival Black on Watercolor paper and then watercolored with Bermuda Bay and Lemon Lime Twist.
  3. It was fast and easy to layer the main focal point of the card with the stamped flowers, doilies and ribbon.

Make sure you go “back” if you missed Bree’s wonderful creation or you can loop on around by hitting the “next” button to get to Dani’s gorgeous work and the rest of the hop!

More Sale-a-Bration Beauty!

Monday Montage Blog Hop – Week 111!!!!

Hello friends! Welcome back to the Monday Montage Blog Hop! You may have gotten here from the amazing Bree Renwick’s blog, make sure you select the “next” button below and that will take you to the next stop on the hop, Dani’s beautiful work.

I just can’t believe this stamp set and framelits set are FREE!!  Gosh, I love them so much!  Today’s card features a mix of the stamps and the framelits and I couldn’t love it more!  Only one more month of Sale-A-Bration, don’t miss these beauties:  the stamp set is free with a $50 order and the framelits are free with a $100 order 🙂

Amazing You Stampin' Up

Amazing You Stampin' Up

Creative Tips:

  1. The watercolor swoosh of Fresh Fig sets off the framelit words perfectly.  After the watercolor background dried, I added a splatter of Bermuda Bay on top.
  2. I gave the die cut “amazing” some heft by cutting it once in Bermuda Bay and two more times in Whisper White.  I love how you can see the white behind the Bermuda Bay,
  3. The entire card front is offset on the front of the card and the flower die from the May Flowers Framelits picks up the Lemon Lime Twist in the stamping and the “YOU” die cut.  The offset and the die cut add interest and make the whole card front pop.

Make sure you go “back” if you missed Bree’s wonderful creation or you can loop on around by hitting the “next” button to get to Dani’s gorgeous work and the rest of the hop!

Mountain Magic!

Monday Montage Blog Hop – Week 110!!!!

Hello friends! Welcome back to the Monday Montage Blog Hop! You may have gotten here from the amazing Bree Renwick’s blog, make sure you select the “next” button below and that will take you to the next stop on the hop, Elizabeth’s beautiful work.

If you have not played with the Waterfront stamp set yet, you absolutely must order it now!  It is so easy to create amazing art work with!  You just need the set, watercolor paper, some ink and water.  The results are simply stunning!

Waterfront Stampin' Up


Waterfront Stampin' Up

Creative Tips:

  1. I used several colors to stamp my mountains and I used various amounts of ink (stamping off several times with some images).  After layering the images many times, I went back in with an Aquapainter and melted my images together.  Colors used:  Early Espresso, Night of Navy and Tranquil Tide.  I did the same thing with the water using Bermuda Bay, Dapper Denim and Pool Party.
  2. The lone bird is from Wherever You Go stamp set.  If your image isn’t dark enough on the Watercolor Paper, fill in with a Basic Black marker.
  3. I love how the sentiment floats over the card with the landscape coming through the vellum

Make sure you go “back” if you missed Bree’s wonderful creation or you can loop on around by hitting the “next” button to get to Elizabeth’s gorgeous work and the rest of the hop!

Bubbly Super Bowl Fun!

Monday Montage Blog Hop – Week 109!!!!

Hello friends! Welcome back to the Monday Montage Blog Hop! You may have gotten here from the amazing Bree Renwick’s blog, make sure you select the “next” button below and that will take you to the next stop on the hop, Elizabeth’s beautiful work.

Oh my word!  The Bubble Over stamp along with the free Sale-A-Bration paper and the coordinating dies (Bottles & Bubbles Framelits Dies) are so much fun!  I thought it would be fun to make something with this set for Super Bowl Sunday although my “drinks” look pretty tame and not really Super Bowl party worthy lol 🙂  The best part about this suite of products?  You can get the paper totally free with a $50 order during Sale-A-Bration!  It features my absolute fave colors Lemon Lime Twist and Bermuda Bay…yummy!!

Bubble Over Stampin' Up

Bubble Over Stampin' Up

Creative Tips:

  1. I cut the bottles out of vellum and colored them with Calypso Coral Blend from the back to get my color coordinated “liquid” in the bottle.
  2. Dimensionals and glue dots adhered all the parts together and gave the card front tons of dimension!  For the straw, I added a glue dot near the bottom and then slid it “into the bottle”.  It was the last thing I added to the card.
  3. Guess what silver foil is perfect for??  Bottle caps!!  That bottle cap die is the cutest evah!

Make sure you go “back” if you missed Bree’s wonderful creation or you can loop on around by hitting the “next” button to get to Elizabeth’s gorgeous work and the rest of the hop!

Sweet & Simple

Monday Montage Blog Hop – Week 108!!!!

Hello friends! Welcome back to the Monday Montage Blog Hop! You may have gotten here from the amazing Bree Renwick’s blog, make sure you select the “next” button below and that will take you to the next stop on the hop, Dani Dziama’s beautiful work.

Today I was working on a bunch of stuff and needed something simple & sweet for my post.  I received this beautiful stamp set for free in November at Onstage and it was time to ink it up!

Lovely Wishes Stampin' Up

Lovely Wishes Stampin' Up

Lovely Wishes Stampin' Up

Creative Tips:

  1. The flower/leaf image is stamped in Memento Ink so that I could use Stampin Blends on it.  I used Rich Razzleberry and Old Olive and then fussy cut the image.
  2. The other colors in the paper, ink and ribbon?  Fresh Fig and Lemon Lime Twist of course!  I love how these colors pop and they work perfectly with the colors of the blends.

Make sure you go “back” if you missed Bree’s wonderful creation or you can loop on around by hitting the “next” button to get to Dani’s amazing work and the rest of the hop!

Amazingness!

I cannot love the Celebrate You Thinlits enough!!!!  The “amazing” is just that….amazing!!!  The only thing that would be more amazing?  If it said “amazeballs” lol…just kidding.  I would love amazeballs but I am not sure who else would and, to be honest, I probably use the word amazing wayyyyy too much anyway.  Whatever, I love this word & there are so many things each and every day that are amazing 🙂  Guess what makes these dies even better?  They are FREE with a $100 order during Sale-A-Bration.  Seriously.  Free.  What is more amazing than free????  Okay, enough amazingness…on to the project!

I needed a thank you card for a sweet, sweet girl that house sat for us in December and took the best care of our doggies.  This card came together soooo fast!

Celebrate You Stampin' Up

Creative Tips:

  1.  Word dies are my go to when I need big impact and a quick card.  I love how this set has 3 different fonts, each word is a different font.  I used staples to attach “amazing” and mini dimensionals to attach “you” to the card front.
  2. I used the Wood Textures DSP as a focal point on the card front.
  3. To add a little more interest to the card, the large flower image from Awesomely Artistic is stamped in Bermuda Bay on the white card base.

Thank you so much for stopping by!  I hope I’ve inspired you to be creative today!

Shop now for any of the products used in this project, links below:

Love is in the air!

Monday Montage Blog Hop – Week 107!!!!

Hello friends! Welcome back to the Monday Montage Blog Hop! You may have gotten here from the amazing Bree Renwick’s blog, make sure you select the “next” button below and that will take you to the next stop on the hop, Elizabeth Price’s beautiful work.

Most of Christmas is put away and my family celebrations are behind me now!  What a crazy few weeks it was at the end of December!  I had the week between Christmas and New Year’s off and I planned to do all kinds of crafting but that ended up not really happening…we had 4 different nights of rolling Christmas and I just plain didn’t have time lol!  It was wonderful to just be lazy and spend lots of quality time with family & friends 🙂

It’s time to get going with 2018 projects and, of course, the first thing on my horizon is Valentines Day.  I haven’t had a sweetheart in years but I still absolutely love the season of hearts and arrows and always enjoy creating with our “love” themed suites.  Today I got out “Sure Do Love You” and the coordinating framelits and I.am.in.LOVE!!!!  I have lots and lots of ideas of fun things to make with this suite of products 🙂

At first this little box had me confused!  I was thinking, where is the other piece??  Once I figured it out though, it is so easy to use and so cute!  I’m going to make a quick video of how to put this together so stay tuned for that!  Next I need to make some cute cards to go into my little box 🙂

Sure Do Love You Stampin' Up

Sure Do Love You Stampin' Up

Creative Tips:

  1. I used Daffodil Delight (Dark) Blends to create “gold rhinestones”…this works so well!
  2. I white embossed the sentiment on Shimmery White Paper and then watercolored it with Berry Burst.  I LOVE how this came out!  It gives a lovely pop of color to the creation which is otherwise primarily white and gold.
  3. I am also totes in love with the Wood Textures Designer Series Paper Stack….for some reason I had not opened this gem yet.  (I know…seriously??!?)  I love this stuff!

Make sure you go “back” if you missed Bree’s wonderful creation or you can loop on around by hitting the “next” button to get to Elizabeth’s amazing work and the rest of the hop!

O Christmas Tree!

Monday Montage Blog Hop – Week 106!!!!

Hello friends! Welcome back to the Monday Montage Blog Hop! You may have gotten here from the amazing Bree Renwick’s blog, make sure you select the “next” button below and that will take you to the next stop on the hop, Dani Dziama’s beautiful work.

I know Christmas is right around the corner but I am still working on my Christmas cards and this set is so perfect for creating quick & amazing cards for the season!  I love, love how fast and easy it is to layer the parts of this beautiful tree together.

Season Like Christmas Stampin' Up

Season Like Christmas Stampin' Up

Creative Tips:

  1. This card features a lot of white and Tranquil Tide, I used touches of gold to make the whole card pop with the foil snowflake (I will be so sad to see these go!), the gold embossed sentiment and the gold star at the top of the tree.
  2. Mixing stamp sets to get just the right sentiment for your card is always an option!  I love the amazing fonts in the Watercolor Christmas set and I seem to use them a lot.  They emboss so beautifully!  I started with one of the sentiments that came with the tree set but it just didn’t emboss well and will do much better just stamped 🙂
  3. This whole card has lots of layers and wow factor but came together in a flash!  I generally staple some of my layers together and then add them all to the card front at once, this makes it so much easier to layer several pieces to your card front.  Another tip for adding embossing to a stamped image without having your embossing powder stick to everything…use your embossing buddy to “dry” out the first inked image, then stamp your versamark image and emboss.  This is how I added the white, embossed snow to the tree after stamping the tree images.

Make sure you go “back” if you missed Bree’s wonderful creation or you can loop on around by hitting the “next” button to get to Dani’s amazing work and the rest of the hop!