Banner Fun!

mondaymontage banner revised Oct 13

Monday Montage Blog Hop – Week 12

Hello friends! Welcome back to our Monday Montage Blog Hop! You may have gotten here from the amazing Bree Renwick’s blog, make sure you select the “next” button below and that will take you to the next stop on the hop, the fabulous Dani Dziama’s blog. I am soooo excited to share our projects with you today, we are all having so much fun with the new Occasions Mini Catalog and Sale-a-Bration freebies!

I have a cute banner for you today that is made mostly from the FREE Heartfelt Banner Designer Kit!  Yup, you read that correctly…spend $50 on Stampin’ Up product and get this adorns banner kit for FREE!

Montage 1-19-14 004 (1)

Montage 1-19-14 005 (1)

Montage 1-19-14 006

This was sooooo easy to put together!  I used several pieces of the banner kit and added some elements of my own.  I actually have enough kit pieces left to make another banner as a gift!  I turned my project into a photo banner, I will be able to move photos in and out as I like so that they get off my phone and camera and out into the world!

I hope you are inspired to make a fun banner project, I just love how you can throw anything you want on to them!

Don’t miss the rest of the pretties my friends have for you!  I just know everyone has gorgeous projects to share!

Make sure you go “Back” if you missed Bree Renwick or you can loop on around by hitting the “Next” button to get to Dani Dziama and the rest of the hop!

mondaymontagebackrevmondaymontagenext

Monday Montage Blog Hop – Week 5

mondaymontage banner revised Oct 13

Hello friends! Welcome back to Monday Montage! You should have arrived here from the amazing Bree Renwick’s blog, select the “next” button below and that will take you to the next stop on the hop, the fabulous Dani Dziama’s blog. I can’t wait to see what they have to share this week, you won’t want to miss it!

IMG_9166

IMG_9167

“Undefined”…I have to admit when they launched this new line at convention this summer I just didn’t get it.  I thought the completed stamps looked a little kindergarten-y and the whole idea didn’t speak to me creatively.  But….I decided to order the kit and give it a whirl.  I really wanted my very own “glamper” stamp so that is what I made!  I have to admit, it was really fun!  and I love, love the way my stamp came out!  I gave it the Shasta wing and made it look as vintage-y trailer as I could!

Now that I had the glamper, what better colors to use than Tempting Turquoise and Real Red?  Perfect!  I used the World Map background stamp and stamped it in full strength Tempting Turquoise on a piece of cardstock cut to fit exactly on the right side of the swing card.  On top of the World Map image, I stamped “Off the Grid” in Whisper White.  Another little trick I did was to use the Chevron Punch on a 1 1/4″ strip of Real Red card stock.  I trimmed the front end to match the “V” and I trimmed the back end to fit into the fold of the card.  Then I lined up the punched out chevrons to match the strip on the top of the fold.  The last little old school technique I used was to mask the trailer and then stamp the “tire tread” image from Gorgeous Grunge under my little trailer.  After I added my tire tread, I stamped one of the Gorgeous Grunge splatters on top of the glamper image with Illuminate Ink.  I think I put Illuminate splatter on almost every card I make these days!

The whole card is full of symbolism to just hit the road and “get out there”!  I can’t wait to have my own little glamper to do just that in!  My bestie SIL just got a cute little glamper last weekend and her stove is turquoise.  I think I will send this glamper card to her to celebrate her new little home on wheels!

I’m so glad you are back to enjoy our creative inspiration!  I continue to be awed by the skill and creativity of my fellow friends on this hop!  Be sure to come back every other Monday to see what we have up our sleeves for you!

Make sure you go “Back” if you missed Bree Renwick or you can loop on around by hitting the “Next” button to get to Dani Dziama and the rest of the hop!

mondaymontagebackrevmondaymontagenext

Monday Montage Blog Hop – Week 4

mondaymontage banner revised Oct 13

Hello friends! Welcome back to Monday Montage! You should have arrived here from the amazing Bree Renwick’s blog, select the “next” button below and that will take you to the next stop on the hop, the fabulous Dani Dziama’s blog. I can’t wait to see what they have to share this week, you won’t want to miss it!

Boo Banner 004

It’s the 7th day of October and today’s post is all about Halloween!  A Halloween banner to be exact.  I took the Halloween Banner Kit and the Build a Banner Simply Created Kit and added some flair of my own to make this spooky, grungy Boo Banner.  I had lots of pieces of both kits left to make other goodies with, I love that the banner kits are so generous!  The Build a Banner Simply Created Kit comes with 18 blank canvas paper pennants, 6 of each design as well as all the stencils!  And the stencils, oh my love them!  There is a stripe, a chevron and a polka dot stencil as well as masks for the center circle for the letters.  There is also a complete alphabet!  I used the alpha for the “BOO” on my banner although I put all of my letters on circles.

With the stencils I used the sponge method and just sponged ink into the patterns.  I love the look that gave.  I also used stencil adhesive to ensure that my stencil didn’t move as I sponged the ink on. I grunged up every image with something from Gorgeous Grunge….oh.my.I.heart.that.set!  The sky is the limit with this banner kit, you can make yours exactly like the picture or change it up and make it your own.  I love and hope you do too!

I’m so glad you are back for week 4 of our Monday Montage!  I continue to be awed by the skill and creativity of my fellow friends on this hop!  Be sure to come back every other Monday for another big dose of creative inspiration!

Make sure you go “Back” if you missed Bree Renwick or you can loop on around by hitting the “Next” button to get to Dani Dziama and the rest of the hop!

mondaymontagebackrevmondaymontagenext

Monday Montage Blog Hop – Week 3

mondaymontage5

Hello friends! Welcome back to Monday Montage! You should have arrived here from the amazing Bree Renwick’s blog, select the “next” button below and that will take you to the next stop on the hop, the fabulous Dani Dziama’s blog. I can’t wait to see what they have to share this week, you won’t want to miss it!

Card 1

Card 2

Card 3

Card 4

Card 5

I have had this idea in my brain ever since I saw the Perfect Blend set in the catalog! Combined with Gorgeous Grunge I think I have created the perfect blend between two of my faves: coffee & grunge! Enough with the weird puns … let’s talk about my card 🙂

Pretty simple really, I used Baked Brown Sugar cardstock and ink and Whisper White card stock. I stamped the coffee cup in Baked Brown Sugar ink on Whisper White cardstock and then cut it out. After I cut the coffee cup out, I cut a slit in the “lid” and pushed a Starbucks stopper in. I hot glued the stopper to the back of the cup and had to cut off the bottom of the stopper with wire cutters. The stopper is a little too big for cup but I think it looks super cute! Garden Green ink matches the Starbucks stopper exactly and I used that for the sentiment. The stopper and the hot glue behind the cup give the whole card a lot of dimension, that cup just pops right off the front of the card!

The rest is the big splatter from Gorgeous Grunge in Baked Brown Sugar added full strength and stamped off to the base and some embellishments.

I hope you have enjoyed my card today! It’s been a rough week at work this week and coffee is just about the only thing that has gotten me through it; so it is really fitting that today’s creation features coffee!

I’m so glad you are back for week 3 of our Monday Montage! The last two weeks have been filled with amazing and beautiful creations! So don’t forget to come back every other Monday for another big dose of creative inspiration!

Make sure you go “Back” if you missed Bree Renwick or you can loop on around by hitting the “Next” button to get to Dani Dziama and the rest of the hop!

mondaymontagebackrevmondaymontagenext

2013 Artisan Finalists Blog Hop – Day 10

  1. 2013artisanfinalistA

Welcome to Day 10 of the 2013 Artisan Design Team Finalists Blog Hop!  This is the end of our hop featuring the projects we submitted to Stampin’ Up for this contest.  We have decided as a group to continue to share our creativity with you going forward twice a month starting on Monday, August 26th!  So set your calendar for the launch this Monday of “Monday Montage”.  After seeing all these awesome projects up close and personal, I know you won’t want to miss these talented girls’ future creations!

You should have come from the fabulous Bree Renwick’s post to get here and from here you can click on “next” and get to Dani Dziama’s amazing work!  If you missed Bree either select the “back” button to get there or go all the way around the hop to get back to her.

IMG_4165

IMG_4166

IMG_4170

IMG_4171

IMG_4172

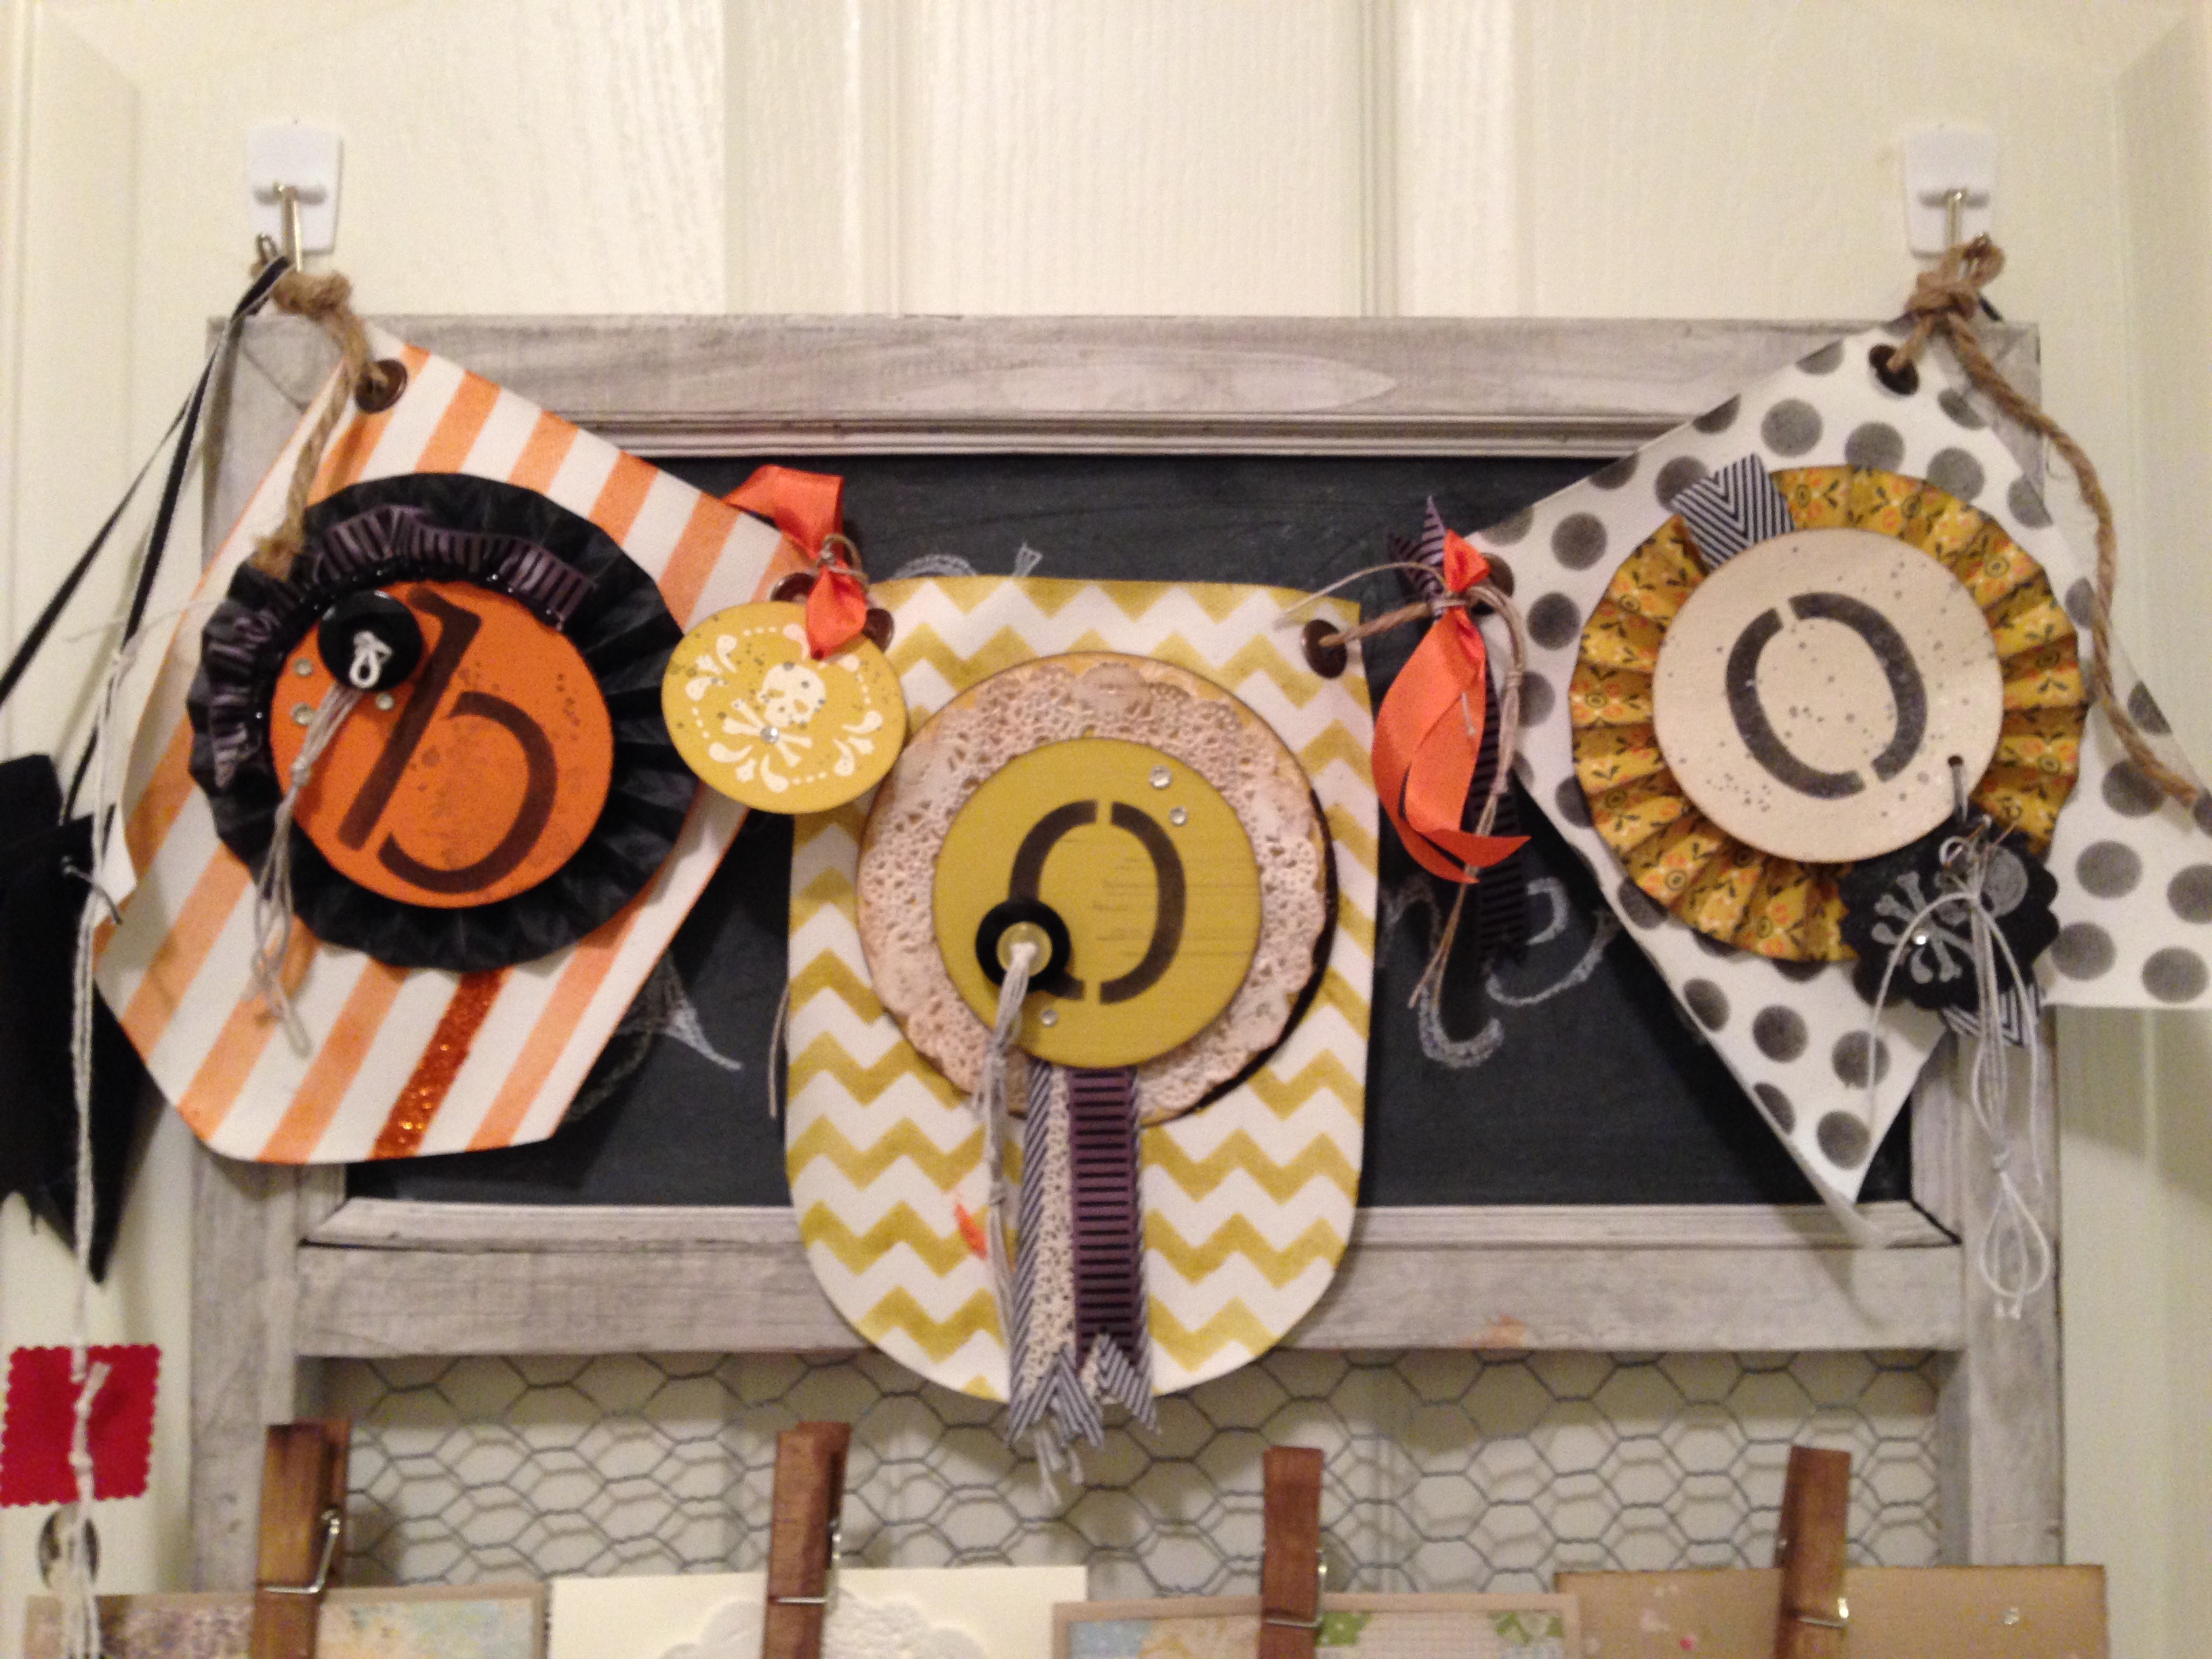
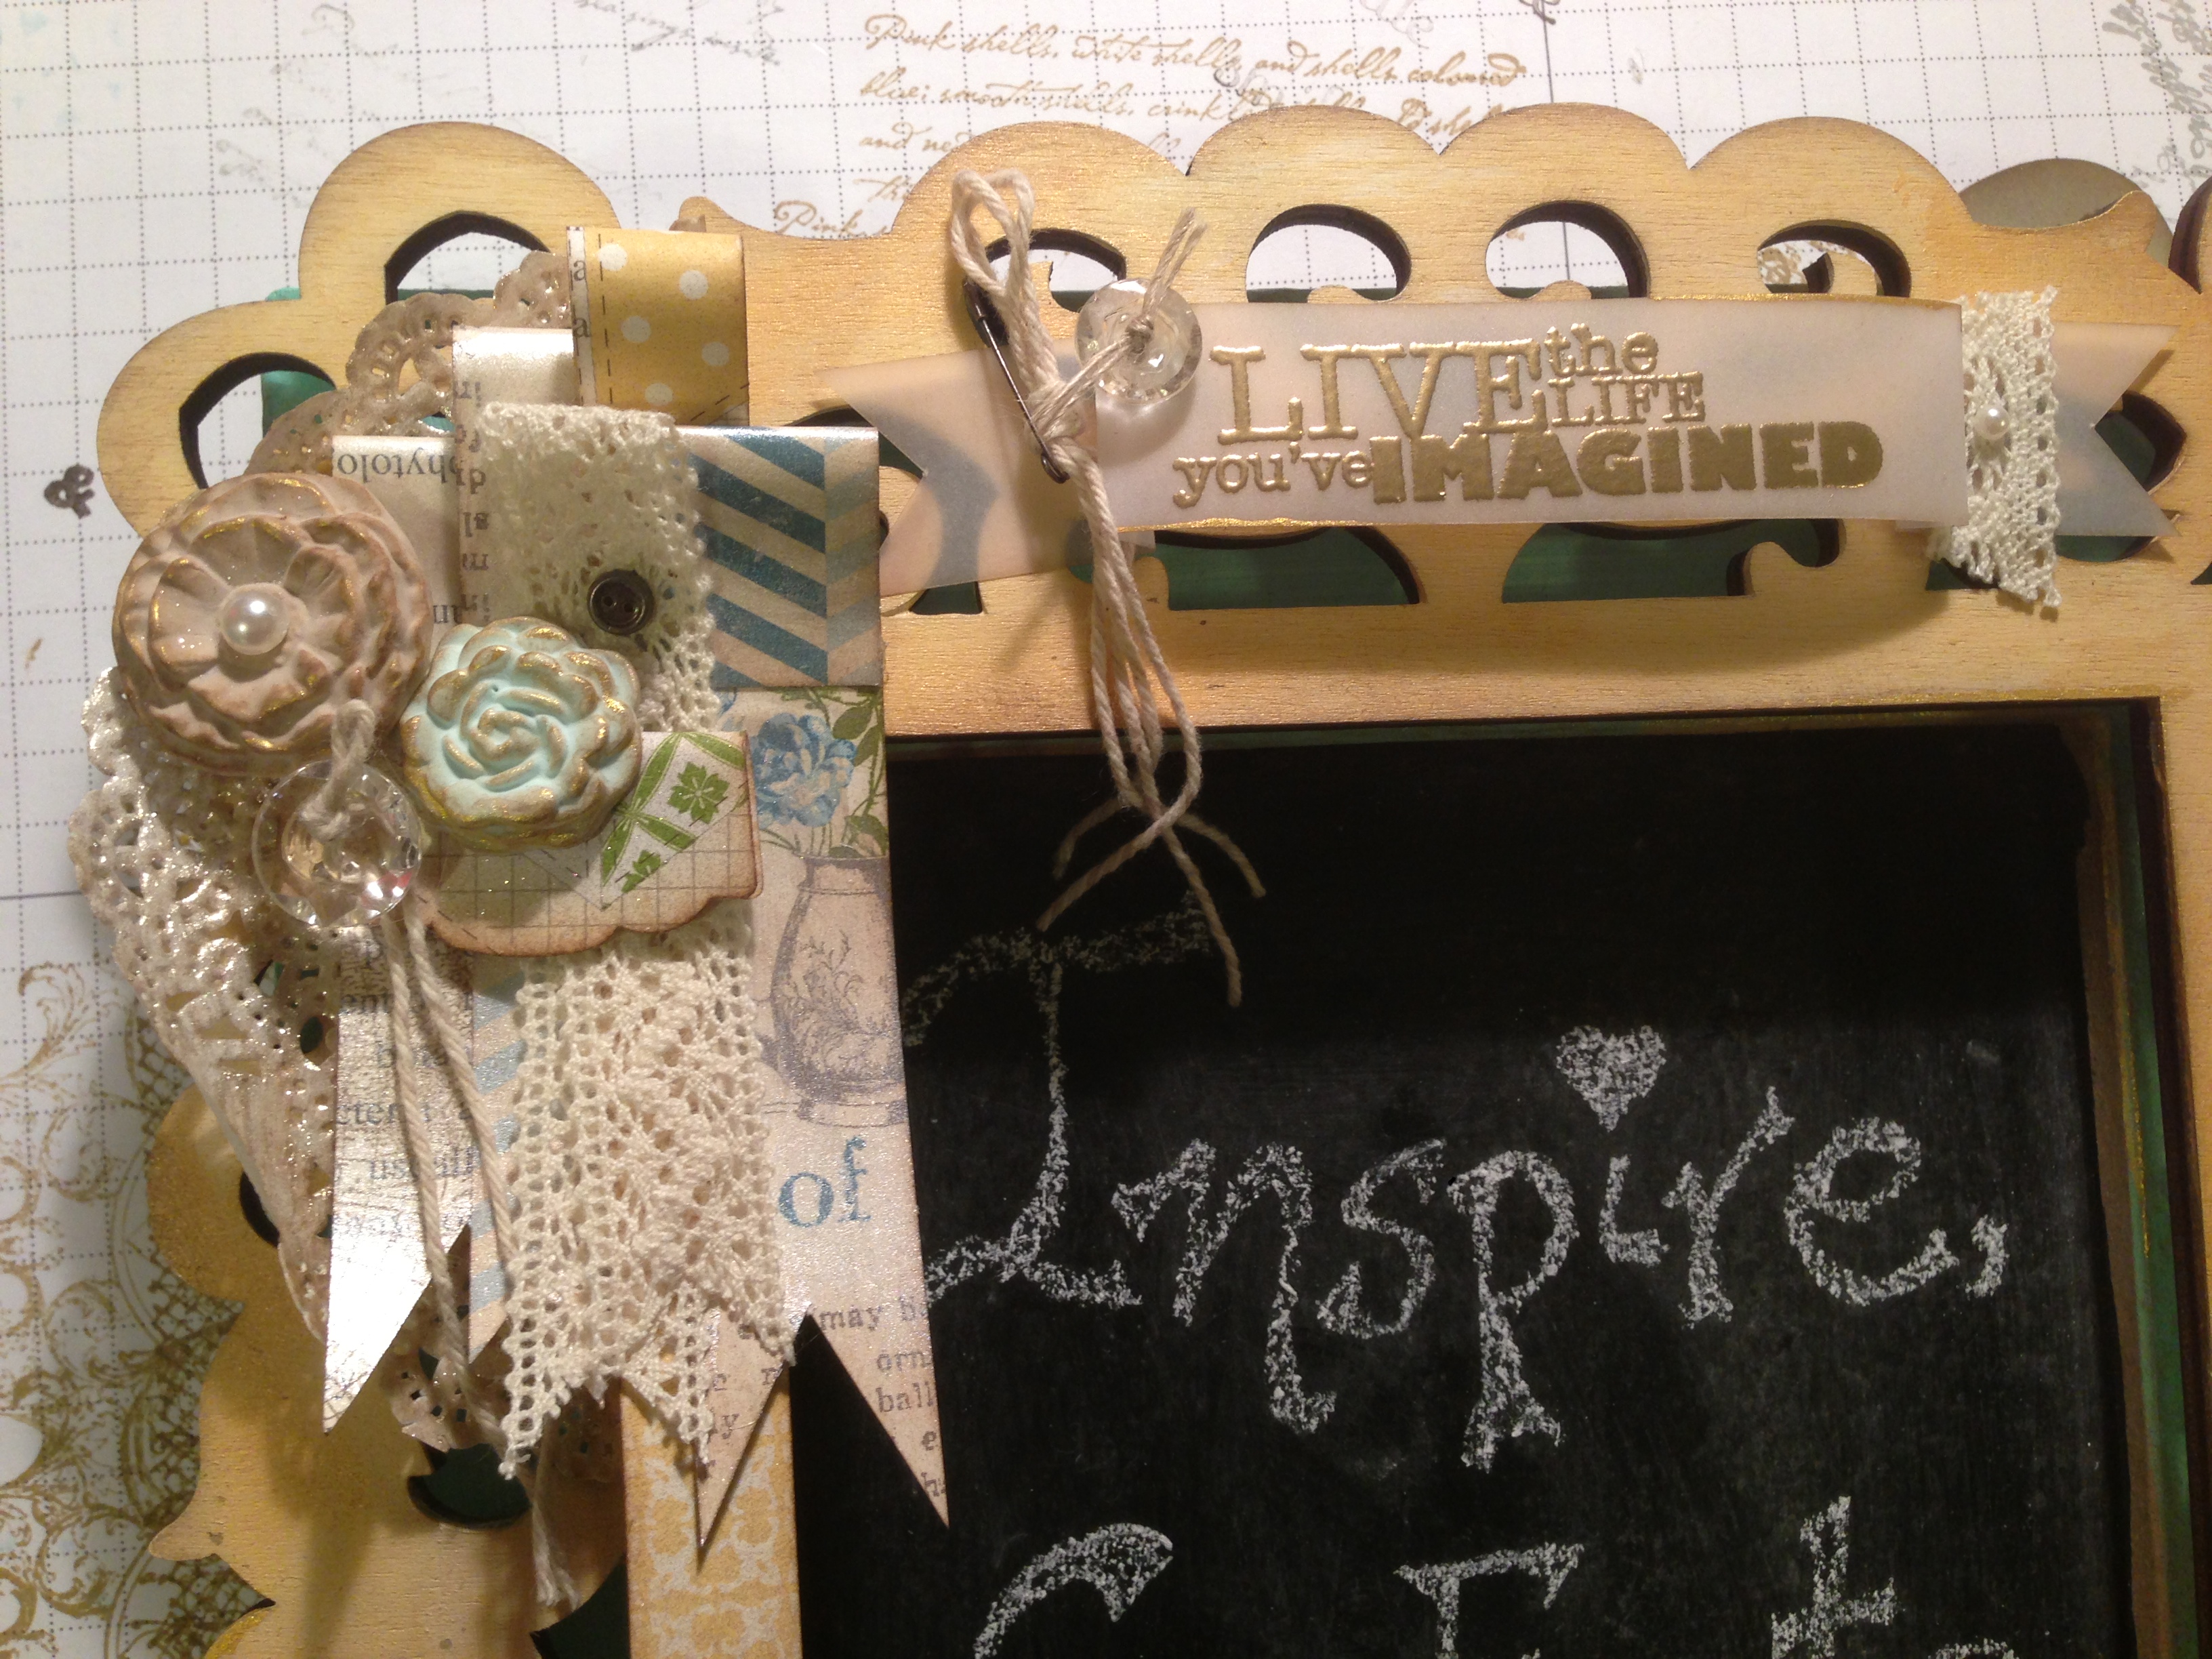
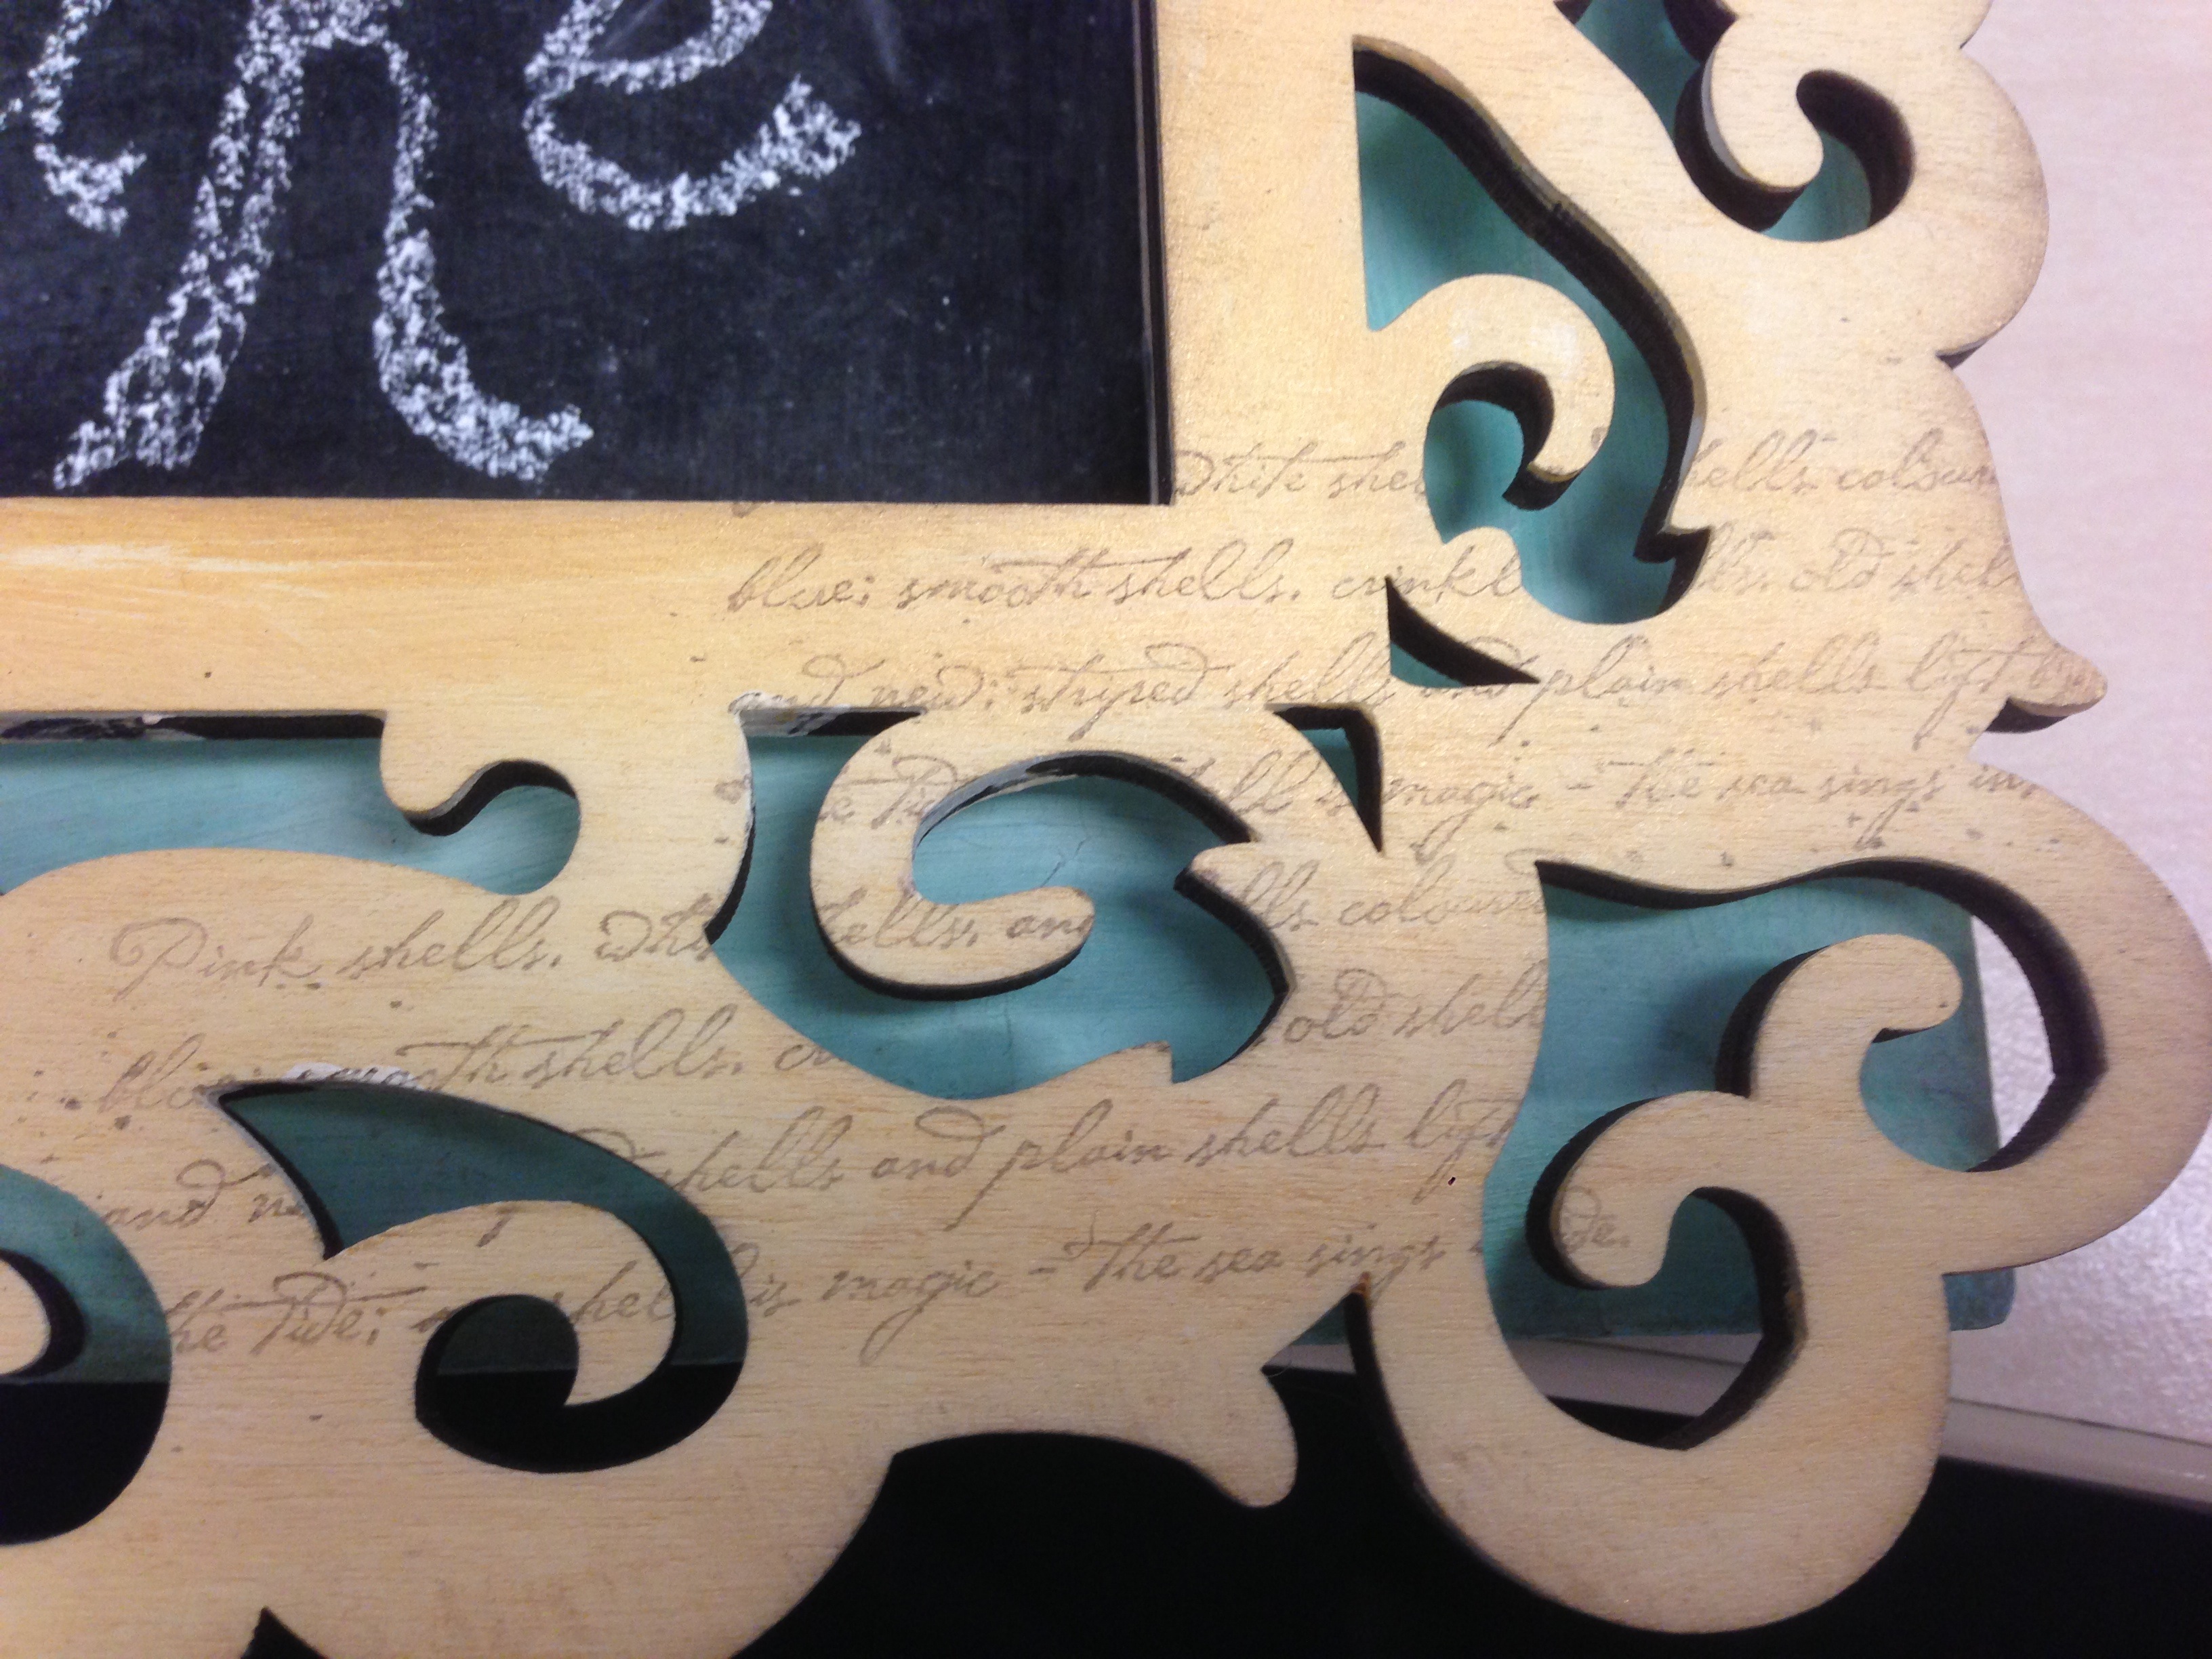
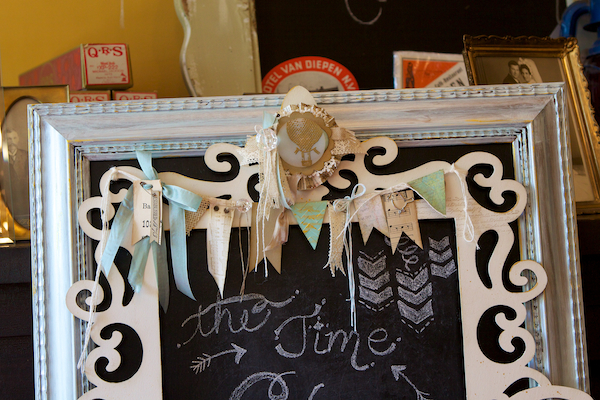
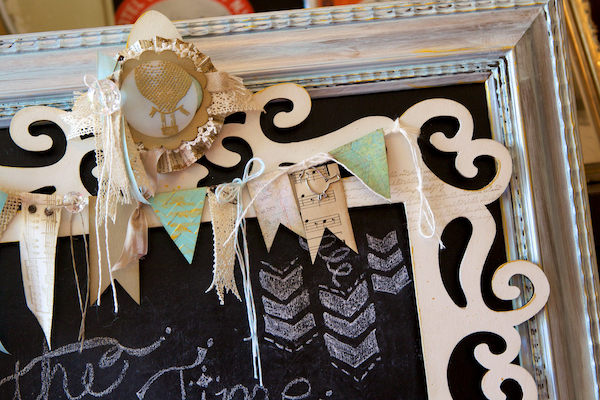
Today’s post features my second 3D entry.  I just love this project and I have to say I started on it weeks before entries were due and worked on it as a whole for quite some time!  This is a chalkboard frame that I put together and embellished.  I bought the frame from Michael’s and it had a recessed area where the picture would go.  I painted and distressed the frame and added chalkboard paint to the recess.  The laser cut wood frame came from Michaels also, it features most of the embellishments.

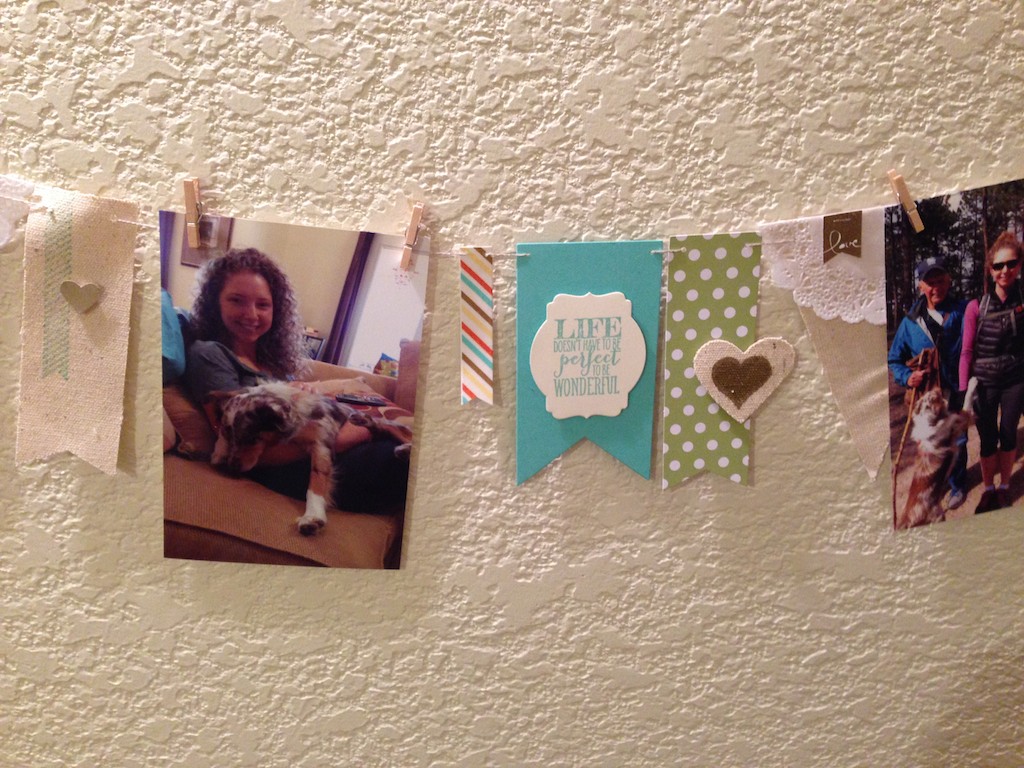
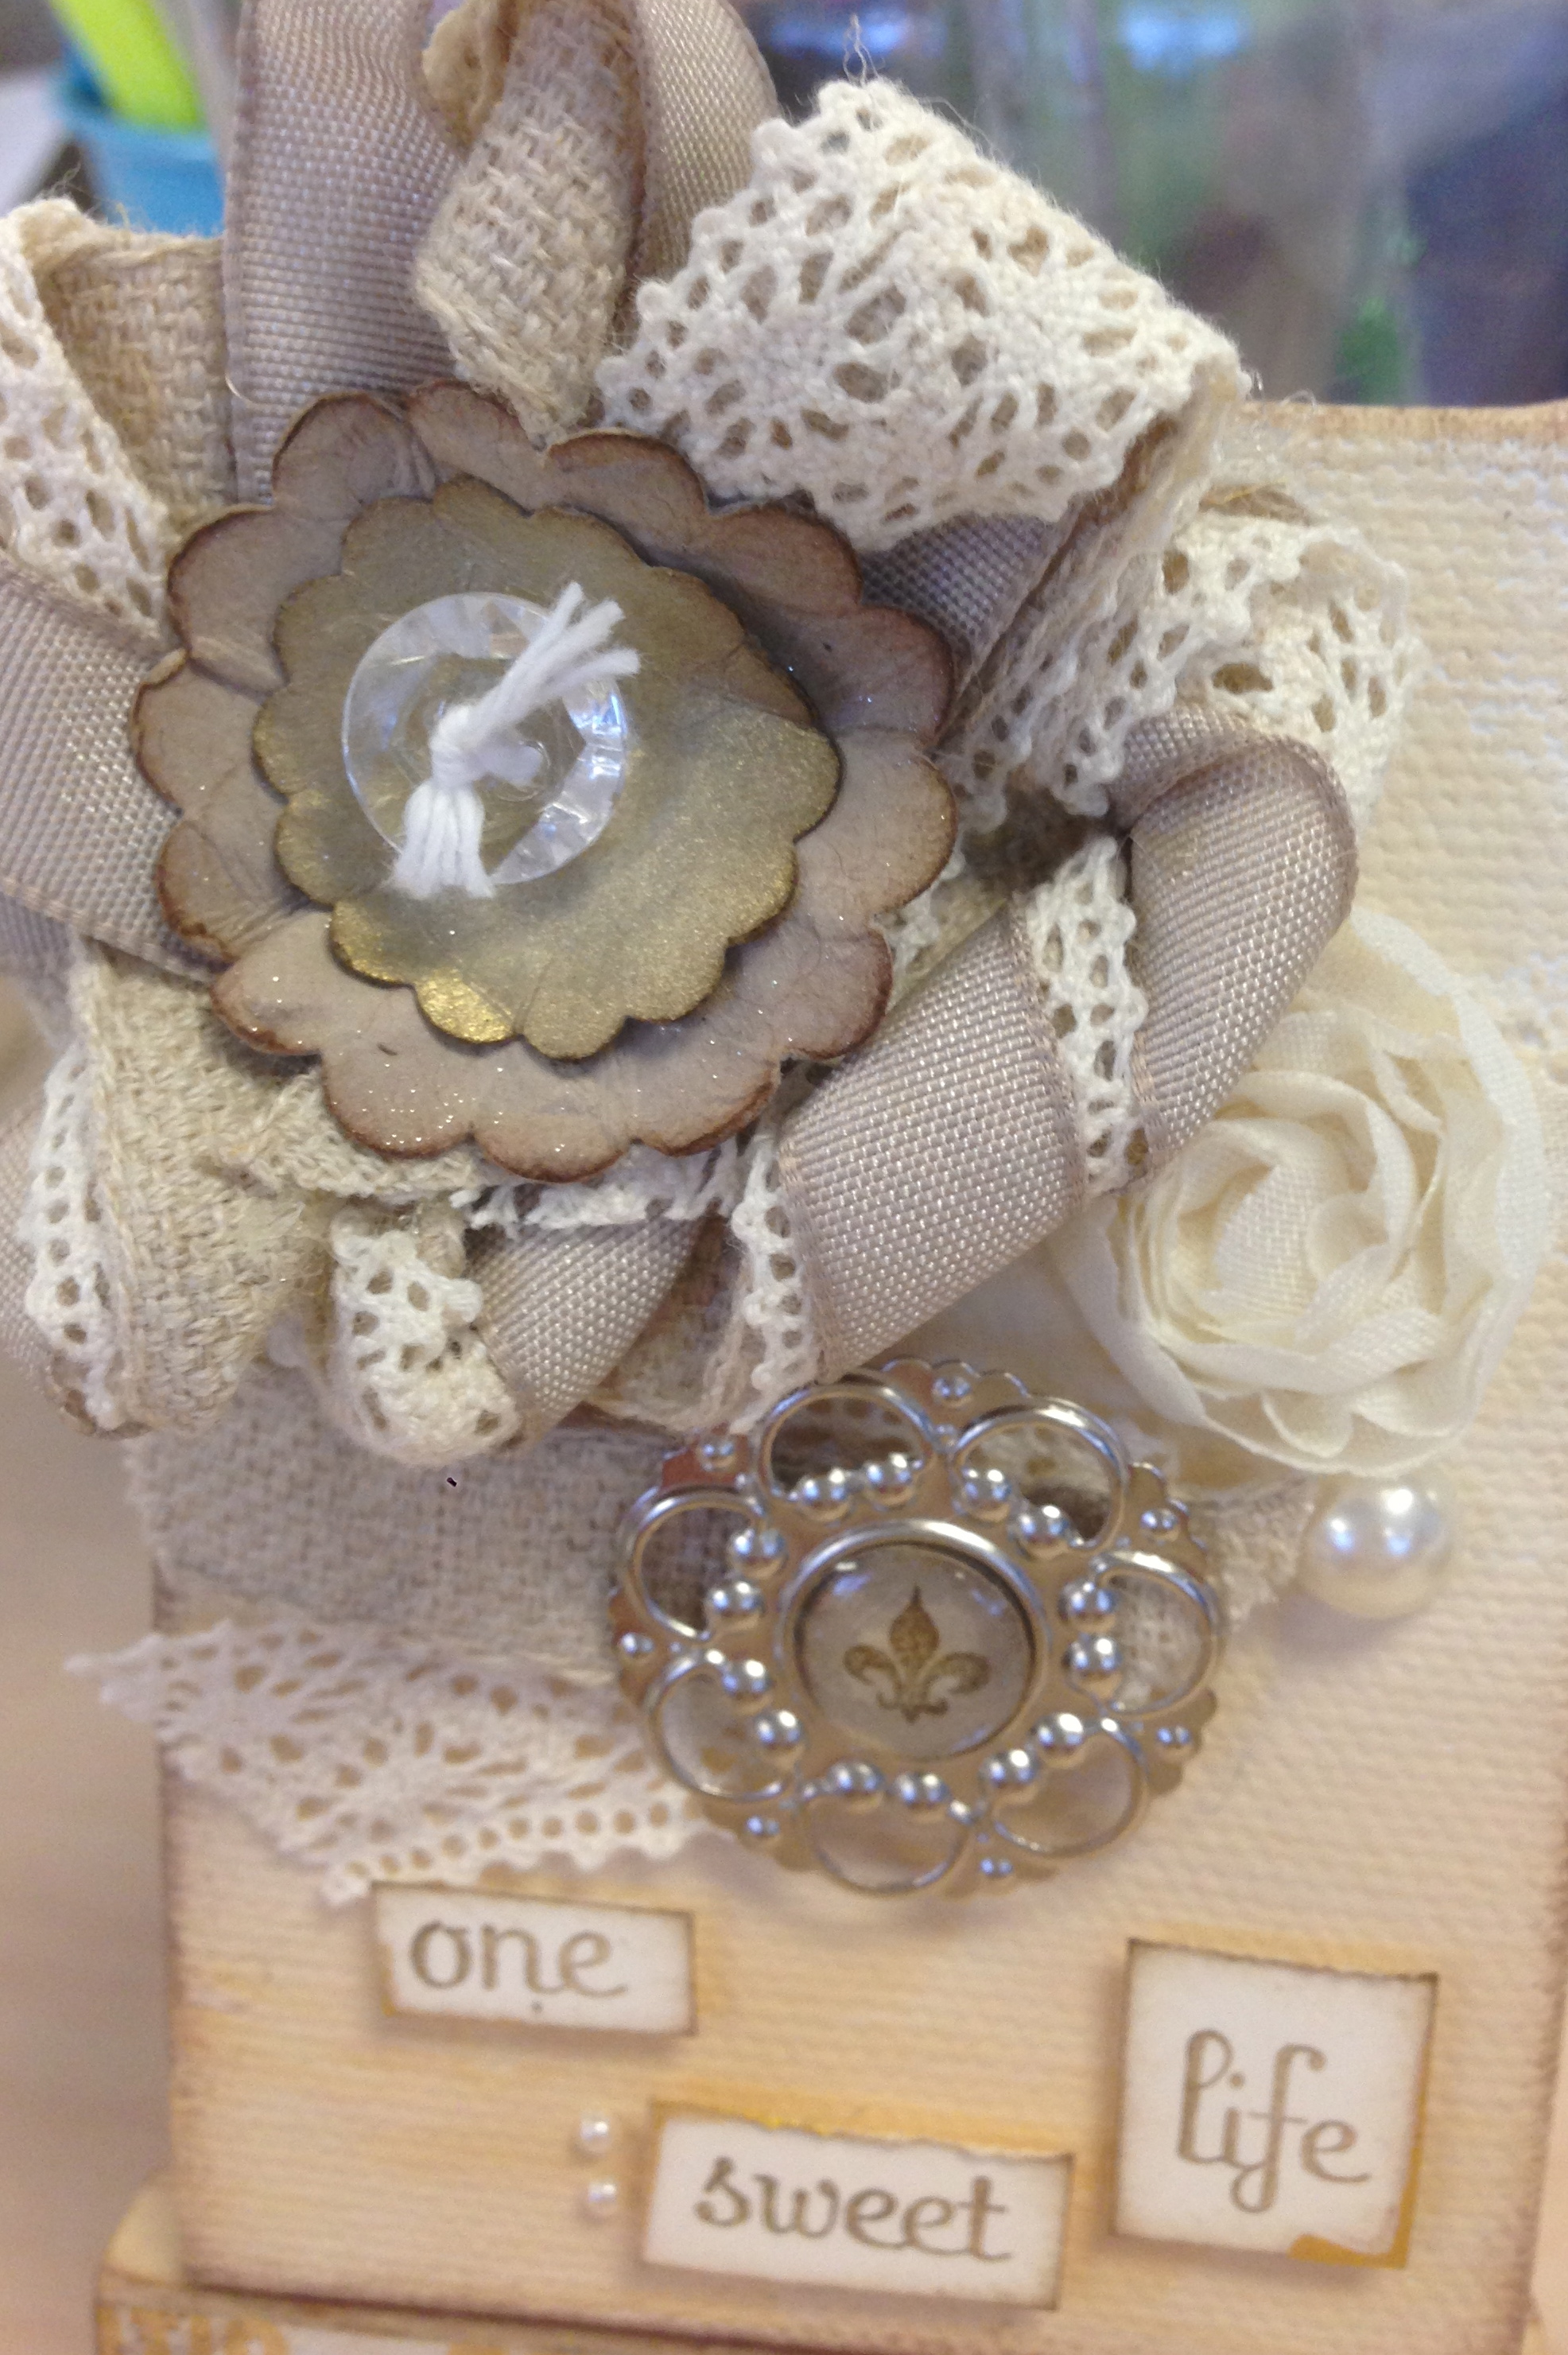
Highlights:  The pictures tell most of the story on this project but here are some of the details.  I made flowers with the Simply Pressed Clay and Molds.  I dyed the clay with Primrose Petals and Soft Suede and sponged them and added gold highlights with my trusty Gold Lame Smooch Pearlized Accent Ink.  For the pennants I stacked Tea for Two DSP strips, crochet trim, a painted doily and buttons.  For this pennant, too much was not even enough!  I added and added until it looked over the top!  For the top banner I gold embossed a sentiment from Really Good Greeting on Vellum, added gold smooch highlights and a button and crochet trim.  The rest of the frame I sponged with Soft Suede and added gold smooch in random spots.  I also stamped the script image from By the Tide in the bottom right corner.  For the final touch, I added the chalk art “Inspire, Create & Share” on the chalkboard.

I sure hope you have enjoyed this hop as much as we have enjoyed sharing our creations!  Make sure you join us on Monday, August 26th for the premier of “Monday Montage”.  Look for the logo below and you will know you are in the right place!

1186304_528822597185782_1896617363_n

Here are the products I used for this project:

Stamps:  By the Tide, Really Good Greetings

Ink:  Primrose Petals, VersaMark, Soft Suede

Cardstock:  White Vellum, Tea for Two DSP, First Edition DSP

Embellishments:  Vintage Faceted Designer Buttons, Simply Pressed Clay, Vintage Trinkets, Pearl Basic Jewels, 5/8″ Crochet Trim, Linen Thread, Gold Embossing Powder, Champagne Mist Shimmer Paint, Frost White Shimmer Paint, Boutique Boxes Designer Kit, Gold Lame Smooch Pearlized Accent Ink, White Tea Lace Paper Doilies

Tools:  Buttons & Blossoms Clay Molds

To purchase these products go to my online store!

Check here for upcoming events and classes!

Make sure you check out all the fabulous projects created by the finalists by going through the hop!  Select “back” to see Bree Renwick’s fabulous work and select “next” to get to Dani Dziama’s amazing projects!  You do not want to miss a thing!!!

2013artfinalistback2013artfinalistnext

2013 Artisan Finalists Blog Hop – Day 4

2013artisanfinalistA

Welcome to Day 4 of the 2013 Artisan Design Team Finalists Blog Hop!  You should have come from the fabulous Bree Renwick’s post to get here and from here you can click on “next” and get to Dani Dziama’s amazing work!  Aren’t these projects amazing?  I am overwhelmed with how pretty everything is every day!  If you missed Bree either select the “back” button to get there or go all the way around the hop to get back to her.

IMG_4178

IMG_4179

Today I am sharing one of the 3-D projects I submitted for the Artisan Design Team contest.  This project is small in stature but I love, love the way it came out!  I think it is a perfect gift for someone that works in an office and doesn’t have a lot of space for knick-knacks in their workspace.

I purchased the miniature canvas and easel from a craft store and painted the canvas with acrylic paint.  It’s a mix of Antique White and Linen and probably some other colors.  I mixed so that the effect was not flat but very antique feeling.  I made the flower with a combination of Crochet Trim, Taffeta Ribbon and the new 7/16″ Trim ribbon.  I hot glued the flower together and topped it off with some punched Crumb Cake and Brushed Gold Cardstock.  The final touch to my flower is the gorgeous Vintage Faceted Button….yummy!

Next I stamped the Fleur de Lis image from the Itty Bitties stamp set on Crumb Cake, sponged lightly with Soft Suede Ink and used the image on the Designer Builder Brad.  Under the brad I added a pretty little ribbon pennant.  I stamped “one” “sweet” “life” on Very Vanilla Cardstock, cut it out and sponged it lightly with Soft Suede (my fave sponging color).  I roughed the edges with a fancy tool…my fingernail….and attached the words to the canvas with dimensionals.  I added a ribbon trim flower (alas another retired product I loved!) and some pearls to the project to give it some bling.  For over the top bling, I sprayed the flower with shimmer mist and I “painted” the edges of the words with Gold Lame Smooch Pearlized Accent Ink.  This fantastic little item is still available on the clearance rack and I have to say that I LOVE it!  It is soooo pretty and really adds a pretty, vintage touch when you splatter it on your project or use it to line the edges of pennants, banners and other paper edges!

I couldn’t leave the little easel with no love so I sponged the easel with Soft Suede to distress it a little and adhered a tiny piece of Tea for Two DSP across the front.

I think the final result is just cute as can be!  The sky is the limit with these little canvases.  Think a “Best Friend” tiny picture or “Happy Birthday”…..lot’s of fun projects can be created!

Here are the products I used:

Stamps:  Itty Bitties, Fabulous Phrases

Ink:  Soft Suede

Cardstock:  Crumb Cake, Brushed Gold, Very Vanilla, Tea for Two DSP

Embellishments:  Vintage Faceted Designer Buttons, Designer Builder Brads, Large Pearl Basic Jewels, Whisper White Baker’s Twine, 5/8″ Crochet Trim, 3/8″ Crumb Cake Taffeta Ribbon, Pearl Basic Jewels, Gold Lame Smooch Pearlized Accent Ink, 5/8″ Flower Trim, 7/16″ Trim

To purchase these products go to my online store!

Check here for upcoming events and classes!

Make sure you check out all the fabulous projects created by the finalists by going through the hop!  Select “back” to see Bree Renwick’s fabulous work and select “next” to get to Dani Dziama’s amazing projects!

2013artfinalistback2013artfinalistnext

Busy summer days!

Wowsers this summer is flying by!  Between work, travel and projects I have been a very busy girl!  I feel very blessed that I got to travel to Alaska again, an epic two week visit with family!  That was amazing!  If you ever get the chance to go to Alaska, I can’t recommend it enough.  The beauty everywhere takes your breath away!  And during the summer it is light most of the time which makes for a very interesting sleeping pattern!  Next up was Salt Lake City for the Stampin’ Up Convention!  Before all of that, Arizona to help my son and his girlfriend move home from college!  Sheesh!   I’ve been logging some miles!  In between I have been super busy at work at AAA and we also had a little fire nearby (Colorado Black Forest Fire) in June and I moved my stamp room from the basement to the second floor!  It’s making me tired just reading all of this!

I received some very exciting news while I was in Alaska, I got a call from Stampin’ Up and was notified that I had been selected as one of the Top 20 Finalists for the 2013 Artisan Design Team!  What an honor!  I spent the next three weeks until Awards Night at convention with my stomach in a knot worrying about whether or not I made the team (top 10).  In the end I didn’t but I still feel like I was a big winner just making the top 20!  I made 19 new awesome friends too!  All of the finalists connected on Facebook before convention and shared our fears and amazement at being selected!  It was a crazy ride all the way around!  Don’t miss our Finalist’s Blog Hop starting on Saturday, August 10th.  We are featuring all the projects we submitted to Stampin’ Up for the contest.  I promise amazing inspiration and beautiful work!

Convention was the absolute best!  I just love hanging out with my besties from near and far and catching up.  We had a wonderful time laughing, crying, shopping, talking and just being together.  I will share some pics and some gorge swaps from convention over the coming weeks.

Today I want to share a couple of projects that I made for a friend’s wedding.  We set up a joint pinboard on Pinterest and several of us pinned numerous ideas for decorations, favors, etc.  One thing I knew I wanted to make for her was a card “box” out of a vintage suitcase similar to one that I saw on Pinterest.  She also wanted a “brooch bouquet”.  If you haven’t seen those, just Google brooch bouquet, they are so pretty!  She got a couple of brooches from her grandmother and then bought the rest from the Goodwill.  I found a small vintage “suitcase” in Arizona at an antique shop for $6!

Here are the finished projects:

IMG_6614

Finished brooch bouquet!

IMG_6615

Close up of some of the brooches, her grandmother’s are clustered together.

IMG_6674

The bride with her gorgeous bouquet!  Stunning!  the bride and her bouquet!

IMG_6616

Nearly finished card box.  This is the only picture I have of this project right now!  I added a piece of retired “First Edition” DSP to the inside of the lid after I took this picture and that completed the project 🙂  I am going to get some more pictures of this beauty and will share another day.  It was about 4 am when I took this and I just had to go to bed!!!  Look at my giant crafting mess all around the finished suitcase.  I was a busy, busy girl that night!  The banner says “CARDS” and is made with burlap banner pieces.  I used the Big Shot to cut out the letters in Brushed Gold paper.  Each banner piece is embellished a little bit differently with antique lace, flower trim, buttons and ribbon.  I lined the inside of the suitcase with satin fabric that is a vintage-y cream color.  I added some tulle and burlap to the handle to finish the look.

I hope you enjoyed these projects!  I certainly enjoyed every minute of putting them together from being inspired by Pinterest projects to finding the materials needed to the final result 🙂

My bestie Debbie Keane and I are both trying to be more consistent bloggers so we are challenging each other to blog regularly.  Check out her blog at http://www.pungostamper.blogspot.com.  She has some amazing projects for you to drool over!  We are hoping that if we keep each other accountable we will do a better job posting!

Do something you love to do today!

To purchase some of these products go to my online store!

Check here for upcoming events and classes!

Chalk Art Love <3 !

_MG_2254

_MG_2258

Hello friends, I am on my way back home today after a fabulous vacation in Virginia with my best friend.  We spent 10 days chatting, creating, venting, shopping, antiquing, stamping, laughing and creating some more!  The last couple of days another great friend and a new friend joined us and we went into creativity overdrive!  It’s been so inspiring and fabulous, my spirit and soul are full and I am going home with renewed creative energy.

We created 32 projects and dreamed up at least another 32 that we didn’t get to!  Our biggest undertaking is the chalkboard frame pictured above.  We both took Rhonna Farrer’s Chalk Art on-line workshop and have been inspired to learn to make our own chalk art for some time now.  We really needed a showcase for our chalk art efforts though!  We had a couple of ideas and spent 45 minutes walking down every aisle in Michaels and came home with the bones of the project pictured above.  Then we painted & sanded & distressed & sponged & added gold accents & glued this beauty together.  It needed some embellishment of course and we spent almost a day collaborating on the beautiful, airy banner and rosette for the top.  We used lots of Stampin’ Up paper, ribbon, buttons, etc. as well as some pieces cut from some antique sheet music.  I think the end result is breathtaking!

_MG_2255

Some of the products of featured are:

You’re Amazing Stamp Set, Established Elegance Stamp Set, This and That Epic Day DSP, Pool Party Seam Binding, Gold Embossing Powder, Brushed Gold Card Stock, Vintage Faceted Designer Buttons, Vintage Trinkets, Pool Party Bakers Twine, Linen Thread, Artisan Embellishments Kit, Natural 7/8″ Cotton Ribbon & Natural 7/16″ Trim Ribbon.  Phew!  Lotsa goodies on this!

Truly this project is over the top and an unusual undertaking, but oh so pretty and fun!  A once in a while, special vacation project….just for me!

I hope you love it as much as I do!

_MG_2256

To purchase these products go to my online store!

Check here for upcoming events and classes!