2013 Artisan Finalists Blog Hop – Day 1

2013artisanfinalistA

Welcome to the 2013 Artisan Design Team Finalists Blog Hop!  We will be sharing all the projects that we submitted to Stampin’ Up for the contest over the next ten days.  I can’t wait to share all the projects I poured my heart into for this!  This is an AH-mazingly talented group of ladies and I know you will be inspired by all the gorgeous projects!  You can choose the “next” and “back” buttons below to get to each designer’s post each day.

First off, I have to say that I was humbled and overjoyed to find myself in the company of all these creative souls!  What an honor to make the Top 20 in this contest!  I will be following all of the 2013 Artisan Design Team’s posts this year, I can’t wait to see what they come up with!  I feel especially lucky to have become friends with these girls during the weeks prior to convention when we found ourselves as part of the Top 20!  We still chat as we have time and I have truly won some wonderful new crafty friends 🙂

IMG_4162

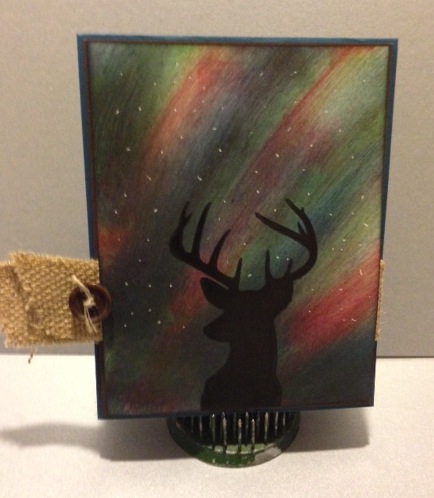
The first project I am sharing is a card featuring some of my favorite products old and new.  I was so sad to see the Shimmer Paint retire in May!  I just loved that stuff and used it in many ways!  On this card, I “painted” full strength Champagne Mist Shimmer Paint on my White Tea Lace Paper Doily and on at least one of my banners…yummy!  My button is made with the White Simply Pressed Clay dyed with Calypso Coral Re-Inker.  I sponged the dry button with Soft Suede Ink to give it that vintage look.  I used the Canvas Creations for the label shape, I cut it out with a framelit from the Labels Collection.  Then I stamped it with the Ship’s Log image from “The Open Sea” stamp set and sponged the edges with Soft Suede.  Thank goodness that stamp set is still around, I find myself reaching for it often!

Here are the products I used:

Stamps:  The Open Sea, Loving Thoughts

Ink:  Soft Suede, Baked Brown Sugar, VersaMark

Cardstock:  Smoky Slate, Brushed Gold, Epic Day This and That DSP

Embellishments:  Canvas Creations, Champagne Mist Shimmer Paint, Simply Pressed Clay, Calypso Coral Baker’s Twine, Rhinestone Basic Jewels, White Tea Lace Paper Doilies, Gold Embossing Powder

Tools:  Big Shot, Honeycomb Embossing Folder, Labels Collection Framelits, Buttons & Blossoms Simply Pressed Clay Molds

To purchase these products go to my online store!

Check here for upcoming events and classes!

Make sure you check out all the fabulous projects created by the finalists by going through the hop!  Select “back” to see Bree Renwick’s fabulous work and select “next” to get to Dani Dziama’s amazing projects!

2013artfinalistback2013artfinalistnext

the “Northern Lights”….

I thought it was fitting to share this card today since I vacationed in Alaska this summer, the land of the aurora borealis or northern lights!  I haven’t seen the real northern lights but I think this card definitely gives an impression of this phenomenon and features my new favorite deer head stamp set!  Funny how that stamp has captured my heart…

This technique looks fancy shmancy but it is actually very simple to do.  You can Google the northern lights stamping technique and there are several YouTube videos on how to do it so I am not going to detail the technique here, just the colors and products I used.  I do have two tips.  I got the deer to be so nice and crisp by re-inking my pad right before we stamped him.  And if you get a smudge of the black from the stamp edge or clumsy stamping (me!!!), you can use your finger to smudge the ink into the background.  You have to do it right away before the ink dries completely but you won’t see your mistake at all!

There are a couple of things I love about this card.  The technique comes out slightly differently every time you do it…fun!  I am not a big fan of making the same thing over and over again…this becomes a problem for me every time I do swap cards, at some point in the process my ADD kicks in and I can barely stand to finish making them!  I also love that it can be used to give to a man, rarely do we make cards that a man would like to receive.  This is the perfect card for that guy in your life that needs a card from you for something!  The last thing I love is that it is quick and easy to make and the result looks like it was “hard”.  We made these in my stamp club last week and everyone’s came out a little bit differently and all were beautiful!

photo

Stamps:  Remembering Christmas

Ink:  Summer Starfruit, Coastal Cabana, Gumball Green, Raspberry Ripple, Midnight Muse, Basic Black

Cardstock:  Whisper White, Midnight Muse, Early Espresso

Embellishments:  1-1/4″ Burlap Ribbon, Linen Thread, Naturals Designer Buttons

Do something creative every day!

To purchase these products go to my online store!

Check here for upcoming events and classes!

Busy summer days!

Wowsers this summer is flying by!  Between work, travel and projects I have been a very busy girl!  I feel very blessed that I got to travel to Alaska again, an epic two week visit with family!  That was amazing!  If you ever get the chance to go to Alaska, I can’t recommend it enough.  The beauty everywhere takes your breath away!  And during the summer it is light most of the time which makes for a very interesting sleeping pattern!  Next up was Salt Lake City for the Stampin’ Up Convention!  Before all of that, Arizona to help my son and his girlfriend move home from college!  Sheesh!   I’ve been logging some miles!  In between I have been super busy at work at AAA and we also had a little fire nearby (Colorado Black Forest Fire) in June and I moved my stamp room from the basement to the second floor!  It’s making me tired just reading all of this!

I received some very exciting news while I was in Alaska, I got a call from Stampin’ Up and was notified that I had been selected as one of the Top 20 Finalists for the 2013 Artisan Design Team!  What an honor!  I spent the next three weeks until Awards Night at convention with my stomach in a knot worrying about whether or not I made the team (top 10).  In the end I didn’t but I still feel like I was a big winner just making the top 20!  I made 19 new awesome friends too!  All of the finalists connected on Facebook before convention and shared our fears and amazement at being selected!  It was a crazy ride all the way around!  Don’t miss our Finalist’s Blog Hop starting on Saturday, August 10th.  We are featuring all the projects we submitted to Stampin’ Up for the contest.  I promise amazing inspiration and beautiful work!

Convention was the absolute best!  I just love hanging out with my besties from near and far and catching up.  We had a wonderful time laughing, crying, shopping, talking and just being together.  I will share some pics and some gorge swaps from convention over the coming weeks.

Today I want to share a couple of projects that I made for a friend’s wedding.  We set up a joint pinboard on Pinterest and several of us pinned numerous ideas for decorations, favors, etc.  One thing I knew I wanted to make for her was a card “box” out of a vintage suitcase similar to one that I saw on Pinterest.  She also wanted a “brooch bouquet”.  If you haven’t seen those, just Google brooch bouquet, they are so pretty!  She got a couple of brooches from her grandmother and then bought the rest from the Goodwill.  I found a small vintage “suitcase” in Arizona at an antique shop for $6!

Here are the finished projects:

IMG_6614

Finished brooch bouquet!

IMG_6615

Close up of some of the brooches, her grandmother’s are clustered together.

IMG_6674

The bride with her gorgeous bouquet!  Stunning!  the bride and her bouquet!

IMG_6616

Nearly finished card box.  This is the only picture I have of this project right now!  I added a piece of retired “First Edition” DSP to the inside of the lid after I took this picture and that completed the project 🙂  I am going to get some more pictures of this beauty and will share another day.  It was about 4 am when I took this and I just had to go to bed!!!  Look at my giant crafting mess all around the finished suitcase.  I was a busy, busy girl that night!  The banner says “CARDS” and is made with burlap banner pieces.  I used the Big Shot to cut out the letters in Brushed Gold paper.  Each banner piece is embellished a little bit differently with antique lace, flower trim, buttons and ribbon.  I lined the inside of the suitcase with satin fabric that is a vintage-y cream color.  I added some tulle and burlap to the handle to finish the look.

I hope you enjoyed these projects!  I certainly enjoyed every minute of putting them together from being inspired by Pinterest projects to finding the materials needed to the final result 🙂

My bestie Debbie Keane and I are both trying to be more consistent bloggers so we are challenging each other to blog regularly.  Check out her blog at http://www.pungostamper.blogspot.com.  She has some amazing projects for you to drool over!  We are hoping that if we keep each other accountable we will do a better job posting!

Do something you love to do today!

To purchase some of these products go to my online store!

Check here for upcoming events and classes!